
Getting ready to paint your home can be a fun time. Not only do you get to completely rejuvenate a room, but you could also change how it looks. Painting can be a fast and easy project that anyone can tackle on their own but that doesn’t mean it is a project that should be taken lightly.
Unfortunately, there are many potential mistakes that can be made when you paint a room and end up with a sloppy looking room that is disappointing. As you begin prepping to paint your home getting advice from expert commercial painting contractors or interior designers will be the secret to your success.
When you get tips from the people who paint walls every day for a living, they know what they’re talking about and their results prove it. If you aren’t sure where to start when it comes to painting your home on your own you’re in the right place. Here are 5 great tips to help you DIY with expert results.
1. Choose the Right Color
Unless you are painting your house specifically to list it for sale, when you might want to choose a pleasing neutral color, you can paint a room any color you want. So whether you like bold colors on a statement wall, bright colors or more subdued tones, choose colors according to what makes you happy.
It is generally assumed that darker colors generally make a room seem smaller, so if you have a small space already a dark paint job might make the space seem cramped. But sometimes the cozy look is what you want. Another option is to use the darker color as an accent wall or on your accessories.
Painting a room is fairly easy to do so if it ends up that you aren’t happy with the color, in the end, you can always make changes. But that’s not really good use of your resources. So looking at samples is a great way to pick the correct color the first time around.
Many retailers offer sample-sized paint cans fairly inexpensively. Buying a can or two of the colors you are considering can be helpful. Paint a large area on at least two walls. While two walls may seem a bit much, it will give you a better indication of how the paint will look at different times of the day and in many lighting situations.
The color undertones in the paint may change depending on how much light shines in through the window. Chances are good that you will quickly figure out throughout the day which color you love and which is just not going to work for you and your home.
If you don’t want to live with large splotches of mismatched paint on your walls for a while there is a solution for you! Did you know that there are stick-on paint samples available? With paint samples like “Samplize” you can easily stick the real paint color to your wall easily. The plus side is that these samples are designed to be easily removed.
Being about to pick paint without the commitment of wet paint can be helpful especially if you are painting a lot of different areas in your home. Don’t feel pressured in choosing your paint colors, take some time to pick the paint you will love for years.
2. Paint Basics
After you’ve picked your paint color you also have to pick your paint’s finish. The sheen of paint can that’s best depends on your specific needs. While high gloss or satin paint can withstand lots of wear and tear, it’s shiny finish can make your wall’s imperfections stand out.
Semi-gloss is especially good for painting bathrooms as it can withstand the humidity and the occasional wipe down. But if you have warped drywall or patched up plaster you may want to stick to a matte finish, like flat paint. While flat paint won’t clean as easily it will hide the flaws a wall may have.
Depending on your needs, you may prefer a specialty finish like chalkboard paint or magnetic paint, making a unique surface that is fun for children and adults alike. These interesting finishes can make any room pop!
When you’re buying your paint use this handy formula to make sure you buy enough. Take the width of the walls and add them all up. Multiply that number by the height of your ceiling. Then divide that number by 350 since most gallons of paint will cover about 350 square feet. This is a great way to estimate how many gallons you will need to paint your room.
Remember that you may need more than one coat! A good second coat covers any brush stroke imperfections or missed spots. Painting a second coat also makes for more even coverage. You might also want to plan to have a small amount of paint remaining for future touch-ups. Having extra is never a bad choice. (Just store it tightly closed in a cool place.)
3. Prepare Your Walls Well
It might seem crazy to suggest that the bulk of your time painting is the time spent preparing your walls and rooms for their fresh coat of paint. But moving furniture, taping off areas and laying down drop cloths can be incredibly time-consuming. However, prep work is well worth your time and will help you make sure you have everything you need to begin.
Did you know that dirty walls will not hold paint properly? Not only that but excess grease, grease or dust could even prevent your paint from going on smoothly and even drying well. You definitely want to be sure that you get your walls cleaned before you start painting.
Cleaning walls is fairly easy, most will simply need a dry dusting. If a more significant clean is needed, warm soapy water is a great option. (Use a grease-fighting soap for rooms that may be greasy like a kitchen.) Be sure to wipe down your walls with just water to remove any lingering soap residue and let them dry completely before you go any further.
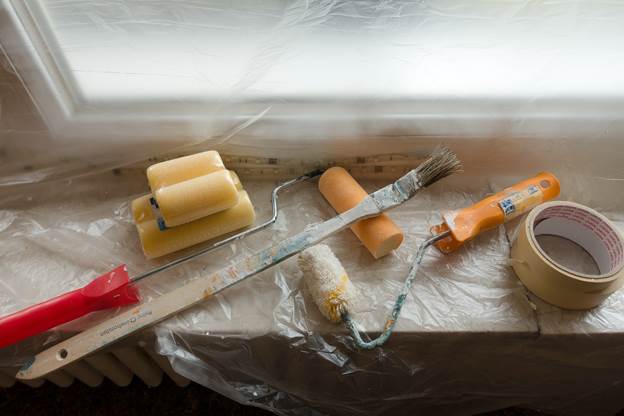
As you take your clean walls and get ready to paint don’t forget the importance of drop cloths. No matter how skilled you are it only takes one wrong move to leave a gallon of paint on the floor or a wayward brushstroke on your baseboard. Painter’s tape will help protect areas that don’t need paint and a drop cloth will keep your floor clean as well.
A word to the wise, while plastic drop cloths are cheap and easy to come by, they can be slippery to walk on and require tape to stay in place. (Plus any spills will just remain puddles and you may wind up tracking paint around.) Professional painters opt for canvas drop cloths since they will stay in place, allow the spilled paint to dry and can be reused many times.
4. Paint Carefully
When you’re ready to paint you need to make sure your paint is properly mixed. Yes, the machines at the store mix your paint as they blend your color together but you specifically need to stir your paint well before you put a brush of any kind in it.
Many professionals even recommend combining all your paint into a larger 5-gallon bucket before you get started just in case there are slight differences in the pigments from can to can. You definitely don’t want to end up with different color walls when you switch cans or streaks of pigment from not stirring.
If you are planning to paint the trim it is a good idea to paint that before the walls. It is easier and faster to tape the trim before painting walls, so if you begin with the trim you will only have to tape once. You don’t have to worry if you get paint on the walls as you go since you will be painting over any mistakes shortly.
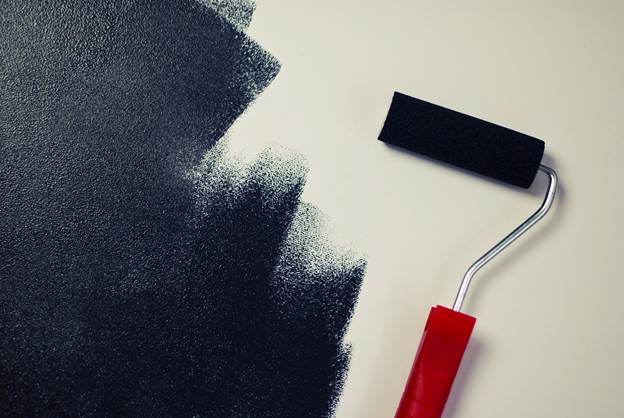
As you paint the walls it is best to try and get one coat on at a time. If you don’t have time to paint one room beginning to end, don’t start. Paint can change slightly based on the humidity and conditions in which it is applied so for a professional-looking paint job shoot for at least one coat of paint in a room during the day.
Don’t forget to paint the ceiling. Ceiling paint can fade and look dull, so if you want your room to pop a fresh coat of paint can really add to the final appearance. As you paint the ceiling work swiftly and move in a uniform direction so you don’t lose track of where you’ve painted. It’s easy to do and missed spots are obvious once the paint dries.
5. Remove Tape Carefully
Make sure that your paint is completely dry. Wait for a full 24 hours before you remove your tape. Removing the tape too soon can still allow the paint to drip where you don’t want it to go. It may seem as though you can just peel the tape immediately, doing so can also damage the walls and leave you with more work.
Your patience will pay off, removing the tape can be truly satisfying and you get a glimpse of what your room is going to look like. Professional painters take a sharp utility knife to slice through the film between the tape and paint before they pull off the tape. Starting in an inconspicuous area, slowly pull at a 45-degree angle to avoid damaging your hard work.
Conclusion
When you paint your home yourself it doesn’t need to be complicated. Follow these tips in order to get fresh and sharp looking walls. When you learn to paint like a pro with these tips you will undoubtedly wind up with a freshly painted home that you can be proud of.


