When it comes to renovating bathrooms, a few things can make all the difference, including a lighted mirror bathroom. These stylish, modern mirrors offer great lighting for shaving, makeup, and ambient light. If you are thinking of adding one, you may be wondering how to wire and connect a lighted mirror safely. Fear not, for we have your back with this step-by-step guide.
In this article, we take you through the steps for wiring and connecting a lighted mirror in your bathroom while ensuring that you safely enjoy its full functionality. We will also give some factors to look out for when choosing your mirror, especially from brands like Wellfor, known for high-quality products.
What Is a Lighted Mirror Bathroom?
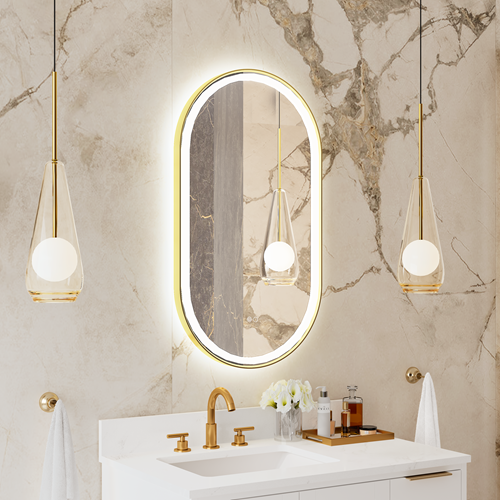
A lighted mirror bathroom will typically integrate LED lights around the perimeter, offering bright, even illumination perfect for activities such as shaving, applying makeup, and brushing teeth. These mirrors provide functional lighting and add a touch of modern elegance to your space. Some Wellfor lighted mirrors have features like adjustable lighting, anti-fog technology, and built-in Bluetooth speakers.
These mirrors can be battery-powered or connected to your house’s electrical system. The article will focus on how to hardwire the mirror to the electrical system, a common approach for permanent installations.
Why You Should Hardwire Your Lighted Mirror
While many lighted mirrors come with plug-in options, hardwiring your lighted mirror offers several advantages:
- Cleaner Look: Hardwiring eliminates visible cords, giving your bathroom a sleek and minimalist aesthetic.
- Reliability: Hardwired mirrors are less likely to be disconnected by accident or damaged.
- More Control: Hardwiring lets you connect the mirror to your existing lighting circuit, giving you complete control over the lighting.
Now, let’s dive into safely wiring and connecting your Wellfor or any other lighted mirror.
Tools You’ll Need
Before you begin, make sure you have the following tools on hand:
- Wire Strippers
- Wire Nuts
- Screwdriver
- Voltage Tester
- Electrical Tape
- Drill and Drill Bits
- Tape Measure
- Level
- Mirror Mounting Bracket (if not included)
- Power Supply Line (Electrical Cable)
Ensure you have safety equipment, like rubber gloves and safety goggles, to protect yourself during installation.
Step 1: Turn Off the Power Supply
Safety first. Turn the power at the circuit breaker off before you get started to avoid electrical shock from the box. You will be dealing with hot wires, so you really want to make sure there is no power.
- Test the electrical circuit with a voltage tester to ensure there’s no electricity flowing to the area where you’ll be working.
- Label the circuit breaker to prevent anyone from mistakenly turning it back on during your installation.
Step 2: Choose the Right Location for Your Lighted Mirror
Selecting the ideal spot for your lighted mirror is crucial not just for aesthetics but also for function. Here are some factors to consider:
- Height: Mount the mirror at a height that suits your daily grooming routine. Ideally, the centre of the mirror should be at eye level.
- Proximity to Power Source: Make sure there’s an electrical source nearby to connect your lighted mirror. If the location requires extending the wiring, call in an electrician.
- Levelling: Use a level to ensure the mirror hangs straight. A crooked mirror can detract from the visual appeal and affect the lighting.
Step 3: Install the Mounting Bracket
Most lighted mirrors come with a mounting bracket secured to the wall. Here’s how to install it:
- Mark the Mounting Holes: Hold the bracket against the wall at the desired location. Use a pencil to mark where you’ll drill the holes for the screws.
- Drill the Holes: Using a drill, make holes in the wall where you marked the spots. Be sure to drill into the studs, as they provide the most support.
- Attach the Mounting Bracket: Secure the mounting bracket with screws. Double-check that the bracket is level before tightening everything.
If your Wellfor mirror doesn’t have a mounting bracket, check the manufacturer’s instructions for specific installation guidelines.
Step 4: Wiring the Mirror
With the mounting bracket in place, it’s time to wire your lighted mirror. This part requires careful attention to ensure safety.
Connect the Power Supply to the Mirror:
Your mirror will have power supply wires that must be connected to your home’s electrical wires. Typically, you’ll be dealing with three wires: the live (black), neutral (white), and ground (green or copper).
Connect the Wires:
-
- Live Wire: Connect the live wire from your home’s power source to the live wire of the mirror using a wire nut.
- Neutral Wire: Similarly, connect the neutral wires (white).
- Ground Wire: Attach the ground wire to the mirror’s grounding screw (usually green) and your home’s ground wire.
Secure the Connections:
Use electrical tape to ensure all connections are secure. You can also use wire nuts to keep the wires from coming loose.
Step 5: Mount the Mirror
Once the wiring is connected, it’s time to hang the mirror on the wall. This is where the mounting bracket comes in handy.
- Hang the Mirror: Carefully lift the mirror and place it onto the mounting bracket. If your mirror has a locking mechanism, make sure to engage it.
- Check Alignment: Make sure the mirror is level and adjust it if needed.
Step 6: Test the Mirror and Lighting
With the mirror mounted and connected, it’s time to turn the power back on and test the installation.
- Turn On the Circuit Breaker: Flip the switch back to its “on” position.
- Test the Mirror’s Functionality: Ensure that the mirror is securely attached to the wall and that the lighting functions correctly.
- Adjust Lighting Settings: If your lighted mirror offers adjustable brightness or colour temperature, test these features to ensure they work as expected.
Step 7: Troubleshooting Common Issues
If the lighted mirror doesn’t work as expected, here are some common issues to check:
- No Power: Double-check the wiring connections to ensure everything is secure. Make sure the circuit breaker is entirely switched on.
- Flickering Lights: This could indicate a loose connection or faulty wiring. You may need to disconnect and rewire the mirror or contact an electrician.
- Mirror Not Secured Properly: If the mirror feels loose, ensure the mounting bracket is firmly attached to the wall and the mirror is locked.
Why Choose a Lighted Mirror from Wellfor?
If you’re considering upgrading your bathroom with a lighted mirror, Wellfor offers some of the best options. Here’s why:
- Quality and Durability: Wellfor’s lighted mirrors are designed for longevity, using high-quality materials that resist wear and tear over time.
- Energy Efficiency: Their LED mirrors provide bright lighting without excessive power, saving you money on electricity bills.
- Modern Features: Wellfor offers mirrors with anti-fog technology, dimming capabilities, and Bluetooth functionality, making them ideal for a modern bathroom.
- Stylish Designs: Whether you’re looking for a minimalist or a more luxurious look, Wellfor has a variety of designs to match any bathroom style.
Takeaway
Wiring and connecting your lighted mirror bathroom is pretty easy if you follow the right steps and observe safety. A well-installed lighted mirror will increase functionality in your bathroom and add a touch of modernity to your space.
Remember to choose a high-quality mirror, such as Wellfor’s, to ensure reliability and aesthetic appeal. If you are not comfortable with any part of the installation process, don’t hesitate to consult a licensed electrician. Your lighted mirror will be well worth the investment in your bathroom’s beauty and functionality!
