Screeding a floor is a great way to form a level surface – but there’s more to it than just applying the mixture. From carrying out the necessary preparations to ensure the application is smooth and following the correct steps, the liquid screed dries thoroughly. Today we’re shedding some light on the process of screeding a floor with liquid screed.
What’s Liquid Screed?
There are several different types of screed out there. Regardless of which you opt for, they all share the same primary function: to provide a smooth floor finish.
Liquid screed encases underground heating pipes or is left as a wearing surface. Having either of these can add real value to your home. Still, it’s first necessary to ensure it’s adequately laid to optimise the screed flooring’s full benefits.
Unlike traditional screed which is typically made up of sand and cement and other aggregates, liquid screed is known as Anhydrite (liquid calcium sulphate), and thus works differently when applied.
What are The Benefits of Liquid Screed?
So, you know what liquid screed is, but how much do you know about its range of benefits? There’s a reason why so many people now opt for this over more traditional applications. Here are just some of the critical benefits of choosing liquid screed:
- Superior finish
- Quicker curing time
- More affordable due to reduced labour time
- Stronger and more durable
- Thinner when applied
- It’s a better conductor of heat when used with underfloor heating
- Self-levelling
- Self-curing
- Less prone to shrinkage
1. Preparation
Screed is not a structural element of a building, which means proper preparation must be carried out first to ensure the finished result is right. In the case of liquid screed, preparation is everything because failure to do so can result in liquid screed getting into nooks and crannies and flowing where it shouldn’t.
Although it’s best to get an expert liquid screed contractor in Northampton to screed your floors if you are doing it yourself, you want to be following the following steps:
- Measure the area and check access in advance – this will determine how much screed is required for the job
- Remove any dust or debris from the site first to prevent the liquid screed from picking this up
- Lay a waterproof membrane to prevent the liquid screed from leaking on application
- Seal any areas where liquid screed could gather such as across steps or doorways
- If underfloor heating is being installed, this must be secured inside the polyethene at this point
2. Laying The Liquid Screed
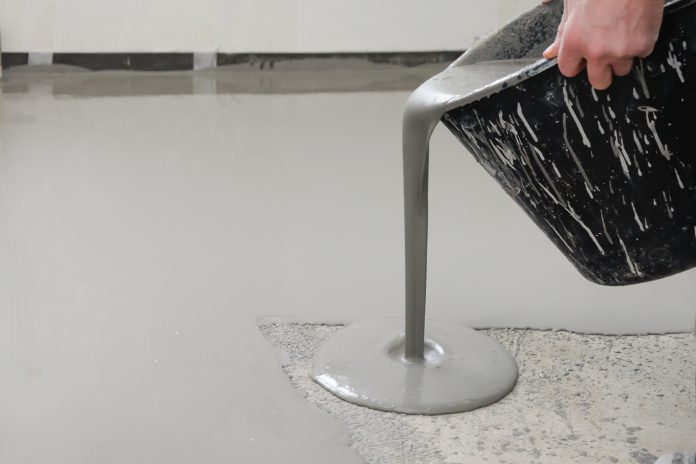
Once you’ve prepped your floor for the liquid screed, and you’re confident the area is watertight with any underfloor heating pipes filled, you can begin applying the liquid screed.
It’s essential you ensure the temperature beneath the floor is not over 30°C or below 5°C as this will prevent the liquid screed from setting correctly.
Suppose you’re using a professional liquid screed in Northampton. In that case, they will likely bring a mix to the working area via a hose. This eliminates the risk of damage to underfloor heating systems (a common complaint when using a wheelbarrow to deliver screed). And to ensure the application is accurate a datum tool and screed levelling tripods will be used to determine how thick the screed layer will be.
Once satisfied, the liquid screed will be pumped into the area and will flow out to all corners, filling in any gaps with ease. Pumping will stop once the liquid screed has reached the desired level, and the tripods will be removed.
3. Screed protection
Like with all types of flooring, specific measures must be in place to adequately protect the flooring. So, before the final floor finish is applied, basic screed protection measures must be in place to prevent screed failure.
Floor screed protection prevents screed failure and achieves a high-quality, durable finish. It is generally advised that liquid screed is left to dry for at least 72 hours after being installed (this means no site traffic is allowed) for the best results. However, it is possible to force dry liquid screed if you’re performing under tight time restraints.
As a rule of thumb, allow around 1 day of drying time for every millimetre of thickness. However, for very thick layers, this could be longer.
Laying The Flooring
Once you’ve completed your screeding, and it is completely dry, you’re ready to install the flooring. Depending on the type of floor you opt for, however, may mean that you need to prepare the finished screeding first. For instance, tiles will require the liquid screed to be thoroughly sanded, with any resulting debris removed. The necessary steps you will have to take afterwards will vary depending on the flooring you’re opting for. It is generally recommended that you consult a professional before making any finishing touches yourself.
Contact Liquid Screed Professionals Today
Naturally, you may be keen to cut costs by laying your own liquid screed. Still, it must be noted that this is a specialist job and requires specific industry knowledge and the right equipment. In many cases, attempting it yourself can cost even more, mostly if done incorrectly, requiring a professional to come and fix it.
The best solution to getting the smoothest floor is hiring a professional liquid screed in Northampton. They’ll assess the area, work on any necessary preparations, and bring in a team of skilled contractors to lay the screed quickly and without issue.
Sound good? We think so. The good news is that there are several extraordinarily affordable and skilled contractors to choose from, such as UK Screeds Ltd who have been laying screed flooring for over 15-years. So, if you need new flooring and are looking for a professional-looking flat surface to work with, consider getting liquid screed applied today,
