As the summer heat starts to rise, the last thing you want is for your air conditioner to break down. Proper maintenance is key to ensuring that your AC unit runs smoothly and efficiently. In this AC repair blog, we’ll provide a step-by-step guide to maintaining your air conditioner so you can stay cool and comfortable all summer long.
Step 1: Clean or replace the air filter
One of the most important maintenance tasks for your air conditioner is cleaning or replacing the air filter. The air filter helps to remove dirt, dust, and other contaminants from the air before it is circulated back into your home. Over time, the air filter can become clogged with dirt and debris, which can reduce the efficiency of your AC unit and even cause it to break down.
To clean or replace the air filter, first, locate the filter slot in the air return grille or the air handler. Then, either vacuum the filter or replace it with a new one, depending on its condition. It’s generally recommended to replace the air filter every 1-3 months, depending on the manufacturer’s recommendations and the air quality in your home.
Step 2: Clean the outdoor unit
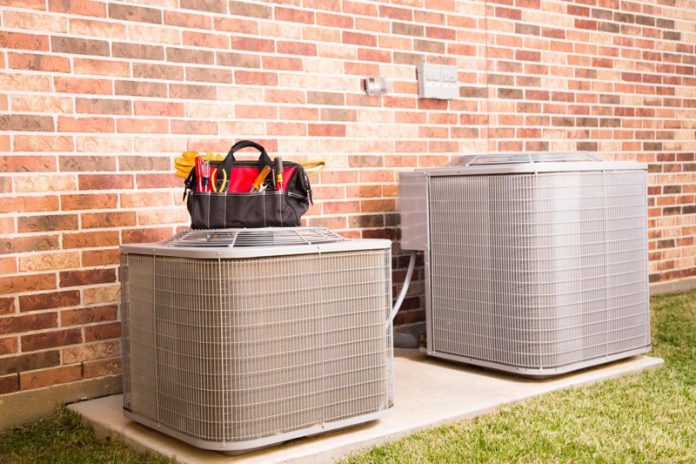
The outdoor unit of your air conditioner contains the condenser and compressor, which are responsible for releasing heat from your home. To keep these components running smoothly, it’s important to clean the outdoor unit regularly.
Start by turning off the power to the AC unit at the thermostat and the breaker. Then, use a garden hose to spray down the condenser fins, being careful not to bend or damage them. You can also use a soft brush or a fin comb to gently clean any dirt or debris that may be stuck in the fins.
Step 3: Check and tighten all electrical connections
Loose electrical connections can cause your air conditioner to malfunction or even short circuit. To prevent this, it’s important to check and tighten all electrical connections on your AC unit.
Start by inspecting the wires and connections at the outdoor unit, making sure they are secure and free of corrosion. Then, move on to the thermostat and the air handler, checking for any loose connections or signs of wear and tear. If you’re not comfortable working with electrical connections, it’s best to hire a professional to handle this task.
Step 4: Lubricate the moving parts
To keep your air conditioner running smoothly, it’s important to lubricate the moving parts. This includes the motors, bearings, and other mechanical components. Over time, these parts can become dry and cause friction, leading to wear and tear and potentially causing the AC unit to break down.
To lubricate the moving parts, use a high-quality lubricant specifically designed for air conditioners. Follow the manufacturer’s instructions for the proper application and amount to use. If you’re not comfortable performing this task, it’s best to hire a professional AC technician.
Step 5: Check and refill the refrigerant
The refrigerant in your air conditioner is responsible for absorbing and releasing heat as it cycles through the system. If the refrigerant levels are too low, it can cause your AC unit to run inefficiently and potentially break down.
To check the refrigerant levels, you’ll need to hire a licensed AC technician. They’ll use a special tool to measure the refrigerant pressure and determine if the levels are sufficient. If the levels are low, the technician can refill the refrigerant as needed.
Step 6: Inspect and clean the air ducts
Dirty or clogged air ducts can reduce the efficiency of your AC unit and cause it to work harder to circulate cool air throughout your home. To improve the performance of your AC unit, it’s important to inspect and clean your air ducts regularly.
To inspect the air ducts, look for any visible signs of damage or wear and tear, such as holes, leaks, or disconnected sections. If you notice any issues, it’s best to hire a professional to repair or replace the damaged sections.
To clean the air ducts, you can use a vacuum with a hose attachment to remove any dirt, dust, or debris that may have accumulated over time. If the air ducts are severely dirty or contaminated, it may be necessary to hire a professional air duct cleaning service.
Step 7: Test the AC unit
Once you’ve completed all of the maintenance tasks, it’s important to test the AC unit to ensure it’s running smoothly and efficiently. Start by turning on the power and setting the thermostat to a comfortable temperature. If the AC unit doesn’t turn on or doesn’t seem to be cooling properly, there may be an issue that needs to be addressed by a professional AC technician.
Conclusion
Maintaining your air conditioner is crucial for ensuring that it runs smoothly and efficiently all summer long. By following the steps outlined in this AC repair blog, you can keep your AC unit in top condition and avoid costly breakdowns. If you’re not comfortable performing any of the maintenance tasks, it’s best to hire a professional AC technician to handle the job. Regular maintenance can help extend the lifespan of your AC unit and save you money on energy bills in the long run.


