
Water is a basic necessity of life. Constant opening and closing of the control of a tap over time can result in a fault or can lead to leaks. Once it occurs, it should not be overlooked or considered an issue of little significance. So, what should be done about it? This is precisely what we will be addressing in this article.
Why Taps Leak: A Guide to Fixing Leaky Faucets
When we begin to experience leaks from any tap in our homes, it can become a thing of discomfort, especially when there’s the constant dripping sound. If this is ignored, water will be wasted and it can even lead to further damage in the plumbing system of the home as a whole.
There are certain steps you can follow to ensure that the problem is corrected immediately and accurately. You can also visit https://build.com.au/how-fix-leaking-tap for more comprehensive details on fixing leaky taps.
To fix this problem, take the following steps:
1. Identify Leaks
The first and most important thing to do is to identify the issue of leakage. Not knowing where the leaks occur is going to make it almost impossible to fix the problem. But once you know where the problem lies, then the solution is nearer.
2. Switch Off the Water Supply
Turn off the valve that supplies water to the place where the leakage is. If the control cannot be located, it is better to turn off the main control that supplies water in the house. Switching off the water supply will prevent any wastage of water while the repair is ongoing.
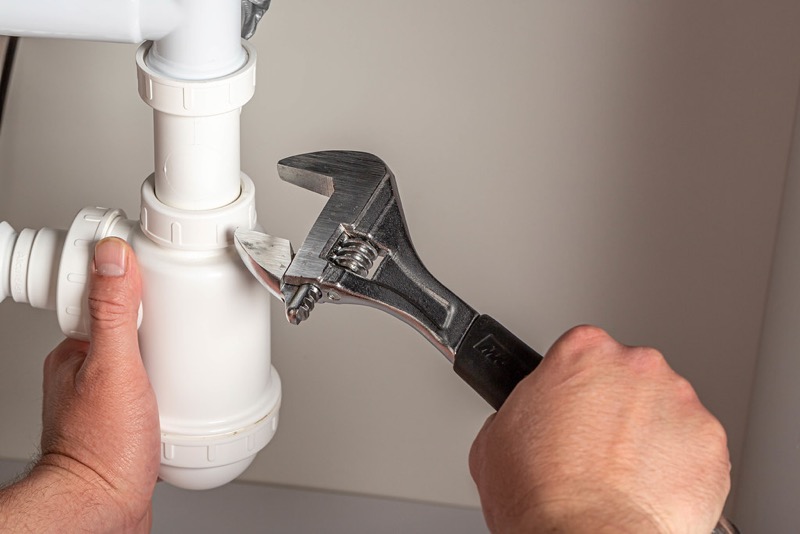
3. Remove the Faucets
The faucet handle should be removed with the help of a screwdriver. Doing this will help you see inside the tap and know where the problem is exactly. From there you will know if the work can be done by you or a professional help.
4. Inspection the Components
Every other component should be checked properly. Doing so, will make sure that there is no damage or wear in any other area. If any part is damaged, it should be replaced with new ones immediately. This should not be overlooked.
5. Reassemble the Faucet
Once the fault has been rectified, the faucets should be reassembled. This simply means, putting the handle back in its place and tightly securing it with the screw or putting a new one if the old one is worn out.
6. Test the Faucet
Finally, turn on the water supply to test the faucet and make sure that the leakage is fixed. If the leaking continues, it is advisable to call in a plumber for professional help. This final step is very important.
Note: All faucets are not the same. The faucet fittings type you have will determine the type of tools you need to work on them.
Good quality, faucets can last for about ten years before developing any form of fault. If the fault is one you can’t fix, contact a leaking tap plumber to help you fix it. Their vast knowledge will make the repair a breeze.
Worn Tap Washers
We want to pay particular attention to this issue because it contributes to most of the tape leakage problems. When they are worn out, they are not effective as they used to be. Therefore, changing it becomes the only solution.
Before changing the washer, you need to locate its position. Every tap has two main parts, which are the tap washer and the seat. The washer is very close to the seat, which creates a build-up of pressure that forces the water into the sink through the spout.
Steps to Changing a Worn Tap Washer
- Turn off the water supply to avoid flooding.
- Insert a plug in the plug hole of the sink to prevent the loss of any components or screws.
- Remove the cover of the tap with a screwdriver. This will make the valve visible enough for it to be easily removed with a spanner.
- With a spanner, remove the washer. If it is stiff, put oil in it and allow it to soak, then try removing it again.
- Remove the old washer and replace it with a new one. Make sure the new one is of the same size as the old one. If not, the leakage may continue.
- Put the tap back by screwing the valve into its place. Make sure it is not too tight as this could spoil it.
- Remove the plug from the plug hole and restore the water supply to test if the leakage still occurs.
Different Types of Taps
Knowing your tap will help you to get the best one for you. Click here to learn more about the structure of taps. Below are the types of taps:
1. Compression Tap
This type is mostly used in gardens for wetting plants and other garden activities. it is a common and traditional type that is still found in most homes. Although it works to supply water to the needed area, it causes a lot of problems and needs frequent changes.
2. Ball Tap
The control system can rotate in both directions. It is also known as the mixer tap because it controls the flow of cold or hot water sources. This also can get easily worn out and will need replacing from time to time.
3. Ceramics Disc Tap
This is quite similar to the ball tap as they perform the same function of controlling the hot or cold-water flow. The difference though is that the ceramics disc is cylindrically shaped.
4. Cartridge Tap
One spectacular thing about this type is the temperature control style. Although it is similar to others, the intensity of the flow of water is controlled by the up and down movements of the cartridge.
Conclusion
Tap leaks can be prevented by regularly checking for wear and tear signs in the faucet components. Also, during the installation of the tap and the washer, it is important to call someone who has vast knowledge in the plumbing field. Such individuals might give alternative advice to your initial choice.


