
Painting the exterior of a house can seem a mammoth task when faced with the prospect. However, this exterior project doesn’t have to be as tumultuous as made out to be, breaking the project into separate sections breaks up the time taken. Painting the house in sections separating into exterior masonry, then windows and doors is the appropriate breakdown I would do.
Before starting to paint the exterior of your house you must first factor in the weather forecast for the day you have in mind to carry out the painting project. It is essential that you understand the impact the weather has on an exterior paint job, failure to plan properly for the elements could end with a poor finish on your exterior with the conditions tampering with the projected result.
This will eventually result in you having to complete the task again to achieve the desired results which is not only tedious to repeat the task but also time consuming amongst other jobs that are on your to-do list.
This guide will give you some essential tips on how to paint your house correctly ensuring that the DIY job you are doing is a successful one.
Painting the Exterior of the house
The largest job when faced with painting the exterior of your house when painting masonry.
Before starting to paint the exterior walls of your house it is strongly advised that you wash the outside of your home, doing this will ensure one that the exterior is clean and free of any moss, algae, or mould and that the paint will adhere far more efficiently to a clean surface. In washing the surface of the exterior using a pressure washer is advised as the most time effective and thorough method of cleaning the surface. Alternatively, if your property isn’t too large you could clean the surface using a masonry cleaner, specifically an anti-fungal wash. Using a stiff brush this would work effectively to clean your exterior but as mentioned will take considerably longer than a pressure washer especially if your house is on the larger side.
Preparing the exterior surface prior to painting is an extremely important aspect when planning to paint an exterior. After cleaning the surface extensively, the next task is to make sure that any remaining loose paint is removed from the surface. This is done so that new paint can be applied effortlessly to the surface and adhere effectively. Additionally, if there are any rough spots on the surface of the wall sanding them down may be a beneficial idea to aid in the application and adhesion of paint to the surface.
After making sure the exterior surface of your house is fully prepared, adding an oil-based primer is the appropriate primer to use for masonry. Using a primer adds a protective layer to the surface from the elements and supports adhesion of the paint to the surface. To apply the primer, it is advised that a long pile or masonry roller are used as these allow greater ease when covering the entirety of the wall and work effectively to apply to the exterior masonry surface.
When the primer has been applied sufficiently and has been left to dry for 3-5 hours, you can begin to think about painting your house’s exterior walls.
Choosing the right paint is very important to the overall finish of your exterior walls of your house. For painting exteriors, it is highly recommended that masonry paint is utilised as it is designed for that surface specifically.
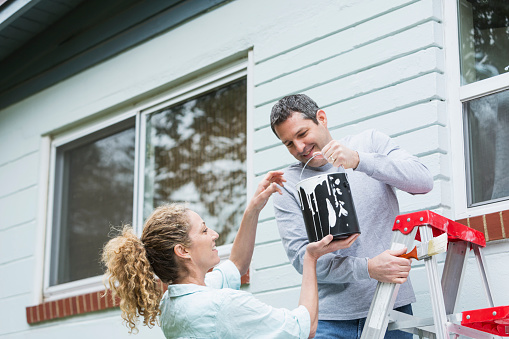
Painting should be done starting from the top and working down, while starting from the top it should be advised to also paint the fascia boards and soffits as these are genuinely neglected when completing exterior paint jobs. Using a ladder may be needed for these areas and the higher regions of your home, just be careful and make sure if used the ladders are properly supported and sturdy before using.
When painting the exterior of your house either using a roller or a spray gun is adequate, a spray gun is quicker and covers a large surface, but a roller is more precise and can get the nooks and cranny’s you can’t target with a spray gun.
Applying two coats to the exterior walls will suffice, after doing so leave the wall to dry for a perfect finished product.
Painting Windows and Doors
After first painting the largest area on your exterior, next is the more delicate task of painting the windows and doors.
These exterior features tend to be made of UPVC material, which can sometimes prove difficult to paint on if not previously done so. With UPVC discolouring over a period these features can either be replaced which is expensive or painted over. Painting on UPVC is easy if the correct paint is utilised to match the surface and its properties.
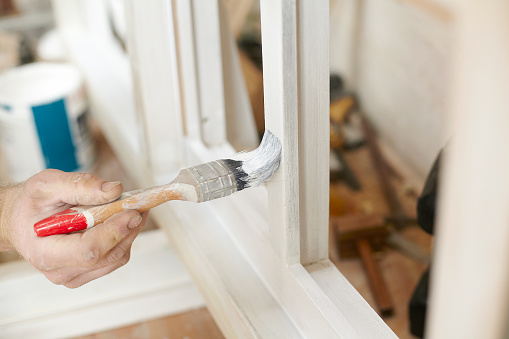
Preparation is key with any painting task on the exterior of a house and painting windows and doors is no exception. Before anything is applied use a low-key sandpaper to sand down the UPVC surfaces to create a more applicable surface for the paint to be applied to. For preparing UPVC windows masking tape can be used to reduce the mess created and limit paint getting onto the windows. When preparing doors all additional features should be removed (door handles, doorknobs) this aids you in limiting obstacles when painting and allows you to paint on a clear surface.
After a thorough preparation of the surface, priming the surface is the next essential procedure. The benefits of priming are that it helps sustain the paints life especially when painting on UPVC, it also helps adhere to this difficult to paint on surface.
When the surface has been primed and been left to dry you are ready to paint your door or window. As mentioned, using the right paint is essential for UPVC doors and windows. It is widely suggested that acrylic or polyurethane based paint should be used to avoid cracking of the paint and that this paint adapts to UPVC’s expansion in different temperatures.
When painting using either a roller or brush would be adequate for this surface. First apply a thin coat onto the surface and allow for it to dry. After leaving the surface to fully dry a second thicker layer can be applied. Be careful of brush marks left after application, therefore it is a helpful tip to not use a cheap brush as this may affect the finish and increase the likelihood of brush marks.
I hope this guide answered your queries on how to paint the exterior of your house covering how to paint the exterior walls of your house and the additional exterior features.


