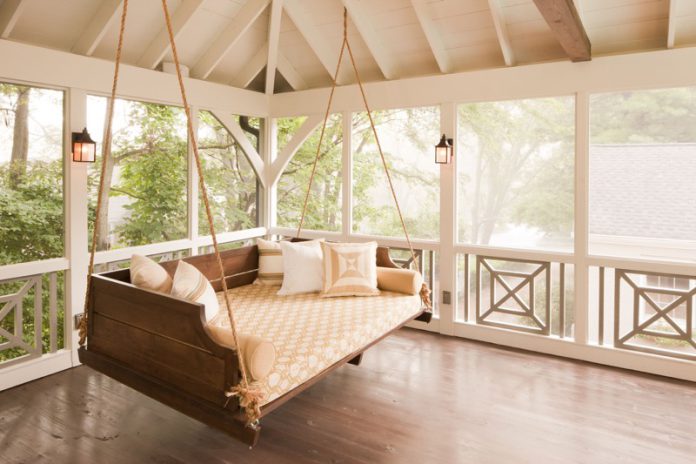
Making a DIY porch swing can transform your porch into an extra living area. We will demonstrate how to build one on the weekend using inexpensive items that you can find inside your home.
A porch swing can be considered one of the most remarkable improvements you can make to your outdoor living space. Rather than purchasing an expensive version from a store, try to make one out on your own.
Steps on How to Install a Porch Swing
Before installing a porch swing, check to ensure that your porch’s ceiling construction is solid enough to hold a two-person swing. If your joists are correctly supported at both ends, you should be safe to attach the swing.
This swing is intended to be hung from the ceiling using a hook. Choose an S-hook suited for outdoor use (galvanized or stainless steel) and has a minimum operating load rating of 500 pounds. Additionally, your hook’s diameter should be not less than 1/2 inch, and its threaded shank should be a minimum of 4 inches long.
Collaborate with a friend and set up an afternoon to finish this project. Consider painting your new porch swing to add character and add some color with outdoor pillows.
Instructions
Our guide below will teach you how to build a porch swing. This outdoor project will take several hours to complete, plus time for staining or painting the swing.
1. Cut wood pieces
Using a table saw, cut the wood pieces based on the cut list above. Determine the necessary curved accent angle for the detail you want on the rear of the porch swing. This will be mounted on the 47-1/2″ x 21″ backboard.
2. Construct the base frame
Assemble the swing’s base by aligning the two 47-1/2″ x 3-1/2″ planks parallel to one another. To construct a rectangle, align two 18-inch x 3-1/2-inch boards perpendicular to the two longer boards at each end. The long sides should be divided and marked into thirds with a tape measure, then place the other two 18-inch x 3-1/2-inch boards between the two longer boards at those points. Glue and clamp until completely dry, and after that, pre-drill the holes and install with screws.
3. Connect the frame supports
Along the long sides of the swing foundation, position the two 58-inch x 3-1/2-inch planks flat. Each edge of these planks should protrude 5-1/4 inches beyond the frame. Put screws every six inches to the 47-1/2-inch boards and to where the 58-inch board joins the 18-inch planks.
4. Assemble the seat
Align one long edge of the 47-1/2-inch x 3-3/4-inch board with the 47-1/2-inch x 26-inch plywood sheet. Attach the board in place and secure using clamps until it dries. From the bottom, screw the components together.
5. Attach the seat
Flip the base frame so the longboards are on the bottom. Place the seat, board side down, on top of the frame, with the edge of the board flat against the frame’s side. On the other side, there should be approximately 1-1/4-inch overlap. From the bottom of the seat to the frame’s bottom borders, you must s crew every eight inches or so.
6. Assemble the back
Position the two back pieces to ensure that the cutout patterns pair up, and use the shorter (7-inch tall) board on the top. Draw a straight line through the middle of the smaller board using a pencil and straightedge. Screw every six to eight inches along the length of the line. Vertically align the two 5-1/4-inch-wide back support pieces, one on each side, against the plywood backboard. Draw a line through the center with a straightedge and then attach with screws along the line.
7. Assemble the sides
On your work table, place one of the angled 18-inch plywood side pieces flat. Align the 18-inch x 3-1/2-inch board on the plywood’s squared edge. Draw a line through the center of the board using a straightedge and screw three screws on the line. Rep with the opposite arm.
Align the angled support board perpendicular to the plywood against the 18-inch board with a squared edge flush against the plywood’s longer side and the angled edge pointing toward the plywood’s shorter edge. Secure the 10-3/8-inch support board by marking and drilling screws. Carry out the same procedure with the opposite arm and 10-3/8-inch support board.
Perpendicularly align a 33-1/2-inch-long arm board along the plywood’s long edge. The arm should be offset approximately 1 inch from the plywood’s angled side and 7-1/2 inches at the squared side. Screw at the top of the arm board on the border of the plywood and where the arm meets the angled support board 10-3/8-inch. Rep with the opposite arm.
8. Connect the arms to the base
Align one of the completed arm panels against the side of the base, using the 18-inch x 3-1/2-inch board perpendicular with the 58-inch x 3-1/2-inch board attached to the side of the seat. Your angled edge of the plywood side piece must face away from the swing, toward the back. Drill your holes in advance and use screws to secure the side piece to the base frame along the base of the plywood side. Carry out the same procedure with the other completed arm panel.
9. Attach the backboard
Attach the swing’s back panel by putting a screw through the plywood side pieces to the back panel’s sides. Seal the seat’s bottom and back foundation with a line of external wood glue.
10. Insert the side trim
Position the 18-5/8-inch x 3-1/2-inch angled board beneath the armrest to make the angled edges flush with the armrest’s bottom and base support’s top. Secure with a screw. Rep on the other side.
11. Sand and smooth
To avoid weathering, seal the screw holes using exterior wood filler. Once completely dry, use sandpaper to smooth off any rough edges.
12. Borehole’s drilling
Drill a 1-inch borehole into every bun foot with a hole saw. Drill a 1-inch borehole in the middle of every baseboard below the armrests. Make two holes at either edge of each armrest, precisely on top of the holes in the baseboard.
13. Knot the ropes
Determine the height of the hanging hooks with the desired distance between your swing and the ground. Allow several inches for knots. Any extra can always be trimmed later.
Attach the rope’s end down into the front of the arm and base through a bun foot, starting on one side of the swing. Secure with an overhand knot. Reverse the procedure with the opposite end of the rope at the backside. Do not cut any excess rope until the swing is hung since this will allow you to make any necessary adjustments to your knots, as well as the swing’s height and balance. Repeat on the opposite side of the swing, and then hang.


