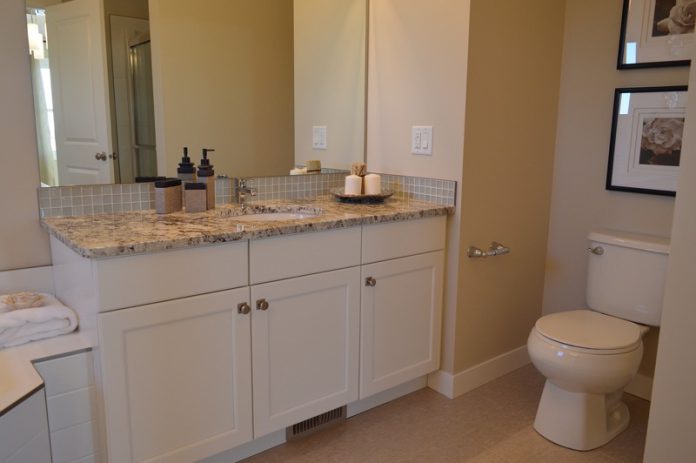
Bathrooms may seem to be a humble room, but an ancient looking bathroom can bring down the value of your home. Any home renovation, including bathroom renovations help to increase the market value of your property, but if your savvy enough to complete the job yourself, you can potentially save yourself quite a bit of cash.
To update your bathroom need not be a costly and dramatic exercise. A relatively quick process would be to install a new vanity. Here are some simple tips to help you on your way.
-
Pick your new vanity.
Be sure to measure your current vanity first (or if you’ve removed it, measure the space for the vanity). Don’t forget to include the top of the counter of the vanity in your calculations as this is often slightly longer than the rest of the measurements. This will save any complications from choosing one of the wrong size. It’s quite difficult to trim down a vanity and one that is too small will leave unsightly gaps.
-
Pick your new faucet.
If your updating your vanity, you might as well go the whole hog and pick out a new faucet system too. Be sure to replace all the internal parts as well, such as O rings and other components.
-
Empty the vanity and clear space.
Take everything out of the vanity and store it out of the bathroom. Take all items of the floor and out of the room too. Ideally, you want to have your bathroom as empty as possible. If you have any other items next to the vanity or in close proximity, remove them too. You’ll need a bit of space to complete the job and this saves you scrambling for space and tripping over materials.
Remove everything electrical from the bathroom. Water and electricity definitely don not mix.
Make sure to have the room ventilated with an open window so you can get fresh air in whilst you’re working. This isn’t always an easy job and if you’re working up a sweat, fresh air can help keep you and the room cool.
-
Disconnect the water.
The most crucial step is to turn of the main water supply. As you’ll be working with water and removing pipes, this is a precaution to stop any excess water loss which could cause damage to your bathroom. After this, go into your bathroom and turn of the valves to the current sink and turn on the tap to get rid of any water and pressure contained within the system.
The second step if the piping underneath the sink, otherwise known as the P trap. There will be water in there too, so place a bucket underneath to catch the liquid that comes out. Loosen the nut at the top of the trap and carefully pull the pipe away from the underneath of the sink.
After that you’ll need to detach the valves from the water lines. With a utility knife, cut the sealant which attaches the sink backsplash to the wall.
-
Remove the current vanity.
First, remove the counter tip of the vanity so you have clear access to all areas of the vanity cupboards. Then take out the screws holding the vanity to the wall. If there are any large gaps or holes in the wall, you’ll need to address them first and patch them up with some putty.
-
Clear the floor and walls.
You want to ensure that the walls and floors as clean as you can get them. This will help make the vanity be a good fit and also from getting any items trapped in there which might release undesirable odours afterwards.
-
Measure up the wall and make it for the new vanity.
With the new bathroom vanity’s width and height, mark the new location. Locate and mark the studs within this vanity’s outline using a stud finder. If the back of your new vanity is solid, take measurements of the pipes’ locations on the wall and convert those dimensions to the vanity’s back.
-
Put in your new vanity.
In order to align it with the preceding marks, slide the vanity cabinet into place. If necessary, you can take the doors off your new vanity to make installation simpler. Drill pilot holes into the closest studs after the vanity has been levelled, and then attach with screws. You will need wall anchors if there aren’t any studs for you to drill into. There are various anchors that are suitable for plaster, tile, or drywall. Apply the appropriate anchor to your wall.
-
Next comes the faucet.
Before fastening the sink to the vanity, put the sink’s bathroom faucet and drain together. The next step is to mount the faucet with the plastic gasket. Then, tighten the bolts while holding the faucet from below and place the faucet in the holes on the vanity top that are specified for it. Finally, use an adjustable wrench to secure the new faucet’s water supply lines.
-
Put the top of the vanity on.
You will need to dry-fit the vanity top over the vanity if you have chosen a bathroom vanity base or a vanity without an attached top. When attaching the vanity top to the vanity, be sure to adhere to the manufacturer’s instructions.
Make sure there are no gaps between the wall and the vanity and that the wall is straight and be sure to use silicone caulk for the top of the cabinet to keep it all together.
Place the vanity top in place, then firmly press it down. Verify that the vanity top is flush with the wall and level. Make adjustments if required.
-
Turn the water supply back on.
Reconnect the faucet lines to the water supply and then reconnect the Ptrap. Turn the mains water back on. Turn on the taps and check if there any leaks, and if there are, fix them.
Author: Therese Vickers.


