Gathering around a crackling fire pit on a cool evening offers unmatched ambiance and warmth. The glowing flames create such a warm, inviting ambiance for quality time with family and friends. If you’ve been dreaming of having your own backyard fire pit, the good news is that with the right planning and materials, building one is totally doable as a DIY project. This guide will walk through the entire process step-by-step so you can start hosting unforgettable backyard bonfires.
Selecting the Location
The initial step involves choosing the ideal location for your new fire pit. This key decision will determine how enjoyable your fire pit experience will be. First, consider the airflow and smoke direction. Avoid placing the fire pit directly under trees or covered patios, as this can block proper ventilation. The smoke will linger instead of dissipating. Select a spot at least 10-15 feet away from homes, decks, wooden fences, and other structures to mitigate fire risks.
Also, consider proximity to seating areas. The fire pit should be conveniently located close to where you want to place chairs, benches, or logs for seating around the fire. However, allow enough distance so people don’t have to move seats every time new firewood needs to be added. In terms of view, pick a spot where the fire can be enjoyed from seated areas and from inside your home if desired.
Selecting Suitable Building Materials
A range of materials, each with unique benefits, are suitable for constructing fire pits. Common options include concrete, brick, heavy stone, metal, glass, and fire-rated composite substances. When using concrete, calculating the precise volume needed for the project’s dimensions is crucial. A concrete calculator can ensure you have the right amount of concrete without wastage. Also, consider factors like durability, appearance, cost, and availability when selecting your materials.
Concrete and metals like steel or iron are very durable options that can withstand high heat for years. Bricks, blocks, and stones should be solid and flat, at least 4 inches thick, to contain fires safely. You can also choose composite fiberglass or refractory materials, which require little maintenance but can be more expensive.
Choosing the Design
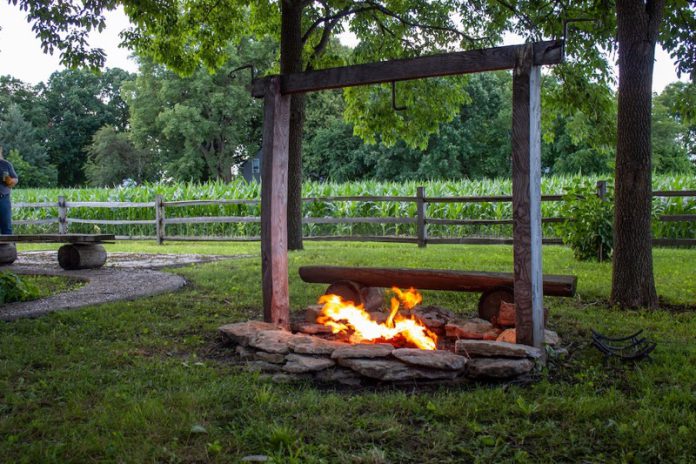
Fire pits today come in nearly endless shapes, sizes, and designs. A classic and popular design is the straightforward ring or square shape. Pre-fabricated metal, stone, or concrete fire rings contain the fire safely within an attractive barrier. These can be purchased or built as creative DIY projects to your custom specifications.
For a rustic, natural aesthetic, an in-ground fire pit is a great option. This involves digging a hole and lining it with stone or concrete blocks to contain the fire. In-ground pits have a lower profile and blend into the landscape seamlessly. If you want a decorative focal point, fire tables are a great option. A metal tabletop and base surround the firepit area. The tabletop provides a convenient surface for drinks and plates while socializing around the flickering flames.
There are also portable fire pits that add versatility since you can move them around your yard to different spots whenever desired. Models range from simple metal basins on legs to elaborate wheeled pits with chimneys. Determine the optimal size and design based on the number of people you plan to gather around the fire.
Preparing the Site
After finalizing the design and materials, the next step is to prepare the site. Use stakes and string to outline the exact size and shape of your pit. Mark the footprint. Remove any grass or plants inside the outline down to bare soil.
For an in-ground fire pit, excavate the hole 12-18 inches deep using a shovel and pickaxe. Then, add a 2-4 inch deep layer of gravel to line the hole and allow for drainage underneath. Compact and level the soil with a hand tamper to create an even, stable base for your firebricks or concrete.
For above-ground models, excavate just deep enough to accommodate the foundation or footer materials to reinforce the perimeter. The right site prep ensures your fire pit will be structurally sound for years of glowing fires to come.
Building a Permanent Fire Pit
Constructing a permanent fire pit requires properly bonding and sealing the materials together for longevity. In constructing concrete fire pits, start by creating robust wooden forms to maintain the shape during concrete pouring. Use high heat-resistant refractory cement instead of standard concrete, which can crack under fire intensity.
Reinforce the concrete with steel rebar or mesh to prevent cracking. Allow the concrete adequate curing time of at least one week before building your first fire. For a natural stone or brick fire pit, dig a trench the entire perimeter and fill it with concrete to create a sturdy footer.
Then, lay the first row of bricks or stones on top of the footer. Use mortar between each layer, covering all surfaces to seal. Build up the layers, overlapping the vertical seams in a running bond pattern. Allow the mortar to fully cure for 72 hours before lighting. This ensures moisture has evaporated completely to prevent cracks from heat exposure. Proper bonding creates a permanent fire pit to enjoy for decades.
Constructing a Portable Fire Pit
Portable fire pits allow you to move the fire to different spots as desired. Many lightweight yet durable pre-fab models are available for purchase. You can also construct your own custom portable fire pit using heavy-duty materials.
Opt for a steel bowl, basin, ring, or a cubic shape. Thick cast iron or galvanized steel are also sturdy options. Cut the metal to size with shears. Weld or screw legs made from steel pipes or square tubing to elevate the basin above ground level. This allows for airflow and drainage.
For added portability, attach wheels or casters to one side. Include handles for ease of mobility. Keep portable pits smaller, around 3 feet wide, to maneuver easily. Choose a plain metal finish or get creative with high-temp paints and decorative metal finishes like copper or rust patina. Your portable fire pit can follow the party anywhere.
Installing Safety Features
Incorporating essential safety features into your fire pit design is imperative. Surround the entire pit with non-combustible materials like brick, stone, or concrete to at least 18 inches beyond the pit edge. This prevents sparks from igniting grass or mulch. Incorporate sturdy spark screens or mesh covers to prevent dangerous airborne embers.
Install a snug-fitting metal lid or sturdy weather-resistant cover when the fire pit is not in use to restrict access and prevent accidents. Keep a fire extinguisher, hose, sand, and shovel nearby at all times to quickly extinguish flames if needed. Create a 5-10 foot non-combustible zone around the pit, clearing away any combustible debris. Planning for safety upfront ensures many fun evenings around the fire for years to come.
Conclusion
Installing a fire pit in your backyard is an easy and enjoyable DIY project. With the above tips, you’ll be able to create a beautiful, functional outdoor space for you and your loved ones to gather around. Customize your fire pit to match your yard and style. Your new favorite relaxation destination awaits! A backyard fire pit brings people together, providing lasting memories, cozy comfort, and a much-needed escape from daily stress and worries.
