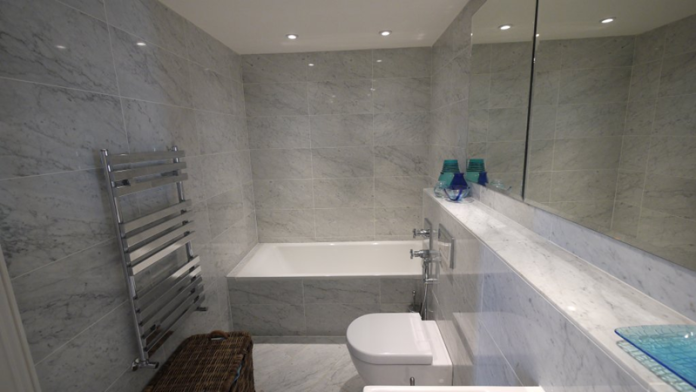
Tiling your kitchen or bathroom can refresh the entire look of those rooms, as well as give it a sense of style and functionality. However, to get that professional finish right, you’ll want to prepare your walls and floors correctly. Proper preparation will ensure tiles adhere perfectly and last longer, but it will also look their best. In this article, we will guide you through the basic steps on how to prepare your walls and floors for kitchen and bathroom tiling.
Step 1: Clear the area.
Remove all fixtures, appliances, and furniture in the area. This lets you work directly on surfaces and ensures that nothing is going to interfere with the placement of your tile. You’ll need to take down the light fixtures, remove countertops, sinks, etc. Take away all debris, old tiles, or existing adhesives from the floor.
Step 2: Remove Old Tiles and Adhesive
If you installed tiles, fill them completely. The old ones crack, loosen, and sometimes they inhibit the bonding of new tiles. Removal: Everything remaining on the surface including old adhesive and grout has to be removed by hammering and chiselling, or you can even use electric devices called tile scraper.
Tip Key: If there is excess adhesive, use a chemical adhesive remover or sand the surface to be perfectly smooth.
Step 3: Evaluate the Substrate
Inspection time for the substrate to ensure it is sound. The substrate for the installation of kitchen and bathroom tile can include drywall, cement board, or even concrete. Look for the following:
Look for cracks: Check the walls and floor surfaces for cracks or any form of damage. If there are cracks, ensure that the appropriate filler or grout is used to fill the holes. This will prevent the possibility of your tiles cracking or shifting over time.
Level the Surface: Level the surface; otherwise, uneven surfaces will shift the tiles and give an unattractive finish. Check the areas that need levelling by using a spirit level or straightedge. If necessary, self-level the surface with self-levelling compound or with thin set.
Step 4: Clean the Surface
Clean the surface before laying of new tiles. Dust and dirt have an effect on tile adhesives while laying tile. Use damp cloth or sponge to wash walls and floors. Hard grime and soap scum use a mild detergent, cleaning solution for removal.
Tip: Ensure the surface is completely dry to proceed to another step of laying tile since the moisture of the substrate interferes with tile adhesions as well as being the starting point of probable long-run problems.
Step 5: Install Waterproof Membrane for Bathrooms
Bathrooms must be waterproof. Apply a waterproof membrane or sealant when showers and baths are to be installed. It should create a barrier between the tiles and the substrate. Apply it with brushes or rollers. Apply in thin, even layers. All seams, corners, and edges have to be very well covered.
Step 6: Installing Backer Board (On Walls and Floors)
Highly recommended is to place a backer board. This applies most especially to wet places such as the bathroom and the kitchen. Backer board is a moisture-resistant material that gives structural strength to the walls and the floors. It can be bonded to tiles so that they can be attached to it.
Wall Installation: Install the backer board on the walls with screws or adhesive. It should be level, securely fastened and even.
Floor Installation: Use cements backer board or the suitable underlayment on the floors to provide a suitable solid base. Attach the backer board with screws or adhesive to the subfloor.
Step 7: Priming
Application of primer on tile helps in developing adhesion because of an even surface. Moisture damage is prevented, and durability in tile is increased through the use of primer. According to suitability, whether drywall or cement board, concrete substrates can get suitable primers. The use of either a roller or a brush can be used in application so as to have a uniform effect.
Important: Always ensure that the primer has fully dried, according to the manufacturer’s guidelines, before applying the adhesive or tiles.
Step 8: Choosing the Appropriate Adhesive
The adhesive selected plays a very critical role in ensuring that the tiles adhere to the surface very well. The adhesive required varies based on the tile and substrate material:
Ceramic or Porcelain Tiles: For ceramic or porcelain tiles, choose the appropriate thin set mortar for the application.
Natural Stone Tiles: Special adhesive meant for natural stone, no discoloration, does not damage the material
Glass Tiles: Clear adhesives for glass so no grout lines and adhesives will be visible on it.
Use the manufacturer’s instructions in mixing and in applying the adhesive.
Proper preparation of your walls and floors will be the secret for a professional and long term tile installation in your kitchen or bathroom. By following these steps, such as clearing the area, removal of old tiles and adhesive, inspecting the substrate, cleaning, applying waterproof membranes, backer boards, primer, and choosing the correct adhesive, ensures durable, beautiful, and secure tiles. With proper preparation, your kitchen or bathroom tiling project will enhance the aesthetic appeal and will provide a functional and reliable space for years to come.
