
Ever attempted cleaning your own household windows? Looking for that streak-free gleam but ending up with whirls and swirls? If so, you are in good company. Many homeowners attempting to clean their own windows are confronted with smudges and smears, especially in direct sunlight. Why? While we all know the expression “As smooth as glass”, at the microscopic level glass is anything but smooth. It has pitches and crevices (also known as micro-pores) that trap chemicals, minerals, and ions contained in water and detergents, not to mention dirt and grime. Since windows are see-through and reflective, even minor imperfections will show up in direct light. Therefore, window cleaning requires specific equipment and skill levels beyond basic everyday cleaning tasks. But have no fear, you about to learn some DIY window cleaning tips that will give you smudge and smear free glass in no time.
People generally hate washing windows because of dirt, paper towels, dripping water and annoying streaks. But there are many techniques and methods and it doesn’t need to be painfully exhausting or difficult. Try starting with some of these basic tools and methods.
Firstly, gather your supplies and tools. To get off to a good start with cleaning your windows, it is important to have good quality equipment. These include a bucket, squeegee, mop, scraper, and detergents.
Bucket. You need a wide bucket that can fit the squeegee and mop in. You can use a typical window cleaning bucket that is usually used by professionals.
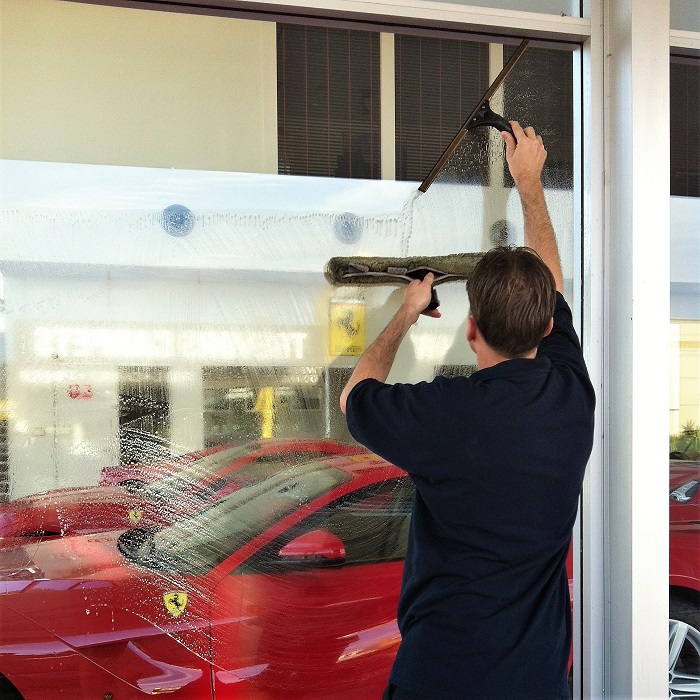
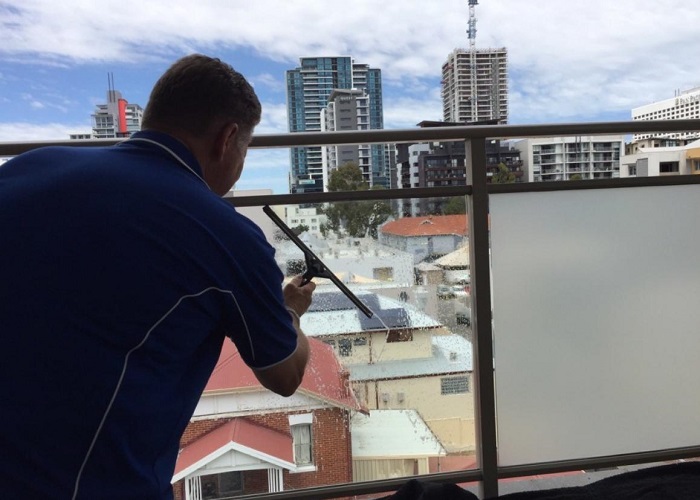
Squeegee. This is the most crucial and important tool of all, so you need a good quality squeegee that has three pieces assembled that are the handle the rubber and the channel. The rubber can be replaced or turned over when it gets older.
Scraper. This usually comes with a replaceable metal blade and used to get the tough marks off like paints, stubborn insect marks or birds droppings. But you need to take care when you use a scraper on glass as it can cause permanent damage or can break the window glass easily.
Ideally, you need to start by cleaning stubborn stains. Outside your windows usually to stubborn stains as the window is exposed to minerals from hard water runoff, bird droppings, and elements that can make a pile up of dirt and grime. You can opt to use mineral deposit removing cleaner and rub the stains on the window and then rinse the area with water. Or you can use a spray with pure vinegar on the affected area and use a cloth to rub the stains.
Sometimes children can decorate the windows with stickers or apply decals that prevent the birds from flying into the windows and removing sticky substances can be a difficult task. However, you can remove it by using a plastic scraper and a spray bottle filled with water. All you need to do is to spray the stickers with water and wait for a couple of minutes, then hold the scraper at an angle of 45 degrees and apply gentle pressure. Then you rinse away the dirt from outside the window.
Vacuum inside the windows. You need to make sure you vacuum all the windows, corners, and frames. This is important as it prevents spreading of dirt around when you do your actual cleaning. Also, you need to put a towel that is large down in front of the window before you start to clean inside the windows to catch the spills.
Scrub the panes. When scrubbing the panes, you need to use a handheld sponge that will work best on multiple pane windows. This hand-held sponge is usually very firm and more absorbent than the synthetic ones. Use the sponge with a solution of liquid soap in water and rub each pane starting from left to right and top to bottom and ensure that you wipe all the corners to loosen the dirt.
Make cleaning solution. There are different cleaning solutions that you can use in cleaning your windows, but it is recommended to just use basic water and dish soap mixture. When you use a spray bottle and paper towel alone to remove the dirt you will leave the windows murky and streaky. So, to ensure that you get the best results, make sure the cleaning solution is mixed properly and has the required ingredients.
Start with a good squeegee. The key to success in cleaning your window is buying a squeegee and keeping it fitted with a new and sharp rubber blade. The squeegee should be dipped in a bucket of window cleaning solution, and then you need to wash your windows at the top left and then pull the squeegee over the soapy pane in a reverse pattern. The key is to squeeze most of the soapy water out of the scrubber to eliminate excess running and dripping. But depending on how dirty your windows are you may be able to wash 5 to 10 windows without squeezing the scrubber. But once you are done cleaning a window, make sure to dry it before moving to the next one and if you notice the squeegee is squeaks when you are washing make sure you add a little more soap to the water.
Wipe the windows dry. If you have a small paned window, you need to wipe away the water in a vertical way by using rubber blade on squeegee, while moving your squeegee from top to bottom. For a big picture window, you need to use horizontal strokes. Using a lint free cloth wipes the blade dry and overlap each stroke. It is important to make sure that the rubber blade is always in contact with the window.

Finally, wipe up the excess water. You need to wipe anywhere the water has spilled, dripped or ran down. You can wipe excess water by using a lint free cloth as it prevents streaks on the window. To avoid damage to the frame, you need to use a separate cloth to dry water from the window sill.
Washing the window does not have to be a chore if you follow these easy steps to clean your window at home and you have the right tools to get the job done, you will be able to get the best results and the work will be easier to do. You can also opt for a professional window cleaner especially if you have huge picture windows or high hard to reach glass.
Looking to clean other areas of the house next? Get the job done fast by following some of these house cleaning tips and tricks.


