Home Blog Page 377

8 Tips to Ensure Life of Wood Flooring

Unlike the past, the contemporary generation has umpteen options to improve the visual appeal of their homes. The market is crammed with a myriad of internal and external designing features that eventually add to the beauty of your home. This speaks volumes about how the construction industry has evolved over time. 

However, as they say, quality never goes out of style. This maxim sits well with wood flooring because despite being one of the oldest types of flooring, it is still very much popular. Wood flooring is not all about looks. In a way, it also conveys your love with tradition. 

Having said that, wood flooring has been stigmatized as something that does not last long enough. Well, it cannot get any further from reality. Many homeowners have stretched the lifespan of hardwood flooring to decades without allowing it to lose its luster. You can also do the same by taking the following measures:  

  1. Choose cleaning supplies carefully 

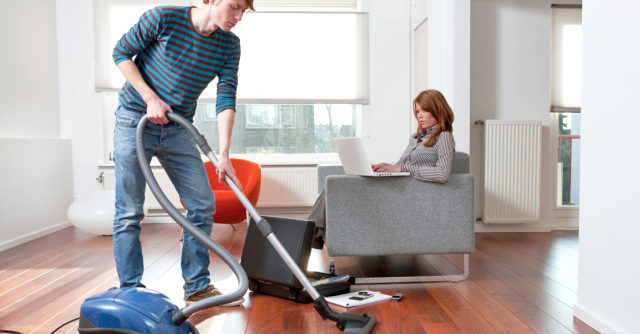
Typically, this is where many people go wrong. Homeowners assume that any type of floor cleaner will get the job done. The best way to buy the right cleaner for wood floors is to read the bottle label. If you have four-legged-friends in the house, then make sure the formula is a non-toxic one. 

A lot of cleaning supplies used for outdoor decking may do a fine job early in the piece. They are sure to cause irreparable damage in the long run. For those looking for budget-friendly options can make equally good cleaners at their home. Some of the most famous home-made cleaners are as follows: 

  • If you have the remotest of an idea about DIY cleaning alternatives, you would know the importance of vinegar. Depending on the severity of grime, mix vinegar in water and mope it on your wood floor. The floor will regain its shine again. Sometimes the finishing of the floor is water-sensitive. In that case, you should consider mixing vegetable oil with vinegar.  
  • Black tea is rich with ingredients like tannic acid, which usually use in the cleaning liquids. Swap your floor with three tea bags blended into 4 cups of water and bid farewell to dirt. You may add a squeezed lime, lemon or orange for fragrance. 
  1. Do not allow shoes inside 

Arguably the biggest source of bringing dirt into the house is shoes. You may have a habit of wiping shoes time and again, but still, it is impossible to entirely get rid of dust and filth. These seemingly invisible particles are no less than parasites for a wood floor. So if you do not leave shoes at the entrance, the floor will get scuffs and scratches rather sooner than later. 

This measure is comparatively easy to implement among the family members. But asking guests to do the same might be a tricky part because it may not sound courteous enough. There are friendly and diplomatic ways to put no-shoe policy into effect: 

  • Make the most of a signboard. This a polite way to communicate your message.
  • Install a bench and cubbies at the entry point. 
  1. Swap your space with rugs and mats

Having dealt with outside dirt, it is time to nib in the bud of the mess generated inside the house, such as food straps and spilled-liquids. That is where mats and rugs swing into action. The kitchen is the go-to place to be layered with these home elements because it accounts for the maximum clutter. 

Other than kitchen counter and sink, you should also swap rugs and mats on high traffic areas of the house. The designs of these house elements have evolved with time. So rugs and mats will not prove to be a liability as far as the attractiveness of your house is concerned.      

  1. Keep sunlight at bay

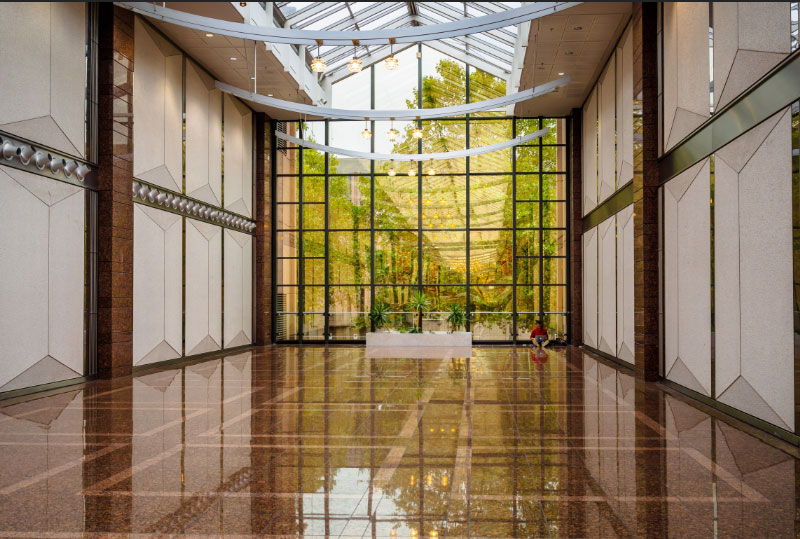
There are vast and varied benefits of sunlight if it is taken in a measured proportion; This is one reason why we all love our house to be exposed to the sun. After all, an excessive amount of UV rays will lead to disastrous consequences for wood flooring. It will take away all the shine and glitter, giving the floor an extremely dull look. There are two efficient ways to minimize the severity of UV rays: 

  1. Arrange your furniture in such a way that it largely blocks sunlight from piercing into your house
  2. Install high-quality windows 
  1. Avoid dragging furniture

Moving objects like furniture can also cause considerable damage to wood flooring. Despite strictly forbidding, children may drag chairs and lightweight sofas anyway. You should use caster underneath suchlike fittings. 

Casters will surely protect the floor from wear and tear, but some of them could inflict marks on the floor. Therefore, to be on the safe side, it is recommended to opt for non-marking casters made of rubber instead of plastic or metal casters. 

  1. Keep it dry 

No person in his sane mind would ever suggest you to install wood flooring in the bathroom and laundry room. The reason behind this is that these are moisture-prone areas. But having a wood floor in relatively drier parts of the house does not mean it can not catch moisture. Even the slightest of moisture can cause havoc to the wood floor, notes National Wood Flooring Association.  Broadly put, keeping the floor dry is critical if you want it to last longer. 

Of course, mats and rugs will pose deterrence against moisture. But it would be better to invest in a dehumidifier and vacuum. They will make a world of difference.   

  1. Deep cleaning is a must 

Though we brush regularly, many of us still go to the dentist at least once a year for thorough cleaning. The same goes for wood flooring. Manufacturers suggest that every homeowner must hire professionals to do away with deep-seated dirt at least once a year. Do not take liberty with the cleaning schedule or else it will not live up to your expectations. 

  1. Refinish the floor frequently  

This is also an essential piece of advice coming from the end of experts. As a rule of thumb, it will be a healthy practice to indulge in refinishing every five to seven years. Depending on the condition of the floor, you may subsequently delay or rush for the process. 

The takeaway message

As you can see, maintaining wood floors is not a tough nut to crack. Just a handful of simple strategies can add decades into their overall lifespan. Since we have outlined the best tried and trusted tips, you do not need to look any further. 


Ways to conveniently maintain the home

Home, as we call it, is not just a physical space where we sleep, eat and repeat. Home, in addition to its physical reality, has an emotional sentiment in our hearts. This is where we make our memories of growing up, celebrating best moments, and mourning on worst outcomes, etc. Therefore, taking care of our houses is more of a precious activity rather than just a house chore. But, in the hustle and bustle of our urbanized lives, where everyone is busy, every moment we are multitasking, fulfilling job responsibilities, raising kids, etc., having another set of work in the form of home maintenance is kind of daunting, despite our emotional connection with our homes. 

Additionally, owning a house or even rented out, comes with a hefty cost. It is one of the largest splurges of finances one spent in his or her lifetime. In the case of a tenant, it is still a handsome portion of your monthly expenses, and you would be responsible for any mishaps or major overhauls. Therefore, it is wise to give home maintenance a serious business, as it has quite a cost attached to it in case of not getting it right. Similarly, some issues can be minor and require minimal effort, if done on time For example, cleaning or replacing air filters and vessels of heating and cooling systems monthly. If not done regularly, you might end up with heating and cooling problems that can only be saved by installing a new Heating and Cooling system, which will be a way massive cost than regular maintenance.

Interestingly, like in every good governance practice, such house maintenance can be done effectively and efficiently with lesser on the mind and our busy schedules by simply segregating and scheduling house chores on a daily, weekly and monthly basis. In this way, you can get all bases covered with lesser hassle.

In addition to such in-advance planning, scheduling and segregation of tasks, let’s explore other ways that can make our lives easier while maintaining our houses.

  1. Take Professionals on Board:

Some tasks are simple and convenient to be managed by ourselves. But some daunting ones fall in the domain of professionals. Yes, we all want to save costs and try to do it ourselves, but in some special cases, it makes financial sense to take the help of professionals. There are many professional service providers who can help you out with plumbing, AC repairs, Garbage Management, etc, like AIRTECH. You can simply visit the website https://roohome.com and book a service straight away. Professional help is pricey but effective than our efforts.

  1. Heating and Cooling Systems in Check:

Heating and Cooling Systems are usually running all the time and we don’t realize its importance once it’s broken. It manages the climate system of the house and ultimately our comfort. On the flip side, if they are working well, they can become a source of pollution for our houses. Therefore, it is wise to take care of its maintenance on priority. Regular checking and cleaning of Air Filter and Vessels in every six months can prove to be a beneficial exercise, as it will enhance the overall life of your cooling and venting system.

  1. Moisture Can be Your Enemy:

Moisture can prove to be underrated stress. Normally, due to the general nature of weather especially in the dense areas, our houses attract and pick moisture from the environment. It is also due to the material used in the construction of our houses like wood. Such moisture causes bad odor and smell, and it can deteriorate our health and other materials in our houses.

Therefore, the usage of exhaust fans and proper ventilation is necessary for our houses to keep the humidity levels low and slow.

  1. Exteriors are the First Impression:

You won’t like a house which, no matter how beautiful and classy from the inside, is boring and dull from the exteriors. It brings the overall feel of your house. Therefore, look out critically for any slight wear and tear outside. Similarly, observe minimal decays happening anywhere outside in the lawn areas even, as such declines prove to be hefty overhauls if not taken care of in the first instance. 

Conclusion:

As we discussed earlier, our homes are financial subjects for us. Maintenance is not only necessary for keeping it well for our livelihood, but it is also for its longevity. Because, as we all know, if things are properly taken care of regularly, they can’t be recovered with their same finesse and outlook with even the major overhauls.

Similarly, regular maintenance of our houses also bears long-term fruits in the form of a better price and selling value along with higher demand in the neighborhoods due to its interior and exterior grace.  

8 Kitchen Cleaning Tips & Tricks That You Don’t Want To Miss

Cleaning kitchens is probably one of the most tedious tasks every housewife and mom has to do on a regular basis. Besides just looking after their kids and spouse, nothing can be frustrated than working in a dirty and messy kitchen.

With so little time in your hand, in this article, we have curated the top 8 best kitchen cleaning tips and tricks that will help speed up your kitchen cleaning process and make everything looks easier for you.

So without further ado, let’s dive right into the tips.

1. Use Orange Peels Everywhere

Who doesn’t love the scent of orange peels? And if you’re the one who likes throwing off your orange peels, stop right now! Because you can utilize them to really freshen up the smell of your house and kitchen.

All you need are the peels of several oranges, plain white vinegar, water, a spray bottle, and a glass jar with a screw-top lid. Place the orange peels in the vinegar and leave them on various spots in the house. You can place it on places like the kitchen countertops, next to the sinks, the ovens, the greasy stoves, and literally anywhere you want to freshen up the smell.

Using vinegar, the smell can last up to several weeks. You may even transfer some of the mixtures into the bottle and spray it. Imagine how useful your leftover orange peels can be!

2. Shine The Metal In Your Kitchen Using Ammonia

We know you must be pretty frustrated with the greasy metals in your kitchen, especially the grates and burners. But no need to spend time scrubbing them anymore because we’ve got something that can help you clean them up much faster and more efficient.

Ammonia solution is the go-to product here. That’s right, the basic ammonia. All you need is a 1/4 cup of ammonia and a ziplock plastic bag. Pour the ammonia into the bag and place the greasy metal inside it. Remember, we’re not trying to soak it, but rather, to utilize the ammonia fumes to dissolve all the grease from the metals.

Leave the bag overnight, and simply clean off the grease with the help of a sponge on the next day. Voila! You’ll be amazed at how easily the grease can be removed. REMEMBER! Don’t ever mix any chemicals with the ammonia. This can negatively affect your kitchen equipment.

3. Make Use Of Lemon And Vinegar

Did you know that a combination of lemon and vinegar is a magic cleaning solution for your kitchen? You can use it to clean literally almost everything. This ranges from unclogging your garbage disposal to removing grease from your stainless steel sink and unpleasant odor from the fridge.

Heck, a solution of lemon oil and vinegar can also be used to clean your microwave in 5 minutes! Use a few drops of lemon oil and some vinegar, mix them well and soak a cloth in the solution. Then gently wipe your microwave surface and tray and that’s all. It should look as clean as new.

4. Shiny Your Sink With This Method

Everyone and their moms know that cleaning the kitchen sink is probably the toughest job in cleaning your kitchen. But don’t worry, we’ve got you covered with this best kitchen sink cleaning tip that you can ever find.

According to a reputable cleaning company in Australia, the easiest and most effective way to clean the kitchen sink is to use flour and some hot water, followed by the use of lemon to freshen up the smell. The process can be as followed:

  1. Wash the sink thoroughly with hot soapy water to remove all the macroparticles.
  2. Then leave the sink to dry. You can use a clean towel to buff the sink and remember, don’t skip this step. Water can reduce the flour efficiency in cleaning the kitchen sink.
  3. Sprinkle the sink with flour
  4. Buff the flour –  Using a paper towel or soft cloth, buff the flour into the sink like you are waxing a car. Keep buffing and don’t forget the drain, rim around the top of the sink, handles, knobs, and little grooves where dirt likes to hide. You’ll see bits of food start to disappear and things begin to get shiny

Once done with the cleaning process, you can then run icy lemon rinds through the disposal, to remove all the odors. And that’s it! Easy isn’t it? Now you have the clean and the fresh kitchen sink to use.

5. Don’t Forget The Toaster

Moving on from the toughest place to clean in your kitchen to the most difficult appliance to clean, i.e. the toaster. Removing small bread crumbs is one thing and cleaning all the accumulated dirt and debris inside and outside the toaster is another thing.

So here are some steps that you can take to easily clean it up:

  1. Make sure your toaster is unplugged.
  2. Next is to pop out your crumb tray and shake off all of the loose crumbs
  3. Then wash the crumb tray using soapy water to make sure it’s cleaned
  4. Then wipe the toaster Inside out with a soft, damp cloth and gentle soap if necessary. Don’t forget the knobs as well.
  5. If your toaster is stainless steel, use a clean cloth and a bit of vinegar to shine it up
  6. Once done, then pop back the crumb tray and there you go. A clean toaster ready to be used.

You can check out this article to learn more about the steps

6. Dust And Wipe Your Kitchen Counters

Next up in the kitchen cleaning tips and tricks is to dust and wipe down your kitchen countertops and furniture. This is often neglected by many people when cleaning their kitchens.

All you have to do is to use a wet cloth and gently clean off the dust on places like the countertops, the kitchen cabinets, the kitchen desk, etc. Then lay down paper grocery bags to catch dust in the future.

7. Sweep And Mops Your Floors

Now we’ve done all the cleaning inside and around the kitchen area, it’s time to move on to the biggest surface, i.e. your floors.

Sweeping and mopping your kitchen floor should be just like how you would do it in your house. Just make sure all the microparticles like food particles, ingredients, etc. are thrown into the dustbin before the actual cleaning.

The important reason why to clean and mop your floors is to remove all the grease and oil from your cooking process. The best option is to use a TBS white vinegar and water to wipe off the floor, then utilize a little essential oil to sweeten up the smell.

8. Keep Everything Organized

Last but not least is to keep everything organized in your kitchen to avoid cleaning them frequently. Have a place to keep everything. The kitchen utensils, cooking ingredients, jars, plates, etc. and don’t forget to clean them regularly, to avoid spending time on a big kitchen cleaning.

And if you ever need to clean various things in the kitchen, to speed up the process and make things easier, don’t forget to create a cleaning checklist as well.

Conclusion

And that’s all for the 8 kitchen cleaning tips that you can easily follow along and implement. Some of them are pretty obvious but we’ve just simplified them to make everything look easier to follow along and organized for you.

Some of the hacks and ingredients like lemon, vinegar, and ammonia can easily be utilized and the good part is, they’re all available right in your kitchen. You just need to utilize them beyond their common uses.

We hope you’ve enjoyed the article. If so, don’t forget to share it on your social media accounts as well. Cheers!

Benefits of Roof Gutter Guard

why you need a gutter guard copy

If you own a house, there is a very good chance that you have gutters on your roof to help remove water and prevent all of the potential damage that can occur if water is allowed to accumulate around your property.  With that being said, in order to ensure that you have the most effective gutter system that you can have, you may want to seriously start to consider having gutter guards installed.  In case you were unfamiliar with what a gutter guard actually is, it is going to be a vinyl, mesh, wire, or aluminum cover guard that is installed right on top of your current gutter system.  

Why would you want that you ask?  Because the best roof gutter guard is going to help prevent any type of leaves and other large debris from collecting in your gutter system, eventually leading to a clogged up and overflowing gutter.

Here are some of the main benefits of utilizing gutter guards on your home’s gutter system.

Gutter Guards Help to Prevent Clogged Gutters

When it comes to your gutters, one of the main problems is going to be when leaves and other debris start to collect in them, eventually leading to you having clogged gutters that will need to be cleaned in order to work properly again.  In fact, some of the problems that can potentially occur if you have clogged gutters are going to include flooded basements, mildew and mold buildup, and even yard erosion.  On top of that, having clogged gutters can also lead to pools of water, eventually meaning that you will start to have the perfect breeding area for mosquitoes and other insects.

Gutter Guards Make Gutter Maintenance Much Easier

When you have regular gutters, they are going to require that you either clean them or pay somebody to clean them about two times every single year, those times being in the fall and the spring.  While that not sound that bad, it can actually be very time consuming and very expensive to have done.  When you install gutter guards, you are not going to need to clean the gutters out as much, and they will be much easier to clean as well because you will have a limited amount of debris that has been built up.  

As if that weren’t enough, the less time you have to spend cleaning out your gutters, the smaller the safety risk associated with cleaning gutters is going to be, as you will not have to worry about working while on the top of a ladder.

Gutter Guards Help to Prevent Any Kind of Rusting

If you have debris that becomes wet in your gutter system and is allowed to sit there, it will very quickly become a rust-prone gutter system.  Essentially, if you allow this to happen, you are essentially going to allow your gutters to start rusting prematurely.  Since installing gutter guards is going to greatly reduce the amount of debris that is allowed to get into your gutters, it is also going to help prevent any type of premature rusting from occurring.

Investing in Mission Viejo Pool Services for Pool Maintenance

A lot of homeowners assume that by skimping on pool maintenance services, they can save money. This article will discuss on why doing such would actually cost homeowners to generally pay more money in the long run.

With over 10 million residential or private pools in the U.S., one can just imagine the great demand for pool maintenance services. California, being such a sunny state neighborhood to many of the country’s richest people, is particularly in high demand and always looking for Mission Viejo pool services.

It can be really expensive to hire services for swimming pool maintenance. For this reason, when caring for their swimming pools, many homeowners prefer to go the DIY path. They claim that they can save a lot of money in doing so. Although it may be true that homeowners can save money by doing it themselves, it can be tough to deal with pool maintenance. The reality of the matter is that, in the longer run, they are putting themselves in a position for a much greater expense.

Reasons Why Mission Viejo Pool Services are Important

Professional pool services are being provided by professionals who have the experience and skills for pool maintenance to ensure that they do their jobs really well. Homeowners who opt to do it themselves with pool maintenance usually only rely on the internet to guide them through the task. Even though this might be enough for some competent homeowners to get the job done, it might inadvertently open doors to more troubles.

Professional Pool Maintenance: Identifying and Avoiding Bigger Issues 

You can avert any serious problems in the future when your pools are professionally maintained by experts. That is because those professional skilled workers know what to look for. They can easily detect possible problem-starters and immediately apply the modifications needed to prevent them. Even just the slightest inconsistencies that are tell-tale indicators of a potential pool problem can be identified by a professional, and a regular person can easily disregard them.

The detection and prevention of pool issues as soon as possible not only protects one’s pool and pool equipment from destruction and damage, it also saves a lot of money for homeowners. Constructing a pool and installing systems will cost homeowners hundreds, or maybe even thousands, of dollars easily. It is really a huge waste of money to have to replace expensive equipment or even entire pool systems due to simple completely avoidable or preventable problems.

Mission Viejo Pool Services being offered: 

Homeowners who opt to go the DIY route of their own pools can only do so much. They can clean up their pools, clean pool filters, and perhaps repair and modify the heaters for the pool.

More than just basic cleaning and repair facilities, skilled Mission Viejo pool services may offer:

Basic Services

  1. Weekly pool maintenance. 

Even the most basic pool cleaning services provided by businesses providing professional pool maintenance are more extensive than any homeowner can do. The following services are provided on a weekly pool maintenance run:

  • Vacuuming of the pool floor.
  • Removing any algae and calcium deposits by brushing the pool’s walls and tiles.
  • Cleaning and inspecting of pool equipment.
  • Chemical adjustment to make sure that PH and chlorine levels are optimum. 
  1. Pool filter cleaning.

A pool filter works at the very same way a person’s liver works. A pool filter which is clean guarantees that you will be swimming in clean water. Pool repair professionals do the following during a scheduled filter cleanup:

  • They take the pool filters apart – each grid being carefully removed for a thorough check.
  • The grids are examined for any rips or tears. They can be fixed or entirely replaced, depending on the extent of the tear.
  • Then, the grids are thoroughly cleaned and rearranged inside the filter.

Standard filter cleaning generally ends with that but some companies include extra precautions to protect the filter and ensure sustainability such as coating the grids with diatomite.

  1. Upgrade fixtures and equipment repair.

Maintaining a swimming pool requires for numerous equipment to be installed. Such machines regulate the temperature of the pool, its water levels, the chemical levels, and many more. Such devices are vulnerable to damage due to misuse or even the daily wear-and-tear. Whether it is the entire device or just a part of the machine such as the motors, pumps, and filters, professionals will easily get them fully up and running.

Often included under this basic service is pool lighting which requires repair and replacement. Pool services companies will usually replace the lighting fixtures and the wires linking it to one’s electrical unit. They then make sure that these fixtures are securely sealed to avoid exposure to water.

Some companies also provide enhancements to old pool equipment for the purposes of modernization and/or aesthetic appeal. Such improvements may include adding LED lighting, installing controls, integrating automation systems and integrating saltwater conversion devices.

Advanced Services

There are also other pool maintenance companies who are able to provide state-of-the-art Mission Viejo pool services to homeowners who just want to go the extra mile and upgrade their pools.

  1. Installation of a saltwater conversion system.

The presence of chlorine in pools can unwantedly cause stinging in one’s eyes and nose when swimming. Anyone with sensitive skin may also incur severe allergic reactions to this chemical.

Homeowners who are allergic to chlorine may prefer to change their existing chlorinated pools into a saltwater pool. Pool maintenance companies may mount generators, pumps, and a saltwater controller – a complete saltwater system convertor system to lower chlorine levels and provide a more fun pool experience for homeowners.

  1. Acid washes

Homeowners who prefer to be even more stringent in disinfecting their pools can have pool maintenance companies to do acid washing for their pool. 

This tedious process, unlike typical pool cleaning, is very rigorous to make sure that one’s pool surface will look good as new.

It is evident, with all the services a professional pool maintenance company can provide, that it would be better to hire them than DIY maintenance approaches. 

How to Make an Apartment Work as a Family Home

For many people, the city is the most practical place to be for easy access to work and public transport links. However, in locations of this kind, families may struggle to acquire a property that is considered “suitable” for raising children. 

Houses with gardens are hard to come by in built up areas – and can be extravagantly expensive if you wish to live just outside the urban sprawl in a “good” neighbourhood. Apartments are often the most readily available, practical and affordable housing option in cities.

So what is the solution? Well, there’s no rule that says you can’t raise a family in a modest-sized apartment. With good organisation and inventive design, you can provide your kids with just as stimulating and healthy a life in an apartment as you could in a traditional house.

In this article, Property Solvers (a UK-based ‘We Buy Any House’ company) explain the ways in which you can make a flat or apartment work as a family home.

Storage

Clutter is the bane of every parent’s life. However, with limited living space in the typical apartment, it can be difficult to avoid.

Intelligent storage solutions can make a huge difference here. You can double up hollow seating as toy storage and use open shelving as a floor-to-ceiling wall feature as well as a practical place to put trinkets.

Choose furniture wisely. Cabin beds and divan beds provide fantastic storage options that make use of space that would otherwise be rendered “dead” due to its location. Figure out ways to make use of the corners of each room too.

Above all, try to avoid keeping hold of too much junk wherever you can!

Flexibility

One room can have multiple uses. Investing in fold-away tables and beds will allow you to clear space for playtime, exercise and creative activities.

However, remember never to sacrifice comfort for practicality. Keeping your family in a good mood is vital to the success of any living space.

Why not include some fun and quirky features like floor decals that encourage physical games such as hopscotch, human chequers or snakes and ladders to entertain kids even on rainy days?

Of course, you should be sure to place these well away from high traffic areas such as the kitchen in order to avoid accidents!

Easy cleaning

Making a mess is just part and parcel of childhood. It’s important to teach our kids to tidy up and take care of their belongings, but don’t let apartment life discourage you from creativity in the form of fingerpainting, clay modelling, slime making and any other elements of mucky mischief.

Wipe-clean surfaces, including vinyl flooring and tablecloths in materials like PVC, will help you to fight stains and quickly resolve any spills.

Restricting messy activities to a certain area of the house may also mean you can limit the overall amount of extra cleaning you’ll need to do – and might reduce the amount of play-dough you’ll find in unexpected locations!

Indulge the artistic leanings of your children by building creative opportunities into your home. A chalkboard wall can be easily wiped ready for the next creation, and magnetic surfaces will enable you to display their paintings as part of your home decor without getting in the way.

Outdoor time

It’s very healthy for kids to engage with nature and learn a little more about the world around them. For this reason, it’s a great idea to seek out an apartment with some outdoor space such as a balcony or yard. 

You can even create your own little garden by adding plants in pots and tubs or even hanging them from walls. Why not encourage your kids to help take care of them?

If it isn’t possible to find an apartment with outdoor space, try to find a property near a park or playground. Exercise and sunshine will improve your childrens’ health no end and encourage them to be curious about the world.

Safety

While you may think it’s easier to keep an eye on your little ones in a single storey apartment than it is in a house, you’d be surprised at how capable kids are of getting themselves into scrapes!

As with any family property, child-proofing is vital. It’s important to secure everything from blind-strings to kitchen utensils well out of reach and, if possible, out of view in order to avoid temptation.

You should also think about ways to hide electronics, cables and other items that may be dangerous to young children.

If you have a balcony, it must be totally secure at all times. You might want to consider window-restrictors too.

Relaxation

Make sure you focus on yourself as well as the kids. Adults also need the opportunity to have a little fun and to relax. Ensure that your bedroom is a safe haven that stays quiet, clean and tidy at all times. 

Think about adding your own options for entertainment, like a sound system, TV or games console.

Comfort, flexibility and fun should be prioritised in any family home – whether it’s a house or an apartment – and parents or carers should always seek out new opportunities to make life easy for themselves and stimulating for their youngsters.

Tips To Find Best Small Circular Saw

Small circular saws are easy to use. Beginners who are learning woodworking can get started using a circular saw. You can build many useful furniture or repair it inside the home using this saw. You can get creative with woodworking and use it for a variety of projects. They come with good speed and accuracy. They are compact to handle and let you get the job done with speed and perfection. You can cut wood as well as various materials using a small circular saw. The variety of materials you can cut depends on the type of blade and depth of the saw.

Types of Circular Saw

The worm drive is the most common and widely used circular saw. It has a narrow design that makes it easy to use at different angles. Hypnoid are more popular now because they are low maintenance and come with a self-oiling system. 

It also comes with a gear system not found in other types of saws that takes less power to start and perform various cutting jobs. A sidewinder is the lightest saw in the circular saw variety. They operate at a higher speed compared to the other two saws and are less expensive. 

Tips To Find Best Small Circular Saw

1. Size

The size of the circular saw matters as it makes it convenient to use it for hard to reach places. Size is one of the essential factors to consider as it decides the performance and the type of jobs you can perform with this saw. 

For heavy-duty woodworking or cutting through a variety of materials buy a large saw. A small circular saw is versatile and is useful for small and lightweight jobs. You must know the nature of the task you will be performing frequently before you decide the size of the saw.

2. Depth Adjustment

It is essential to look at the markings for the cutting depth. It lets you know the kind of material you can cut and the level of depth you can cut it. 

You must also look into the types of blades that fit the saw to perform the job with accuracy and speed. There will be fewer accidents or injuries when you use this saw to cut any material at depth. 

3. Bevel Angle

It lets you cut the wood at different angles and positions with ease. It is easy to mark the angles at which you want to cut and have less or no chance of having parallax errors. You will be able to create many DIY items with ease and accuracy. 

You can enjoy making furniture or renovating it at home with a circular saw that has this feature. The more number of angles it can adjust to, the better cutting jobs you can have. This setting lets you perform a job with high precision.

4. Markers And Laser Guides

The measures and scales must have visible and clear markings. It can let you use it for intricate jobs and cuts. The markings must be able to line up with the kerf exactly so you can make accurate cuts. When cutting using these markings there must be no obstructions and everything must be visible to the eyes. 

Check the maximum angle and depth you can adjust the saw checking the markings on the blade. The markings are indicators that let you know the maximum angle and the depth you can reach when cutting material. 

You can also look for LEDs and laser guides so you know you can also work at night or where there is a lesser intensity of light. They let you make long cuts and work with consistency for a lengthier time when you choose to cut different materials with this tool. 

5. Triggers And Kickbacks

The circular saws are dangerous tools though they do a versatile job. You must follow safety guidelines to start the cutting job. Buy a small that has an easy start button and has lesser kickbacks. 

It becomes easy to switch the saw to different adjustments when you buy a saw that has these safety features. You can easily make adjustments without experiencing kickbacks if the saw has a locking mechanism. 

6. Corded Or Cordless Saws

This is an individual choice depending on the frequency of use. According to woodworknation, cordless circular saws are handy and very easy to use for renovations and repairs around the house. A cordless saw isn’t ideal for woodworking and construction projects.

Corded saws are perfect for anyone who wants to work for an extended period with continuous power supply. But, cordless saws are ideal for beginners since it can handle small jobs around the house comfortably.

7. Various Metrics To Look At

Horsepower is the torque used to start the saw. You can look for this metric and buy one with good horsepower to reduce kickbacks. Amps is a metric that lets you know the amount of power the motor draws. The standard diameter of the blade is 7.25 inches. You can also find lesser and higher measurements in blades. 

8. Weight

Check the weight of the tool instead of the shipping weight so you know which is handy for home or professional use. You can choose the weight based on the physical strength you can use to handle the weight. You must be able to lift the tool and use it at different angles with ease.

9. Blade Guard

This is essential as it provides safety and prevents injuries when cutting wood or any material. When you are retracing the action you must take extra precaution to prevent being cut. 

It is good to buy a saw that comes with a blade guard. The blade guard must be smooth and must not get stuck inside the material in the process of cutting it.

10. Ergonomic Design

It must be easy to handle and convenient to use. The handle it comes with must fit your hand. You must feel comfortable using it. A handle that comes in a good shape and is made with good material creates a good balance and lets you work for a long time without feeling fatigued or inconvenient. 

Conclusion

These are the tips and features to look for when buying a small circular saw. It makes woodworking a joy when you find the right saw that suits your budget and the tasks you wish to perform. With these tips, you can choose the perfect saw that gives you accurate and precise cuts on various materials. 

Tips To Find Best Sushi Rice Cooker

Enjoy a bowl of freshly cooked sushi rice or cooking various rice varieties choosing from a multi-functional sushi rice cooker. You can pick one with a fuzzy logic and dimensions that suit the capacity you want to cook. Sushi dishes are world famous and can be cooked easily at home when you buy a rice cooker with these features.

Tips To Find Best Sushi Rice Cooker

A sushi rice cooker comes with many features letting you cook many other rice dishes. Multiprogramming, automated, and safety features.

1. Capacity

Everybody has different needs. Choose the capacity based on the frequency of use. If you cook sushi rice occasionally, choose a cooker with smaller capacity. 

Socializing, throwing parties, entertaining people often? Choose a cooker with large capacity. Also consider the space inside your kitchen when choosing capacity. Sushi rice cookers come in all sizes.

2. Multiprogramming And Controls

Choosing a rice cooker with multiprogramming options and controls makes cooking faster and convenient. The digital controls and menus let you cook a variety of dishes with ease. 

It saves cooking time preventing overcooking and burning of food. You have to spend less time monitoring as the recipes are cooked to perfection using this feature.

3. Fuzzy Logic

Rice cookers with this feature smartly adjust temperatures. They make decisions like humans and cook every dish faster and to perfection. You will have more confidence cooking recipes with this feature. You get best results with a cooker that has fuzzy logic.

4. Temperature

Choose a rice cooker that comes with better temperature controls. It is safe to buy a cooker that remains cool on the outside. This is an essential feature as it prevents accidental burns and injuries. It is also safe for families with children as they will not get bruised if they touch the exterior.

5. Lid And Locking System

The lid must come with a locking mechanism so you can cook hassle free. The lid must fit the cooker because without a proper lid, cooking rice recipes would be inconvenient. Detachable lids and the ones with a good locking mechanism prevent overflows and mess.

6. Cooking Methods

A few brands come with cooking methods that let you choose single, double, or triple heating. You can saute, steam, simmer, and choose various cooking mechanisms if you choose a versatile rice cooker.

7. Easy To Clean

Buy a rice cooker that comes with non-stick inner coating as it is easy to clean and maintain. They can be used for many years as cleaning and maintenance is easy. A few brands come with automatic, self-cleaning options that makes cleaning easy and hassle-free.

8. Delay Timer

This makes cooking and preparation easy. It comes with different metrics and you can choose one with a larger delay timer if you cook large quantities or dishes that need preparation. A few brands also come with delay timers for 15 hours, suitable for those who want to slow cook traditional dishes.

9. Affordability

There are umpteen brands available in the market that come with multiple features for a lesser price. Many budget options are available in compact size that can fit any space. 

10. Special Features

You can choose a rice cooker with sushi settings, wi-fi, Bluetooth and voice controls. Language options, more than 10 cooking settings, automated features, water system to collect excess water and many more features are available in various brands of sushi rice cooker.

Customization is another feature that lets you cook a variety of sushi dishes. You can enjoy preparing various sushi recipes and enjoy the flavours and aromas of cooking these dishes.

11. Heat Settings

This is an essential feature to look into so you get fluffy sushi rice that does not have too much water or is undercooked. A rice cooker with multiple settings and adjustments is good to buy. It retains all the flavours of various sushi and rice dishes.

12. Types Of Rice

A few models support all types of rice. Sushi rice recipes with vegetables or seafood are best cooked with Japanese rice. You can make a variety of rice dishes with different types of rice that has sushi settings. 

13. Accessories

They come with spatulas, bowls, baskets. It makes cooking even more enjoyable. It becomes easy to cook any dish when a rice cooker comes with accessories.

14. Inner Pan Or Basket

This is an essential feature to look into as it makes cooking and cleaning convenient. Choose one that has a non-stick pan as it makes daily cooking and cleaning easy.

15. Touchscreen And LCD

It displays the menu and settings chosen. It also displays the timer making it easy for you to monitor cooking sushi. The touchscreen makes choosing settings easy.

16. Commercial Grade

These types of rice cookers have a capacity as large as 90 cups. You can buy it for home use if you want to prepare large meals.

17. Durability

Electric sushi rice cookers come with many automatic features and settings. Rice cookers made with turbo technology and various smart technologies are durable as they make cooking convenient and easy to maintain. A few brands come with a warranty of many years.

18. Weight 

Most of the cookers come in compact size and are lightweight. You can look at the weight and dimensions before buying one. 

19. Detachable Options

Detachable bowls, lids, steam wands make it easy to use this appliance. A few brands come with detachable options that you can look for when buying a rice cooker. A retractable cord makes storage easy.

20. Storage

Rice cookers with large capacity are bulky and take up space on the counter top. Compact size cookers with medium capacity fit kitchen space of all sizes.

21. Cookbooks And Manuals

Check if the rice cooker comes with a manual so it is easy to follow the instructions if you are using it for the first time. You will know to use it the right way as makes correct use of it. 

22. Design

They come in sleek and sophisticated designs. A few come with graphic prints on the exterior. Color options are also available with a few brands. If you are looking for aesthetics along with functionality, you can also look at various design options. 

Conclusion

You can look into these tips when it comes to buying a sushi rice cooker. It makes cooking various sushi recipes easy with programmable options. Cleaning and maintenance is also easy when you choose the non-stick variety. 


How to Dye Concrete Floors and Slabs?

All concrete floors will accept the dye to varying degrees depending on the color and condition in which it is at the time of application of the dye. Traditionally, the best concrete stain has been limited to subtle earth tones and soft greenish blues. The newest concrete staining Orange County water-based concrete dyes and tinctures have expanded the color palette to include almost any imaginable color.

Surface Preparation

Whether you are working on new or old concrete floors, the iron must be completely clean before dying. To dye new concrete slabs, spray water in different places to make sure the iron absorbs it. If it does not, it is likely that the agents that cure it are blocking the entrance.

Older concrete slab floors with stains should be chemically cleaned and any contaminants on the surface. Such as paint drops, sealing paste, etc., should be removed. Generally, this can be achieved by scraping, applying solvents or removal agents, sanding or grinding, depending on how dirty the iron is and the types of stains that are present.

If grinding is necessary, use a diamond pad or a diamond grinding head or black abrasive. Grind lightly and with circular movements of small diameters to avoid leaving marks after grinding. Concrete is like a blank canvas perfect for stamping a color. Because it is porous and has a neutral hue, acid-based chemical dyes.

Apply concrete stains

Manufacturers differ in the timing of the application of the dye. Some say that with the new concrete slabs, it should be expected for at least 28 days before application, while others suggest waiting 14 days. Many contractors prefer to start the application as soon as possible after placing the concrete.

Generally, the colors are more intense if the dye is applied as soon as the concrete is placed, and the diluted dyes that are applied immediately often achieve the same results as the dyes that are not diluted and applied later. Also, remember that water starts the chemical reaction of the dye. For better consistency, make sure that the moisture content of the concrete is almost the same in each area where you are going to place it.

Stain concrete using pattern lines

Many designs incorporate decorative cuts and sanded patterns to improve their appearance. Many contractors use emery or hand saws with planks that run along the perimeter of the guides to cut the lines of the concrete patterns. Use dry cut diamond blades that minimize damage to the edges of the cuts.

When cutting before dyeing concrete slabs, cut just before cleaning the final surface so that you can remove all the dust from the concrete, as it contains lime and can distort the color. When you have to make the cuts after inking, do it after applying the first coat of the sealant.

If there is a color change in one of the lines of the pattern, cut the line first to form a barrier that prevents the second dye color from migrating to the first. If you are going to apply the grout to the cut joints, finish inking and sealing before applying the grout to prevent grout accumulations on the unprotected dye.

Seal very well

You can use different types of surfaces and penetrating sealers, depending on the application in question. For outdoor applications, acrylic sealants. It used to allow moisture to escape from the concrete slab. For outdoor applications, solvent-based acrylics are generally better than water-based ones. The use of silicone sealants is recommended if a shiny or “wet” appearance is not desired.

The options for interior plates consist mainly of acrylics, urethane and epoxy. Acrylics are stable with UV rays, economic and easy to apply and reapply. However, they have a softer surface and are the ones that require more maintenance. Solvent-based acrylics are softer than water-based ones and offer a “wet” appearance that makes many colors look more attractive.

Epoxy sealers are much harder than acrylics. Water-based epoxy binds very well to concrete and offers a clear finish, but does not allow moisture to escape. They are not resistant to UV rays and reapplication is more difficult than that of acrylics. Epoxies are generally more suitable for countertops and food preparation areas.

Finally,

Once the job completed, maintain it easily. Clean the stained concrete the same way you would clean the unstained concrete. To keep exterior concrete surfaces protected, apply a new layer of sealant every one or two years.

How to Install Bathroom Exhaust Fans

Is your bathroom not getting dry as much as you want? Is the air bathroom air filled with moisture and deteriorating the bathroom paint and fabrics? Well, in such cases the best thing to do is attach a bathroom fan. A bathroom exhaust fan will help to keep the moisture at bay and will also expel the excess moisture and foul odour transforming your bathroom completely. 

A common misunderstanding among people is that if there’s ventilation in the bathroom, then there’s no requirement for an exhaust fan. But that’s not true. Ventilation blows the bathroom air around the house. But exhaust, on the other hand, helps to throw the bathroom air outside. This is important for creating fresh air pressure inside the house so that clean and fresh air from outside can come in. 

Therefore, how to install bathroom exhaust fans? Installing a bathroom exhaust fan is one of the easiest home improvement projects that you can undertake in your free time. The majority of work involves you standing on a tall stool or ladder and keeping yourself from falling over! Other than that, the rest is all easy-peasy. 

Things to remember before you begin

  1. Be careful about live electrical wirings.
  2. Make sure that the electricity to that particular spot is cut off before you start meddling with the wires.
  3. Wear a respiratory mask and gloves for extra protection. 
  4. Make sure that the bathroom exhaust fan you are about to install is vented out of the house and not to the attic. 

Steps on how to install bathroom exhaust fans

1.Locate a power source

The first step to a new electrical attachment is to locate a power source. Depending on the electrical line, you might be able to share the same circuit as the ceiling light. If the building code of your area requires you to dedicate a new circuit to the bathroom fan, then you can just run a new cable from the panel source to the ceiling area. 

2.Decide on the air exit point

Air that will be exhausted by the fan should find a way to reach the outdoors. So depending on your bathrooms design and location, you might need to run a duct from the exhaust fan to the roof or the sidewall. Once you have identified the point, attach your round vent and vent caps on the roof or the sidewall.

3.Make an opening for the fan on your ceiling

To fit the fan to your ceiling, you will need to cut out a part of it using a jab saw. Carefully mark the points of screwing for the fan and remove part of the ceiling. 

4.Attaching the fan to the joist

The next step would be to attach the bathroom exhaust fan to the hole that you have a cut-out on the ceiling. You might need an assistant here to help with holding the fan while you fix it to the ceiling with screws. Screw the fan securely to the joist. Sometimes, exhaust fans also come with suspension brackets. These come in handy if you are unable to find an attachment point on the joist. 

5.Rouring the air towards the exterior

Once the fan is attached to the ceiling, check if the fitting is such that the air will be able to flow outwards. Under no circumstance should the air be let to collect in an inside location like the attic. This might rot your attic or other interior walls. 

If the air is not flowing outside, then re-adjust the vent duct as per your requirement. 

6.Attach the fan grill

Bathroom exhaust fans often come with a grill. So once you are done installing the fan, you can go ahead and turn on the circuit. Check if the air is flowing correctly into the concerned vent. If yes, then secure the grill around it. This is a safety feature and should not be avoided. 

And it’s done! It’s not that hard, is it? Ensure that you keep checking the vent caps from time-to-time. Make sure they are not jammed by anything. Otherwise, the exhaust fan may not work properly. In case you ever need to replace the fan, make sure that you get a similar-sized fan so that you do not need to repeat the steps of cutting out your ceiling or attaching a new vent pipe to fit the size of the new fan. 


Recent Posts

Posts You Might Like