Renovating your home can be exciting and can give a fresh look to your living space. However, once the renovation work is completed, the next task is to clean up the mess left behind. Post-renovation cleanup is a challenging task that requires time, effort, and patience.
This article will provide you with a full guide on how to deep clean your home after renovations. We will cover everything from preparing your home for the cleanup to tackling specific areas that require extra attention.
Deep Cleaning Guide After Home Renovation
Step #1: Prepare for the Cleanup
Before you start the cleanup process, it’s important to prepare your home. Remove any furniture or items that may obstruct your cleaning path. Cover floors and surfaces with drop cloths or plastic sheets to protect them from dust and debris.
Step #2: Start with the Dusting
Dusting is the first step in the cleaning process. Begin by dusting the ceilings, walls, and corners utilizing a soft-bristled brush or a vacuum cleaner with a soft brush attachment. Pay extra attention to the areas around light fixtures, as they tend to accumulate a lot of dust.
Step #3: Clean the Windows and Glass Surfaces
Next, clean the windows and glass surfaces using a glass cleaner and a microfiber cloth. Be sure to clean the windows and glass surfaces thoroughly, as they tend to attract a lot of dust and grime.
Step #4: Clean the Floors
After dusting and cleaning the windows, it’s time to tackle the floors. Start cleaning the floors by sweeping or vacuuming them to get rid of any loose debris. Next, mop the floors with a mild cleaner, and pay extra attention to areas that have been exposed to construction materials.
Step #5: Clean the Kitchen and Bathrooms
The kitchen and bathrooms are the areas that require extra attention during the post-renovation cleanup. In the kitchen, clean the countertops, cabinets, and appliances thoroughly. In the bathroom, clean the shower, tub, sink, and toilet using a bathroom cleaner and a scrub brush.
Step #6: Clean the Air Vents and Filters
During renovations, dust and debris tend to accumulate in the air vents and filters. Clean all the air vents and replace the filters to make sure that the air in your home is clean and fresh.
Step #7: Hire a Professional Cleaning Service
If the post-renovation cleanup seems overwhelming or you don’t have the time or energy to handle the task, consider hiring a professional cleaning service. Hiring a professional cleaning service in Toronto or Ottawa can relieve you from the task and ensure a thorough and efficient deep cleaning of your home. They have the experience, skills, and equipment needed to tackle tough post-renovation messes, from removing stubborn dust and debris to disinfecting surfaces. By hiring a reputable cleaning service, you can guarantee that your property is in good hands and enjoy your newly renovated living space.
Professional Cleaning Service for Post-Renovation Cleanup
Deep cleaning your home after renovations is crucial to maintaining a healthy as well as hygienic living space. While it may seem daunting, following these steps can make the process easier and more manageable. If you find the cleaning task overwhelming, consider hiring a professional cleaning service in Toronto or a cleaning service in Ottawa to handle the job for you. With their expertise and equipment, they can ensure that your home is thoroughly cleaned and ready to be enjoyed.
Summer is an ideal time for home improvement projects, whether you do it yourself or hire a professional. It’s the season to enjoy time with friends and family in and around the house. In this article, we will discuss some ideas for easy home upgrades that are perfect to do during the summer season. These practical home improvement projects will help you refresh the look and feel of your house and some will even help with energy savings and efficiency!
Along with the upgrades, your summer projects should include essential home maintenance. So, while you plan your projects to do over the summer, don’t forget to allocate some time and budget for the more functional parts of your home. For example, fixing that drain valve or draining your water heater tank. By taking care of your home in the summer, when it’s warm and beautiful out, your home HVAC systems will be ready to keep you warm and cozy when it’s winter.
Here are some great home improvement ideas to add to your list as you plan your summer home projects!
Start with a Fresh Coat of Paint
When you’re coming up with your list of home improvement projects for the summer, consider a fresh coat of paint!
One of the best ways to refresh your home is to change the colors. Paint your living room with a palette of complementary and contrasting shades to make it more lively and vibrant. Create a soft, comfy feel for the bedroom with pastels and textures. Change up the bathrooms and kitchen to make them more exciting and eye-catching. When you add painting to your list of summer home projects, the possibilities are limitless.
Add to that some artistic motifs, simple murals, or ready-made vinyl stickers, and it will soon feel like you’re in a brand-new house. These upgrades can extend outside as well, with a fresh coat of paint on your front door. Changing the colors of your home is just one thing on our list of easy home upgrades and projects to do over the summer.
Kitchen Upgrades
Have you been considering getting a kitchen island? What about open shelving or installing a butcher block? There are a wide variety of summer home projects, modifications, and additions that you can make to your kitchen. For a quick kitchen upgrade that can make a big difference, you could consider new kitchen sink fixtures or hardware for your cabinets. For a more practical home improvement, consider installing a new energy-efficient dishwasher or refrigerator.
Depending on the size of the space and your budget, you have your pick from functional to aesthetic house upgrades that will improve your daily cooking and dining experience.
Also, pay attention to the floor area. Take advantage of the floor to give color to the kitchen. You can make it alive in summer by using a kitchen rug or carpet with beautiful bright colors. Choose fabrics with simple motifs so that they are more balanced and harmonious in appearance. Here you can rely on ikat fabric. They have a lot of fabrics with various colors and beautiful motifs.
Bathroom & Plumbing Upgrades
Summer is a time to entertain guests, and they will need to use your facilities once in a while. So if you have been planning to upgrade your toilet or install a new one, summer is the right time for it. Modern plumbing solutions also offer water savings and efficiency. By installing a low-flow shower head or bathroom faucet, you’ll lower your water bills and help the environment.
Your summer home improvement projects can extend to the backyard as well by installing a refreshing outdoor shower or a beautiful new water feature.
Smart Home Devices
One of the most popular and practical home improvement projects is to turn your property into a smart home. This easy upgrade to your home allows you to control the lighting, heating, cooling, security, and much more at the touch of a button from anywhere in the world.
With new technology covering everything from smart TVs to smart ovens and thermostats, there are endless smart ways to give your house an upgrade. These devices can now be controlled and programmed through your smartphone, opening an exciting new world of possibilities. Installing smart home devices is one more easy home upgrade to do during the summer.
HVAC Upgrades
Do you feel like your summers are too humid and sticky? Maybe it is time to get a whole-house dehumidifier. These HVAC systems are a lifesaver during the hot summer months. As you’re coming up with home improvement ideas, keep in mind that summer is an excellent time to look at your heating and cooling system and schedule an inspection, plan an overhaul, or upgrade. Get in touch with a professional heating and cooling contractor to learn more about the best HVAC home improvement projects.
Also, there are simple things you can do on your own. Clean air filters and ductwork, and take a walk around the house to make sure outdoor vents are cleared of brush and leaves.
Between your own summer projects, and a tune-up by a licensed HVAC contractor, you’ll be well on your way to your perfect summer indoor experience.
Plant a Garden
Summer is the perfect time to plant a garden and watch it grow. There’s something very therapeutic about plants that instantly calms you down. Add a nook or a patch for mother nature to work her magic for you and your family. As far as easy home upgrades go, this is one of the easiest and most rewarding.
If you are an avid gardener and are ready for a more ambitious outdoor home improvement project, you could look into irrigation or sprinkler systems to keep your flowers and plants happy all season long.
Washing and Cleaning
Summer is also the best time for washing and cleaning. Indoors and outdoors, getting rid of the dirt and dust that has accumulated over the winter is an instant way to refresh your home. As you clean your house, other upgrades can easily be made, such as installing new blinds or rearranging your living room.
Pressure Washing
Also known as a power wash, for a satisfying summer project, use pressurized water to deep clean your house. Available for interior and exterior surfaces, this is one of the easiest and quickest ways to refresh your home and make it look new.
Pool Cleaning
Another commonly overlooked summer home project is pool cleaning. Most pool owners leave it to the last minute and struggle to get an appointment or pay high fees. Plan for a clean-up today and skip all the hassle. Summer is the time for fun and frolicking in the pool, so get ahead by getting a professional cleaning done to make the most of the warm summer days.
Conclusion
A little strategizing goes a long way in planning home improvement projects. Some of the simplest tasks such as cleaning and maintenance can often make a world of difference when done by a professional contractor. Larger house upgrades such as new appliances or HVAC systems will benefit your home for many years to come.
By choosing a few fun and practical home improvements and projects to do over the summer, you’ll be able to enjoy the sunshine in a cleaner, more efficient, and more beautiful home.
Brisbane’s financial sector is rapidly expanding, which means it is becoming increasingly important to choose a trustworthy and experienced broker to handle your investments. With so many different services available, it can be difficult to decide which brokerage firm is right for you. That’s why it helps to research each option carefully and compare the features they offer. Whether you are an experienced investor or just starting out in the world of finance, it is essential to ensure that the brokerage service you select can provide the support you need. In this blog post, we highlight some of the key benefits behind choosing a Brisbane broker for all your investment needs. From up-to-date market analysis and time-saving strategies to professional advice from highly qualified experts, there are numerous reasons why investing with a Brisbane broker could help you reach your long term financial goals faster and more effectively in 2023.
The world of finance is ever-evolving and the importance of having a reliable and experienced broker to help manage investments is essential in today’s world. Choosing an experienced and reputable brokerage service can give you the support and guidance that you need when it comes to managing your finances and ensuring long-term financial success. This blog post will highlight some of the key benefits behind choosing a Brisbane broker to manage your investments in 2023.
Benefits of Choosing a Brisbane Brokerage Service in 2023
A. Up-to-date Market Analysis
One of the main advantages of using a brokerage service based in Brisbane is access to up-to-date market analysis and data. With a wide range of industries and stock markets operating within Australia, it can be difficult for investors to stay on top of all developments without the help from an experienced professional. By working with a Brisbane broker, you can ensure that you always have access to the latest news and insights about the local markets so that you can make informed decisions about where to invest your money.
B. Time-Saving Strategies
Investing in the stock market can be a time consuming and complex process, so it is important to have strategies in place that will help you maximize your returns without taking up too much of your valuable time. Brisbane brokers offer services such as automated trading, portfolio management and portfolio direct debit options which allow you to quickly and easily manage your investments from one central location without needing to constantly monitor the market or make manual changes on an ongoing basis. This can save you both time and effort when managing your financial affairs in 2023. Simplify your mortgage search with a Brisbane broker.
C. Professional Advice from Highly Qualified Experts
When selecting a broker, it is important to ensure that they are fully qualified and experienced in the financial industry. Brisbane brokers have access to advanced market analysis and research, so they can provide professional advice when it comes to investment decisions. This can be invaluable in helping you reach your short and long term financial goals faster and more effectively than if you were to go it alone.
Conclusion
In conclusion, choosing a reputable brokerage service in Brisbane is an essential part of achieving success in 2023. With up-to-date market analysis, time-saving strategies and professional advice from highly qualified experts, a broker based in Brisbane can help you get the most out of your investments. By selecting a reliable and experienced broker for your financial needs, you can ensure that all your investments are managed professionally so that you can achieve your long term financial goals. Thank you for reading!
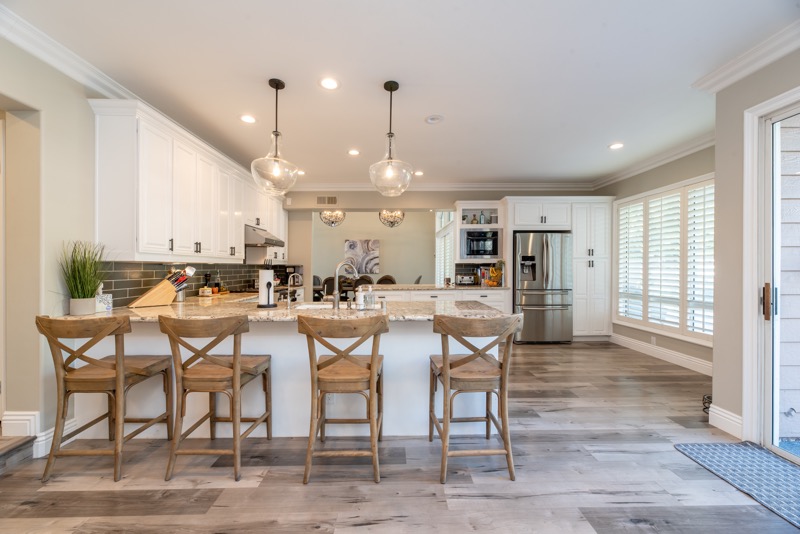
The kitchen is often considered the heart of the home, and it’s a space that we spend a lot of time in. Whether you’re preparing meals, entertaining guests, or spending time with family, the kitchen is a space that needs to be functional, stylish, and comfortable. A kitchen renovation is a great way to transform your space and create a kitchen that meets all of your needs. However, with so many options and details to consider, it can be overwhelming to know where to start. In this blog, we will explore the small details that can make a big impact when it comes to styling your new kitchen. From countertops and cabinetry to lighting and hardware, we will help you navigate the kitchen renovation process and create a space that you and your family will love for years to come.
Countertops:
Countertops are one of the most important aspects of any kitchen renovation. They provide a functional workspace for preparing meals and entertaining guests, but they can also impact the overall look and feel of your kitchen. There are many different types of countertops to choose from, including quartz, granite, and marble. Each material has its own unique look and feel, so it’s important to consider which one will best suit your specific needs and style.
Backsplash:
A backsplash is a great way to add a pop of colour or pattern to your kitchen. It can also help protect your walls from cooking splatters and spills. There are many different types of backsplash materials to choose from, including ceramic tiles, glass tiles, and natural stone. When selecting a backsplash, it’s important to consider the style of your kitchen and choose a material that will complement your countertops and cabinetry.
Cabinetry:
Cabinetry is an essential component of any kitchen renovation. It provides storage space for cookware, dishes, and other kitchen essentials, and it can also function as a major design element within the room. When selecting cabinetry, it’s important to consider both functionality and style. Choose cabinets that are durable, easy to clean, and offer ample storage space. There are many different types of cabinet styles and finishes to choose from, so it’s important to choose a style that complements the overall design of your kitchen.
Lighting:
Lighting is a crucial element of any kitchen renovation. It can help set the mood, highlight specific areas of your kitchen, and improve the overall functionality of the space. There are many different types of lighting to choose from, including pendant lights, track lighting, and recessed lighting. It’s important to consider both the style and function of your lighting fixtures and select ones that complement the overall design of your kitchen.
Hardware:
Hardware is another small detail that can greatly impact the overall look and feel of your kitchen. Cabinet handles, drawer pulls, and other hardware can add a touch of elegance or modernity to your kitchen, depending on the style you choose. When selecting hardware, it’s important to consider the cabinetry style in connection with your kitchen’s overall design.
Flooring:
Flooring is an important aspect of any kitchen renovation. It provides a functional surface for preparing meals and entertaining guests, but it can also function as a major design element. There are many different types of flooring to choose from, including hardwood, tile, and vinyl. When selecting flooring, it’s important to consider the material’s style and functionality. Choose a flooring material that is durable, easy to clean, and complements the overall design of your kitchen.
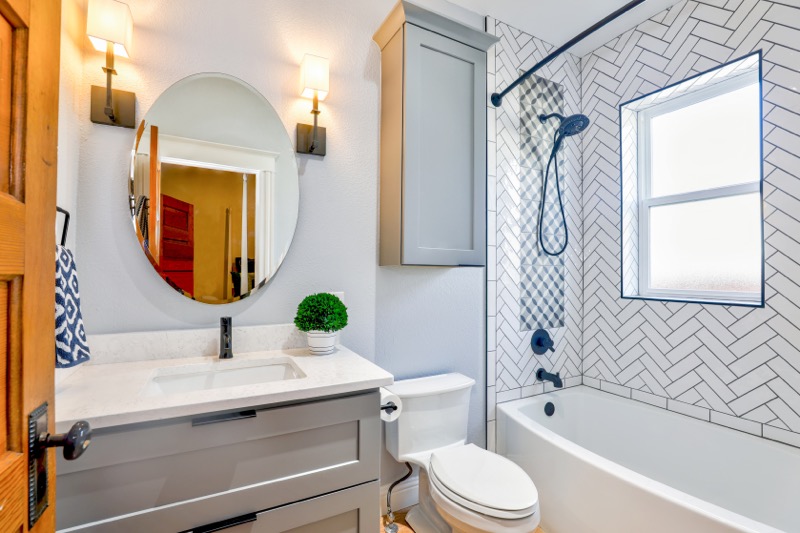
Window Treatments:
Window treatments are a small detail that can greatly impact the overall look and feel of your kitchen. They can provide privacy, control light, and add a touch of colour or pattern to your kitchen. There are many different types of window treatments to choose from, including curtains, blinds, and shades. When selecting window treatments, it’s important to consider both the style and function of the material. Choose window treatments that complement the overall design of your kitchen and provide the functionality you need.
Parting Thoughts
In summary, styling your new kitchen involves paying attention to small details that can make a big impact. From countertops and backsplashes to cabinetry and hardware, each element plays an important role. By selecting the right materials, hardware, and finishes, you can create a cohesive and functional kitchen design that complements your personal style and meets your practical needs. With the help of a professional contractor and a clear budget, you can transform your kitchen into a space that you and your family will love for years to come.
Wine storage is a vital element of wine preservation. Proper storage guarantees that the wine maintains its exquisite quality, flavor, and aroma. The wine rack is a fundamental aspect of wine storage, and choosing the right one for your collection can be an overwhelming task. In this article, we will delve into the significance of wine storage, explore the various wine rack styles available, and provide valuable advice on selecting the perfect wine rack for your collection.
Types of Wine Racks
Wine racks come in various types, each with its own unique features and benefits. Choosing the right type of wine rack is essential for ensuring that your wine collection is stored correctly and remains in optimal condition. By understanding the differences, you can select the one that best fits your needs and complements your home decor.
Metal Wine Racks
Metal wine racks, crafted from steel or wrought iron, are a popular choice due to their exceptional durability and sleek design. One popular type of metal wine rack is the cable floating system. This style of wine rack features aircraft cables that suspend the wine bottles, giving the appearance that they are floating in mid-air. They are perfect for modern or contemporary homes and can be installed on walls or even ceilings, creating a unique and stunning display for your wine collection.
Wall-Mounted Wine Racks
Wall-mounted wine racks are an excellent space-saving solution that can be installed in various locations, such as in a kitchen, dining room, or wine cellar. They are available in different materials, including wood, metal, and acrylic.
Floor Standing Wine Racks
Floor standing wine racks are a popular choice for wine collectors who have a larger collection and want to display it prominently. These wine racks are designed to stand on the floor and can hold a substantial number of bottles, ranging from 50 to 200 or more. Floor standing wine racks come in various materials, including wood, metal, and glass, and in different styles to suit different home decors. They are also available in various shapes, such as rectangular, circular, and hexagonal. With a floor standing wine rack, you can create a beautiful display of your wine collection while keeping your bottles easily accessible for consumption.
Modular Wine Racks
Modular wine racks are a versatile option for wine collectors who want a customizable storage solution. These mostly wood wine racks are designed with adjustable shelves and compartments that can be configured to fit different bottle sizes and shapes. They typically consist of individual modules that can be assembled and arranged in various configurations to suit your space and collection.
Custom Wine Racks
Custom wine racks are an excellent addition to any home or establishment that values both functionality and elegance. These racks are tailored to meet the specific needs, accommodating any size or shape of the wine bottles, while also enhancing the overall aesthetic appeal of the space. With their sleek and stylish designs, custom wine racks are perfect for showcasing a wine collection in a way that is both visually striking and convenient to access. Investing in a custom wine rack not only adds a touch of luxury to your space, but also ensures that your wine is stored properly, preserving its quality and flavor for years to come.
For those with larger collections or more specific storage requirements, custom wine cellars may be the ideal solution.
Wine Rack Styles
Wine racks come in various styles, and each style can add a touch of elegance to any wine collection. The traditional wooden wine racks are classic and versatile, fitting well in both modern and traditional home decor. Metal wine racks, on the other hand, offer a sleek and contemporary look, perfect for a modern-style home. For a more unique look, a wall-mounted wine rack can create a stunning focal point in any room.
Traditional Wine Racks
Traditional wine racks are a classic and elegant way to store your wine collection. These racks come in various sizes and styles, but their common feature is their timeless design. Made of high-quality wood, traditional wine racks can be freestanding or wall-mounted and can accommodate different bottle sizes. They provide a secure and stable environment for your wine bottles to age gracefully, while also showcasing your collection in a sophisticated way. With their understated beauty and functional design, traditional wine racks are a must-have for any wine enthusiast looking to add a touch of refinement to their home decor.
Contemporary Wine Racks
Contemporary wine racks are a beautiful and functional addition to any home or restaurant. The sleek and modern design of metal wine racks offers a touch of elegance that enhances the overall decor of the space. Floating cable wine racks are a popular choice for those seeking a minimalist look. The cables appear almost invisible, creating the illusion of the bottles floating in mid-air. The metal finish adds a touch of sophistication, making it the perfect option for those looking to showcase their wine collection in a stylish and contemporary way. Whether you are a wine enthusiast or simply looking to add a touch of elegance to your home or business, a contemporary metal wine rack is a great option.
Factors to Consider When Choosing a Wine Rack
When choosing a wine rack, there are several factors to consider to ensure that it meets your needs and preferences.
Bottle Capacity
Bottle capacity is a vital consideration as it determines how many bottles the wine rack can hold. Consider the size of your collection and your future storage needs.
Size and Space
Size and space are crucial because you need to ensure that the wine rack fits in the space you have available. Accurate measurement of the space where you plan to place the wine rack is necessary to ensure that you choose the right size. Consider the height, width, and depth of the wine rack to ensure that it fits in the space you have available.
Wine Rack Material
Material is a crucial factor, as it affects the durability and aesthetic appeal of the wine rack. Choose a material that is durable, aesthetically pleasing, and complements your home décor.
Style and Design
Style and design are essential considerations as they dictate the overall look of the wine rack. Choose a style and design that reflects your personal taste and enhances the beauty of your home.
Budget
Budget is an important factor to consider when selecting a wine rack. The cost of a wine rack depends on its material, size, and style. Setting a budget before beginning your wine rack project can help you make decisions about the design and materials that will best suit your needs and wallet.
Conclusion
The process of selecting the appropriate wine rack for your collection is a critical step towards maintaining the quality and longevity of your prized wines. With a wide range of wine rack styles and types available, choosing the ideal one may seem like a daunting task. However, by considering key factors such as size, material, style, and budget, you can make a well-informed decision that reflects your discerning taste and appreciation for the finer things in life.
Cleaning your house may be challenging, especially if you have pets and little children running about. However, it is crucial to maintain your house tidy and secure for your human and animal family members. By adhering to a few straightforward guidelines, you can keep your home clean and organized even while small children and four-legged friends are around.
1. Establish a cleaning schedule
By developing a cleaning regimen, you can stay organized and on top of your cleaning activities. Create a daily checklist for simple activities like wiping off countertops and washing the dishes, and set aside particular days for an extensive cleaning, such as vacuuming or mopping. You may prevent feeling overwhelmed and keep your home clean by dividing your cleaning duties into small chunks.
2. Engage your children
Including your children in the cleaning process may instill responsibility in them and promote the formation of positive habits. By playing music or giving out modest prizes, assign age-appropriate jobs like tidying up toys or dusting the floor and make it a joyful activity. Children are more likely to take ownership of their cleaning duties and contribute to keeping the house clean if they feel like they are a part of the process.
3. Train your pets
Pets can make a mess in your house, but with the right training, they can also contribute to keeping it tidy. For example, teach your dog to paw-wipe before entering the house, and put a microfiber mop at the door to swiftly clean up muddy tracks. To prevent your cat from scratching up your furniture, ensure it has a designated scratching post. You should also maintain your cat’s litter box clean to prevent unwanted odors.
4. Establish a special cleaning station
Maintaining organization and preventing clutter around the house may be easier with a designated cleaning station. So that you can quickly find them when you need them, keep all of your cleaning products, such as a microfiber mop, cleaning solution, and rags, in one location. It may be simpler to store your cleaning materials when you are through cleaning if they have a dedicated place.
5. Use eco-friendly cleaning supplies
Natural cleaning supplies may be safer for the environment and your family. Use natural substitutes like vinegar, baking soda, and essential oils instead of harsh chemicals. These goods can be more affordable in the long term in addition to being safer.
6. Clean up as you go
Maintaining control of problems before they balloon may be accomplished by cleaning as you go. For instance, if you drop anything on the floor, clean it immediately rather than wait. This also applies to routine duties like cleaning the shower after each use or scrubbing the dishes after every meal. You can stop the mess from worsening by caring for them when they arise.
Conclusion
Although it’s not always simple, keeping a clean home while having children and pets is doable. Make your entire family’s living environment clean and healthy with work and perseverance. You can maintain your house spotless and prevent feeling overwhelmed by implementing a few of these recommendations, such as developing a cleaning regimen, involving your children, and utilizing natural cleaning supplies.
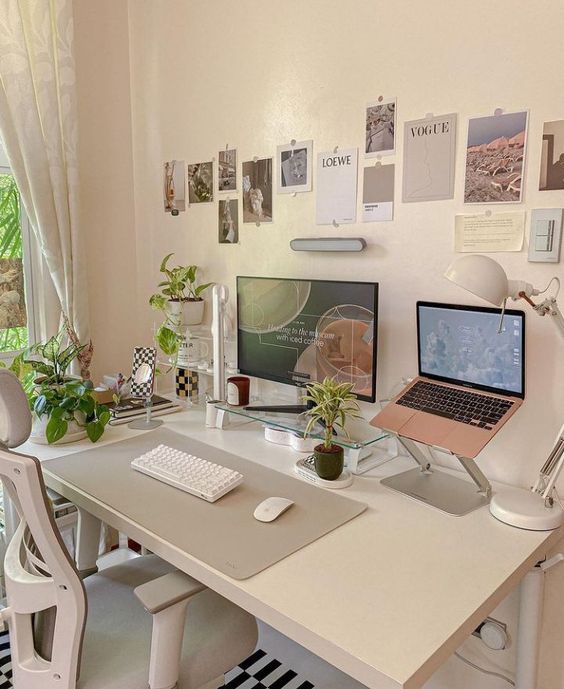
roohome.com– Workspace is an area where tidiness is an essential point that you should pay attention to. A neat workspace can make you feel more comfortable when working at home. And, it is not difficult to maintain workspace tidiness. Most importantly, you know the tips for organizing your workspace. Starting from organizing your books, setting up your laptop/PC layout, and so on. And, in this article, we have provided 18 Tips for Organizing Your Workspace for those of you who want to Create A Tidy Space for Work. So, let’s check it out!
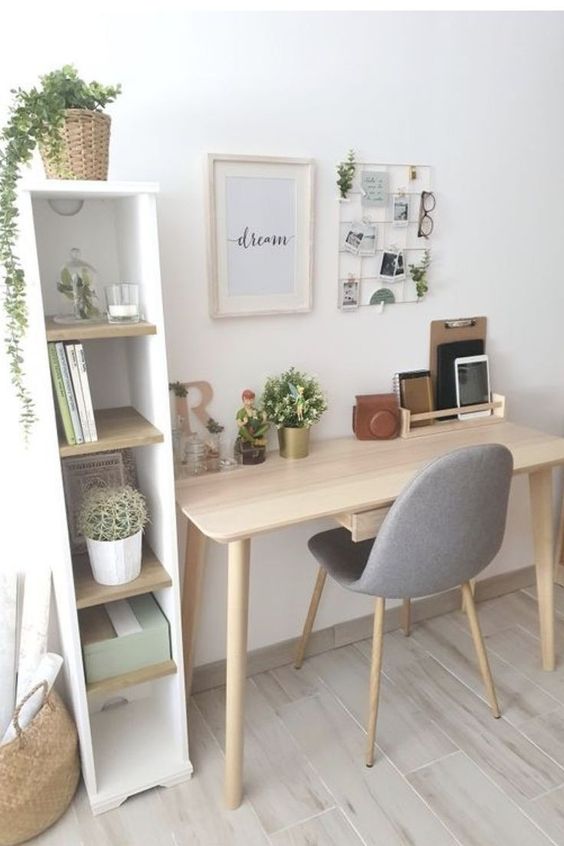
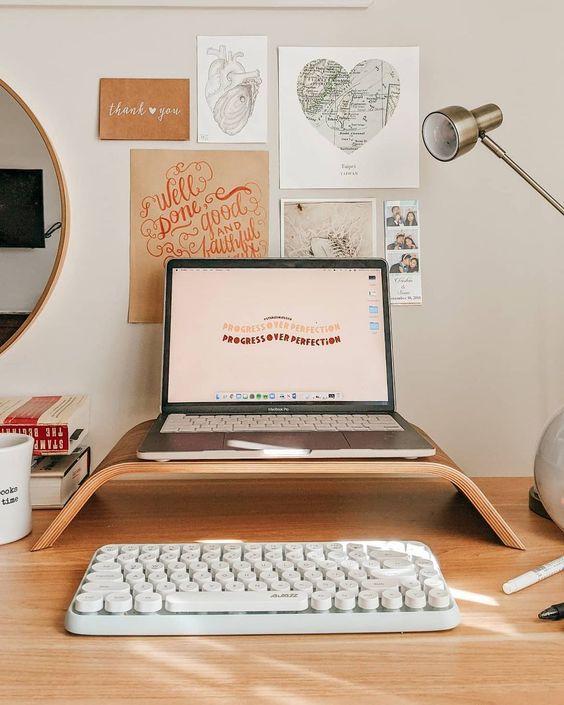
1. Remove Writing Tools on The Desk
Cc: Pinterest
Some people like to collect stationery with attractive designs. Especially for women, stationery with cute designs and bright colors is often the choice. Writing equipment is indeed pleasing to the eye. However, when you put all this writing equipment on your desk, the appearance of the table will look messy.
To make your desk feel comfortable, you have to purge the clutter there. Avoid putting too many things there. Therefore, never put your writing utensils on the table. You can choose another separate shelf to store these items. Or, you can also store it in a drawer.
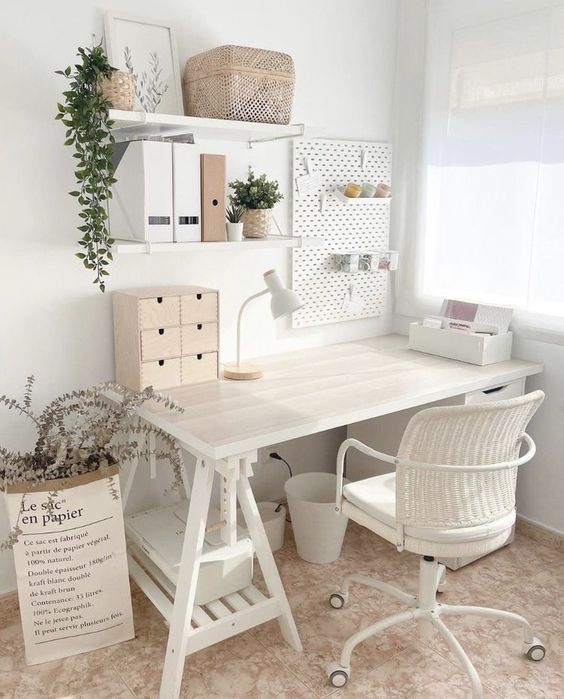
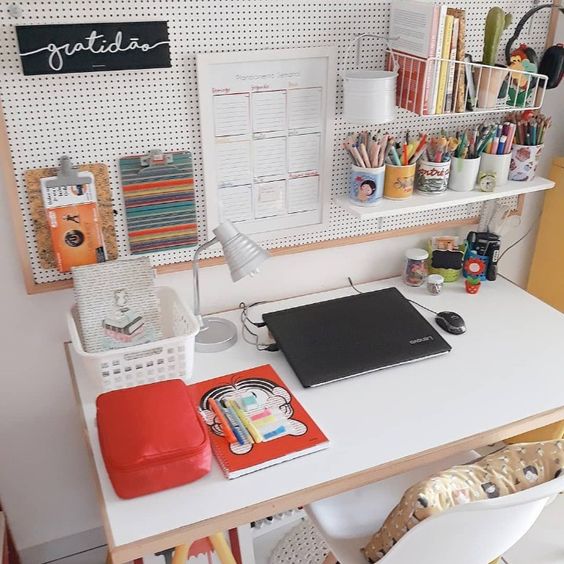
2. Install Floating Wall Shelves
Cc: Pinterest
Never keep too much stuff on the desk if you want to make it feel comfortable to work. It would be better to put your items on a separate shelf. Or, if your room is small and does not allow you to use shelves, then making the wall a storage area is a powerful tip you can try. You can install floating wall shelves there. And, it becomes the next of 18 Tips to Organize Your Workspace.
Put all of your files on the floating wall shelves. You can also make floating wall shelves as an attractive area to increase the beauty of your workspace. That way, working there will be more enjoyable. So, try to decorate the floating wall shelves area with one or two small plants. The natural green also can make your workspace feel fresh and comfier.
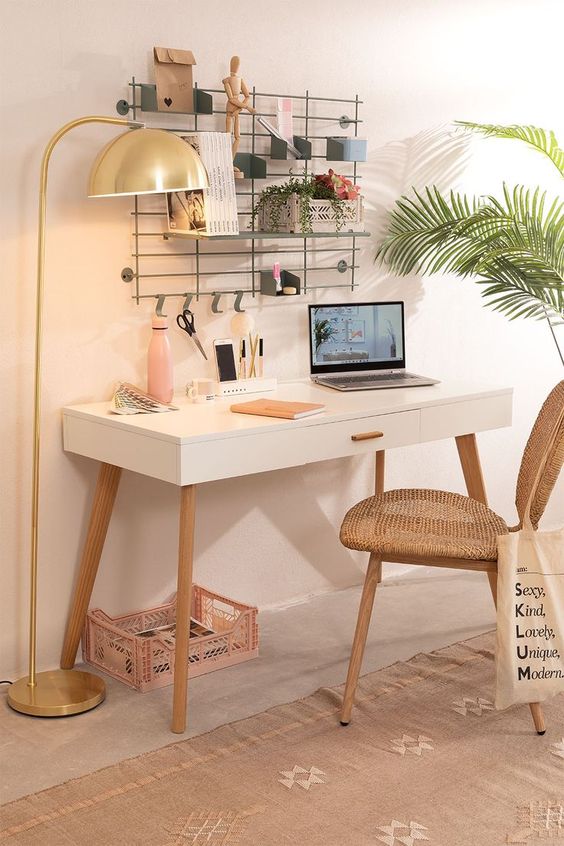
3. Save Your Items in The Drawers
Cc: Pinterest
Utilizing the remaining area as a workspace is an interesting idea. You can make it feel comfy by making it feel wider. And, installing a floating table is the most appropriate choice.
Choose a floating table that has multiple drawers. That way, you no longer need additional shelves for storage. You can store some of your tools in the drawers. And, let the table area only be filled by a laptop, a table lamp for working at night, and some decorations to add value to the beauty and aesthetics of the workspace.
4. Put Rack Beside The Desk
Cc: Pinterest
In order to feel comfortable while working, the desk area must be made clean and away from clutter. Therefore, do not put too many items on your desk. Just one or two books to write, small plants to refresh, and some other decorations to make this spot look attractive.
As we know that there will be a lot of things when working starting from files, books, writing tools, and so on. And it is impossible to put all this stuff on the desk. Therefore, placing a rack beside the desk is the next of 18 Tips to Organize Your Workspace you can follow. Choose a rack color that matches the interior to make the workspace look harmonious and pretty.
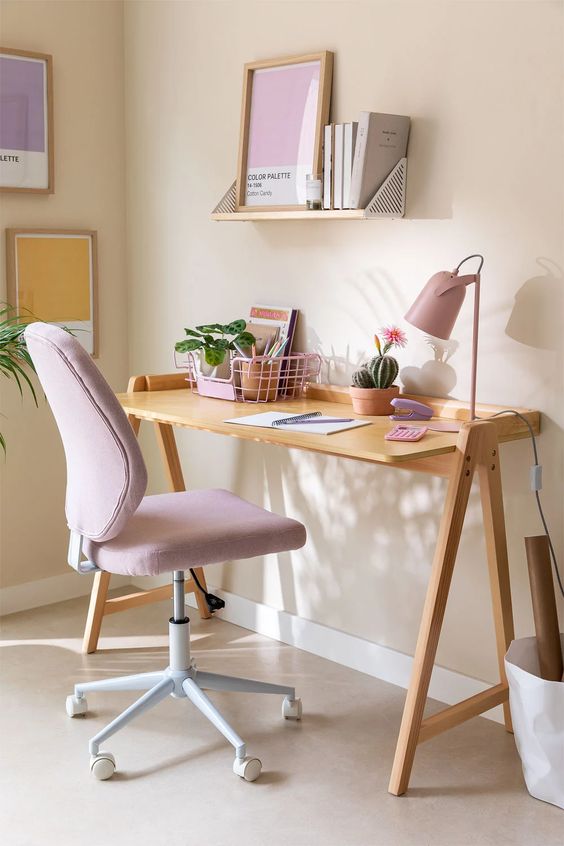
5. Use a Wire Basket
Cc: Pinterest
The wire basket is perfect for a minimalist workspace concept. You can store some of your stuff on the table in one place, starting from books, pen holders filled with pencils and pens, and also a small plant as a refresher. The pink wire basket looks so perfect on the light wood table. Besides that, the same color is also applied to the table lamp and chair which makes the appearance look very simple, sweet, and also harmonious.
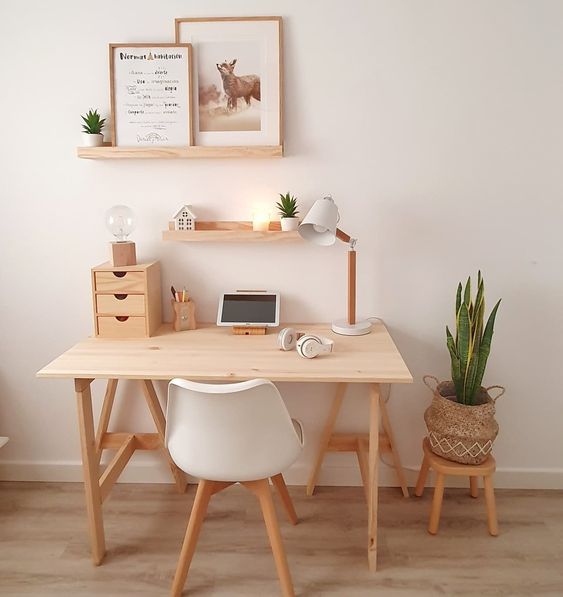
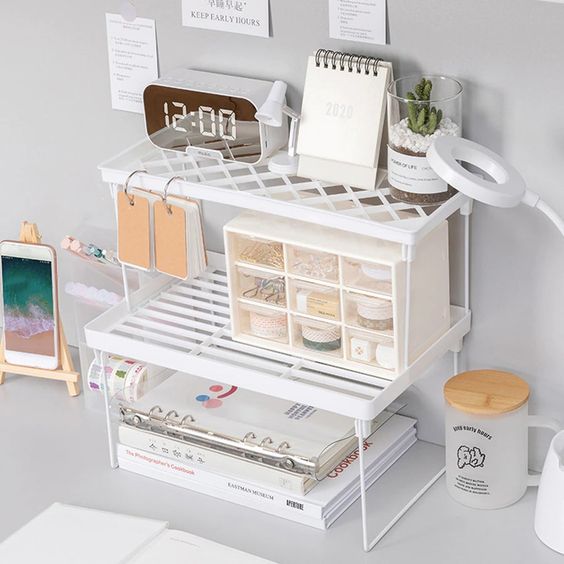
6. Use Mini Two-tiered Wooden Shelf
Cc: Pinterest
Using a mini two-tiered wooden shelf is the next of 18 Tips to Organize Your Workspace you can follow. The natural brown color and texture of the wood bring warmth to the room. This one item will be perfect for a workspace with a minimalist and clean concept. The very thick Japanese design is also very suitable for use in Japandi or Japan workspace designs.
You can use a wooden shelf as a place to store small items such as an alarm clock, books, a beautiful mug, a perfume, and aromatherapy candles. Arrange all of these tools neatly to produce a clean and comfortable workspace.
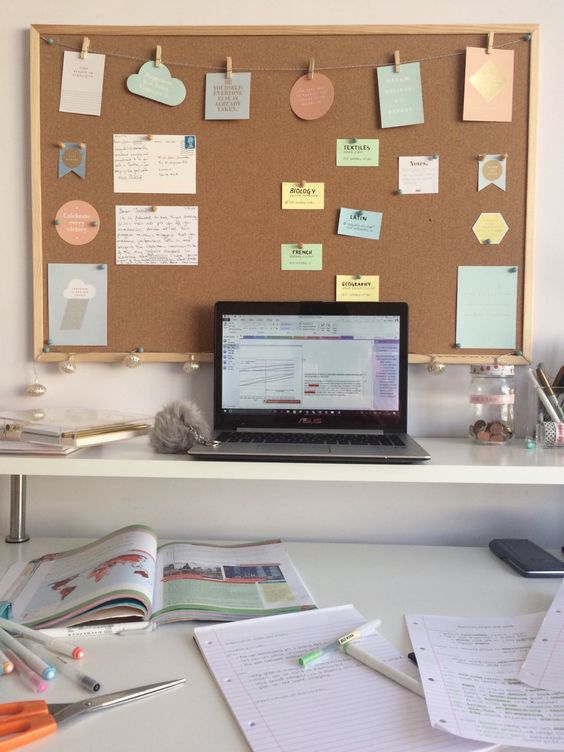
7. Install Wire Grid on The Wall
Cc: Pinterest
Do not let the walls in your workspace look plain. Make dining look attractive by installing wire grids there. Choose a dark wire grid to make it stand out. For example, you can use a black wire grid on a whitewashed wall. Both of these colors are neutral colors so they will look simple when combined.
You can utilize the wire grid to give beauty to the workspace and also as a storage area. There is a small shelf there that you can use to put some books. You can also add a refreshing decoration in the form of small plants there.
8. Use the Drawer Organizer
Cc: Pinterest
It does not matter if your desk does not have a drawer. You can use the drawer organizer. Put this item at a corner of the table to leave a central area that you can work on. With a drawer organizer, you can put some of your small items which if placed on the table can make your work area messy.
Choose the drawer organizer that fits the concept or design of the workspace. For a workspace with a natural and warm concept, you can use a wooden drawer organizer. Wood color will look so sweet when combined with white.
9. Mini Table for Extra Space
Cc: Pinterest
The size of a large laptop can take up a lot of space on your desk. Therefore, putting the mini table in the middle of your desk is the next of 18 Tips to Organize Your Workspace. You can use the upper area as a place to put a laptop. While the bottom area is still empty you can use it to store the keyboard and mouse that you use when working. This method can leave a lot of space on the table which you can use to write a diary or make some notes of your daily activities.
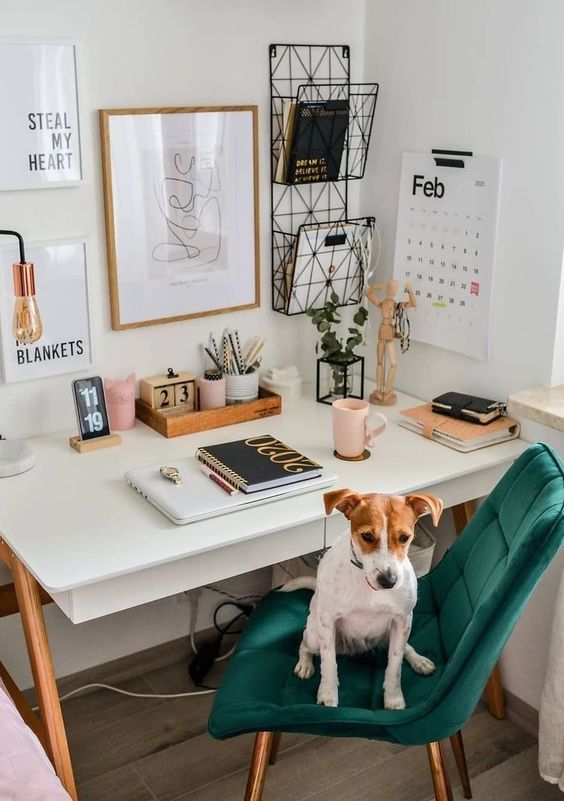
10. Hanging Wall File
Cc: Pinterest
There will be lots of work-related papers, books, or files in the workspace. And, keeping it on the table will only take up space and make the work area cramped. As a result, the workspace becomes uncomfortable. Not only that but the beauty of the workspace is also disturbed. Therefore, using the hanging wall file is the most appropriate way for you to choose.
Install the hanging wall file on an empty wall spot. You can also use this one item as a decoration to fill and decorate your workspace to make it look more aesthetic. The black hanging wall file is perfect for hanging on a white-painted wall.
11. Put Beautiful Mugs for Writing Tools
Cc: Pinterest
As we know that workspace is a place to work. Therefore, do not be surprised if in this area there will be lots of writing tools such as pens, pencils, and several markers with different colors. Putting all writing utensils on the table is not a good idea. This will only take up space and also make a messy table.
To make your stationery look neat, you can use a mug with an attractive design as a place to put your writing utensils. Use several mugs to organize these items. For example, a blue mug for colored pencils, a yellow mug for markers, and a white mug for pencils and pens. Put these mugs on the floating shelves.
12. Install a Board for Your Activity List
Cc: Pinterest
Making notes about the activity to be done or some tasks is a way to keep you in mind. Usually, these notes will be attached to the wall, laptop, or PC. This one habit is certainly not good for the comfort and also the beauty of the workspace. The number of unconditioned notes can make the workspace seem cluttered. Therefore, installing a board on the wall near your workspace is the next of 18 Tips to Organize Your Workspace you can follow.
For a workspace with a simple and calm appearance, choose a board in a neutral color such as black, white, or brown. Black and brown boards are the best to choose from and hang on a white-painted wall.
13. Use Desktop Shelf Organizer
Cc: Pinterest
It does not matter if you want to save your stuff on the desk (if indeed the drawer is full of stuff). However, you need to use an additional item, namely a desktop shelf organizer. You can use the bottom area for storing notebooks, the middle area for storing some small items, and the top area for decoration that can add to the beauty of the workspace. Here you can put a small calendar, a simple small plant, and a digital clock.
The white desktop shelf organizer is perfect for a white workspace. An all-white appearance will create a cleaner and neater impression. That way, the workspace will feel more comfortable to use.
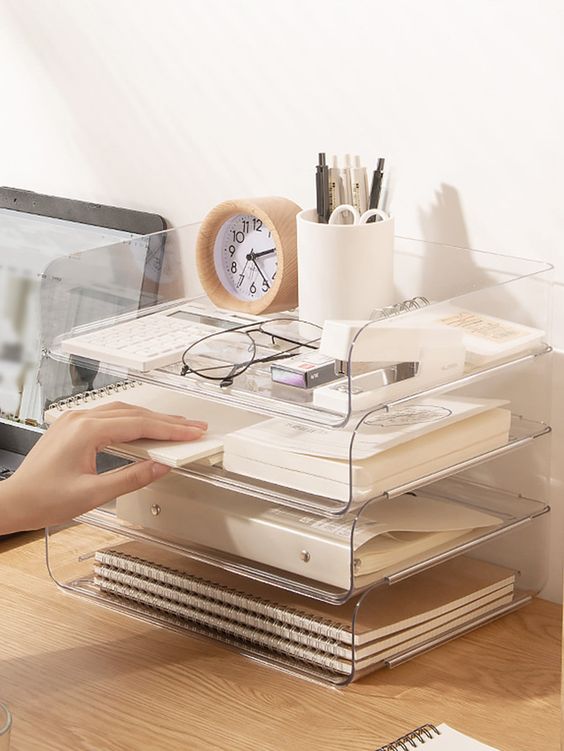
14. Use Clear Letter Tray
Cc: Pinterest
The clear letter tray is an additional item that you can use to store some important letters in your workspace. But, you can also use this as a storage place for books. In the upper area, you can place several items which are also decorations that make the workspace look beautiful and aesthetic.
The clear letter tray is perfect for use in a minimalist workspace design. This item has a very simple appearance. There is no color so it will not have any effect on the minimalist concept itself. The corner area of the table is the most appropriate for placing the clear letter tray.
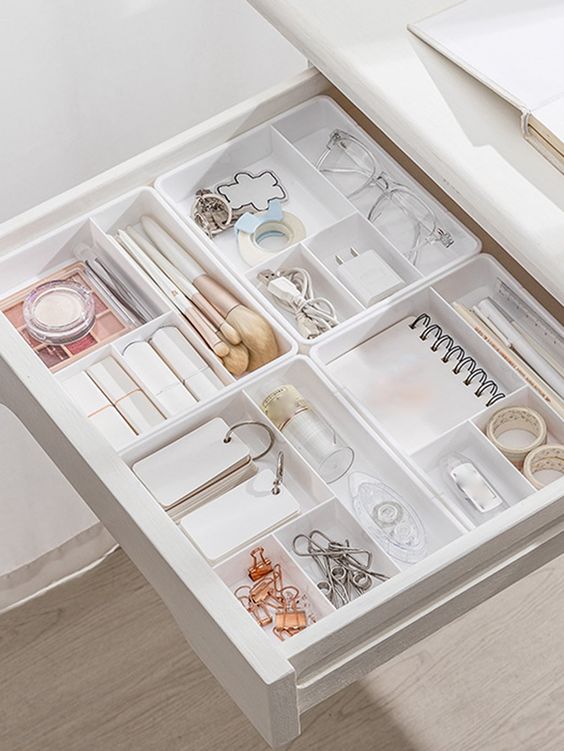
15. Use a 4-Grids Drawer Storage Box
Cc: Pinterest
It is not only the appearance that looks to the eye that you should pay attention to. Some hidden areas are also an important part of the workspace. The drawer area is often the messiest area. Drawers are usually used as a place to store various items. And, being an enclosed area, drawers are often overlooked or overlooked.
Keeping drawers tidy is important. The tidiness of the drawers also influences the comfort of the workspace. And, to keep the contents of the drawers neat and organized, you can use a 4-grid drawer storage box. Make the most of each grid so that the drawers can be filled with lots of items.
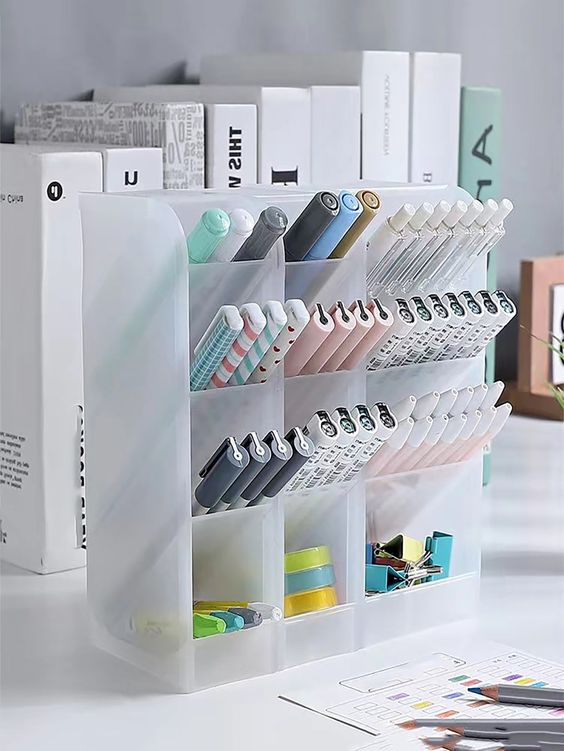
16. Use Multi-Grid Pen Holder
Cc: Pinterest
Have a variety of writing tools and are confused about how to make them look neat on the desk? Here, you can use a multi-grid pen holder. There are several places that you can use to separate one type of stationery from another. That way, besides making the appearance neat, this method can also make it easier for you to pick up the stationery you want to use.
You can choose multi-grid holders with neutral colors like white or black. These two colors can go into all kinds of colors so it will avoid the problem of clashes between colors. Not only that, these two colors are also very suitable for workspaces with a clean, minimalist and soothing concept.
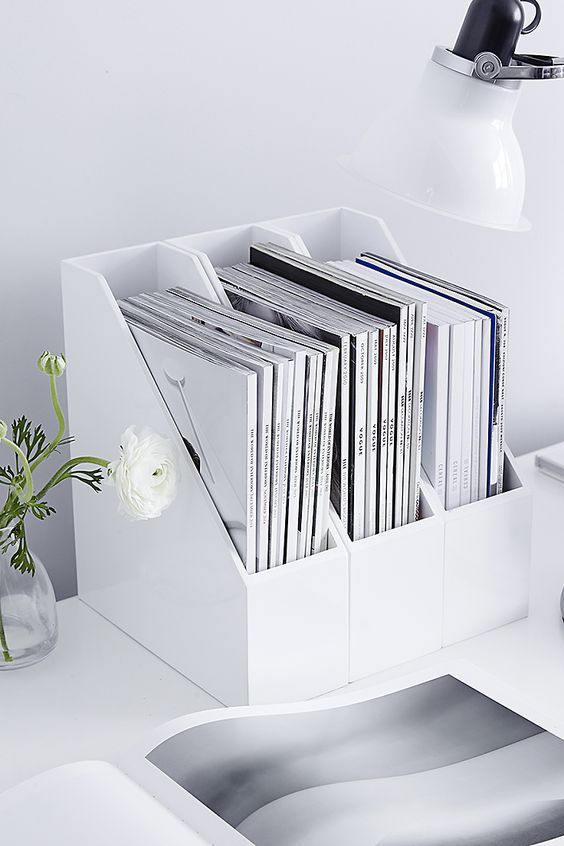
17. Use Magazine File Holder
Cc: Pinterest
Try to always organize every item in the work area. You can use the magazine file holder as a place to store books, letters, magazines, or other documents. Use several magazine file holders and make them function differently. To make it easier for you to find the document you want, you can give a note to each magazine file holder.
You can place the magazine file holder on your desk, floating wall shelves, or rack near your desk. There are many designs that you can choose from. Try to choose a magazine file holder with a design that fits your workspace concept. That way, the beauty of the workspace can be maintained properly.
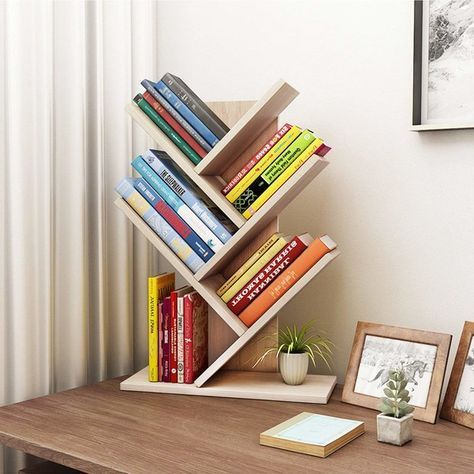
18. Use Mini Bookshelf for Desk
Cc: Pinterest
You can not only store books on a bookshelf. You can also put books (especially books that you often use or are currently using) on your desk. However, pay attention to the neatness and layout of these books. You can make it look neat and not take up much space on the desk by using a mini bookshelf like the picture above. This is the last of 18 Tips to Organize Your Workspace you can follow.
Because of its fairly large size, you can place the mini bookshelf in the corner of the table. That way, there is still free space left in the center of the table that you can use for work.
Final Words
Working at home is not a problem as long as you can create a comfortable workspace like in your office. And, it is not difficult to have a comfortable workspace. Here, you just need to focus on comfort. However, pay attention also to the aesthetic value. A beautiful workspace will also make you feel more comfortable. And, having a comfortable and attractive workspace is not difficult. You only need to maintain tidiness and adjust it to the concept or design of your workspace. The points above are 18 Tips for Organizing Your Workspace for those of you who want to Create A Tidy Space for Work. So, happy trying!
There are many mixed emotions that come into play on moving day. There’s the excitement of getting a fresh start, moving into your dream home, or relocating for a much better job. This conflicts with the feelings of sadness that come from leaving your old home, friends, and life behind. Feeling a little sad about moving is natural. However, focusing on the bright side of things will typically help in the long run.
To adjust quickly to a new move, you should attempt to make your moving day run as smoothly as possible. A positive moving experience will set the stage for your transition to be a successful one. And planning ahead is a great way to ensure you have a positive experience. Here are some hacks you can start using to get ready for your move, whether it’s next month or next year:
Look Into Pet Transportation
Boxing up everything you own is one thing. Transporting the members of your family is another entirely. You can’t shove your kids into the back of a moving truck, and it’s irresponsible to try and do the same to one of your pets.
Luckily for the pet owners out there, pet transportation is available for anyone needing to make a lengthy move. Pet transport is safe, secure, and reliable for pets of all shapes and sizes. And you can rest assured that your furry friend will be in capable hands from point A to point B.
Feelings of concern are normal; this is just a sign that you truly love and care for your pet. Feel free to contact a pet transportation service ahead of time to ask all the questions you need about their role in your move. They should be able to calm your worries and explain the process more fully, so you feel better about moving day.
Learn to Let Go
When you live in one place for an extended period of time, you start to accrue a lot of belongings, some many even say junk. A lot of these items haven’t been touched in a long time. The truth is that you don’t need to pack up everything you own when you move. There are a lot of items that you can sell, donate, or throw away.
As you start organizing and packing everything you own, take inventory of what you come across. Pay attention to clothing you never wear or toys that your children have long forgotten about. There’s no sense in packing these up to take to a new house if they’re not getting any use.
There are other good reasons for shedding some of the extra items you’ve accumulated over the years too. Everything you donate can go to families who are in greater need than yours. Items you are able to sell can be used to pay off gas money for the drive or cover the rental fee for moving equipment.
Get the Ball Rolling Early
One of the biggest mistakes movers make is starting the process too late. Procrastinating the big move is unfortunately easy to do, but all it will do is cause extra stress for you when moving day arrives. As soon as you decide that you’re moving you should get the ball rolling.
Let’s say you’re reading this article in April and you’re planning to move in late July, just before the new school year begins for your kids. You shouldn’t be waiting for the calendar to turn to July to start packing up boxes. You might even consider packing away a few things at the mere thought of making a move. This way, when the time comes you’ll already have started making progress.
To stop yourself from procrastinating, set goals for yourself. This could look like packing one box a day or having a certain room packed by a specific date. It can be helpful to consider items you rarely use. This could be books, extra dishes, DVDs, anything really. If it’s gathering dust, it can likely be packed — or donated! Be honest with yourself about what the essentials are, and packing will be a lot easier.
Hire a Moving Crew
Packing up small items is a relatively easy task. The really tricky business is moving hefty furniture from one house to another. You can enlist the help from family and friends, but moving those large objects will still be a tough endeavor.
If you’re worried about moving all of your large belongings, give some thought into hiring a moving crew. Professional movers have the equipment and training to get even the bulkiest of belongings safely out the door and onto the moving truck. You won’t even have to break a sweat with them around.
Hiring a moving crew helps to ensure your heavy items like furniture and large appliances will be in good hands. They won’t be dropped or banged around as they’re being shifted by capable workers. That leads to another benefit, you don’t have to worry about the walls or floors of your home being scuffed up. It’s also a smart idea to hire a moving crew to avoid possible injuries to yourself. It’s more common that you’d think to tweak your back while lifting incorrectly. If you can cover the cost, it can be worth the investment.
Often moves are a transition point in life. Maybe you’re moving to a new home for a different job, or you need more bedrooms for a growing family. No matter what the reason, a positive moving experience can be a turning point. Follow some of these steps for your moving day, and you’ll be starting the journey off on the right foot.
Rats are typical pests that can cause severe damage inside and outside your property. They are ok to make a nest, whether in your interior or exterior space. Finding the nest’s location is the first step to successfully removing the rat infestation. Though, this might not be the most straightforward task at all. Don’t close this page to get proper instructions on getting rid of rats.
What are the signs of a rat infestation?
The truth is that it’s not rocket science to figure out that you have rats at home or nearby your property. The rodents are careless, messy and quite nasty in their gnawing habits. Here are some of the most common signs of rat infestation to look for:
They are black in nuance and bigger than mice in size. What’s also typical about them is that they are literally everywhere. The most common place, though, to find droppings is nearby the location you usually leave food at your disposal.
The rats love burrowing, and sometimes they might get inside your house or the garage this way. If you see big holes near your home, it might be a mole, but it could also be a rat.
Unlike mice that don’t leave hairs around, rats do. They are usually grey, but sometimes black or brown, too.
Rubbing marks. Such is left on the walls. These signs are made in the name of easier navigation for the rats as they have poor eyesight.
One of the most common signs of a rat infestation is the nest. The rodents will surely create one once they feel welcomed in the property or location.
How to recognise a rat nest?
You can easily track the rat nest by using the signs from the list above. On the other side, this typical proof of rat invasion can be everywhere on your property. Most of the time, the rodents prefer to create their shelter in a spot with enough “building materials”. In other words, the more items you have and the bigger the clutter, the more possible you can find a rat nest there. Until you reach the concrete location, you might encounter other signs of rat infestation, including torn cables, scratched wooden items, chewed electrical cords, etc. If you take your dog or cat for an inspection, you will receive extra assistance finding the nest location. The closer your pet gets to it, the stranger its behaviour will become. Last but not least, remember that a rat nest looks quite similar to a traditional bird nest. It’s just rats don’t use leaves and twigs but everything found around your living space, including garbage.
Typical hotspots for rat nests in the house
Experts have determined traditional concrete areas with signs of rat infestation. And in 90% of them, you will probably see a nest. Check them out below to know where to look for them.
Lofts and attics
These places are favourites for the rats for two main reasons. First of all, they are not 24/7 occupied by people, so they are peaceful enough, and second of all – it’s usually a huge mess here. In the lofts and the attics, the rodents find many old items that are great for building a nest. Besides, it’s dark and safe in here for them.
In the basement
Similarly to the loft and the attic, the basement is a gloomy place that serves the role of a storage spot for homeowners. But what makes the basement even more attractive for the rats is that usually there’s food here. People love storing their jars in here, and the rodents have sharp enough teeth to gnaw the metal lids and have a treat with your supplies.
Inside the garage
The garage is another place supposed to serve one thing but usually becomes the homeowner’s warehouse. As a matter of fact, it’s also one of the hottest rat entry points to your living space. It’s common for a rodent to build a nest in the garage and move inside the building once the weather worsens.
In the walls
Nothing can stop a rat from having a nest in the walls in case of a cavity. This is a very peaceful and inaccessible place for rodents to hide, so as long as the cavity allows it, a nest might soon be made between the walls.
In closet clutter
The more chaotic a living space is, the more possible the rat infestation becomes. The closet is a domestic area where the clutter rules. It’s common for homeowners to leave this space for the end of the cleaning routine, which is why it usually never gets tidied up. And as you can already guess, thus, the closet becomes the rat’s favourite place to make a nest.
In kitchen cabinets
It doesn’t matter how clean and tidied up they are. If the cabinets are full of food, the rats will feel attracted by them. Yet, if your kitchen is a mess and food sources are everywhere, a rat invasion is even more possible.
Under sinks
Rats love moving around the drain system. The canalisation is a very special place for them – it’s dirty, gloomy and away from human intruders. However, when the rodents feel hungry, they start moving along the broken pipes, and thus, they get nearby your kitchen sink area. Making a nest here is a very common rat habit.
Inside insulation
Crawling around the insulation is another typical rat’s hobby. When there’s a gap between the insulation and the floorboards, the rodents are willing to make their nests here. They get more motivated if there’s garbage, such as boxes, clothing items, newspapers, etc., nearby.
How to deal with rat nests in the house
Ok, let’s imagine you have just found a rat nest. You are 100% sure that it’s made of a rodent. The rat infestation is guaranteed, so it’s time for action. Here’s what to do when you spot a rat nest in your living space:
If you want to deal with the rat, don’t destroy its nest. We understand that your first angry reaction would be to break it immediately. However, note that if the nest is not damaged, the rat will return to it. Consider adding a trap to catch the invader.
Using bait or poison is another good idea to fight the rat infestation. Attract the rodent by mixing the chemicals with some tasty food.
Be patient and wait for the rat to come back to the nest. These creatures are eager to travel far away from their homes to look for food. If the nest is not placed in a spot where food is available, the rodent might go outside the house and then return.
If you don’t know how to get rid of rats and poison, baits or traps are not options for you. Better call the local rat control Explain to them that you’ve spotted a nest, and they will return as soon as possible to help you.
Final Thoughts
Finding the rat nest is a big deal, but unfortunately, it does not end your war against the rodents in your home. Make sure to take action against the rat infestation as soon as possible.
End-of-lease cleaning, also known as bond cleaning, is the cleaning of a rental property before vacating it. It is a requirement in most rental agreements and is essential for getting your full bond deposit back. The landlord or property manager will inspect the property thoroughly, and if they find any damage or if the cleaning is not up to their standard, they will deduct the cost from your bond. In this section, we will discuss the importance of end-of-lease cleaning and what it entails.
1.1 Importance of End-of-Lease Cleaning
End-of-lease cleaning is crucial for tenants who are moving out of a rental property. It is essential to ensure that the property is left in the same condition as it was when you moved in. If the property is not adequately cleaned, it may result in the landlord or property manager retaining a portion of your bond to cover the cost of cleaning.
1.2 What is Involved in End-of-Lease Cleaning?
End-of-lease cleaning involves a thorough cleaning of the entire property, including the kitchen, cabinet knobs, bathroom, living areas, bedrooms, and outdoor areas. Some of the essential tasks involved in end-of-lease cleaning include:
Cleaning all surfaces, including floors, walls, and ceilings
Dusting and wiping down all surfaces, including skirting boards, window sills, and door frames
Cleaning all appliances, including ovens, stovetops, and rangehoods
Cleaning and disinfecting the bathroom, including the toilet, shower, bathtub, and sink
Cleaning and disinfecting the kitchen, including the sink, countertops, and cabinets
Removing all cobwebs and insect nests
Cleaning windows and glass surfaces
Cleaning outdoor areas, including patios, balconies, and garages.
Section 2: Tips for Effective End-of-Lease Cleaning
In this section, we will discuss some essential tips for effective end-of-lease cleaning. Following these tips will help ensure that your property is cleaned to a high standard and that you get your full bond deposit back.
2.1 Plan Ahead
End-of-lease cleaning can be time-consuming, so it’s essential to plan ahead. Make a list of all the cleaning tasks you need to complete and allocate sufficient time for each task. It’s also a good idea to schedule the cleaning for a time when you have plenty of time to clean and when the property is vacant.
2.2 Gather the Right Equipment and Supplies
Having the right equipment and supplies is essential for effective end-of-lease cleaning. Some of the essential items you will need include:
Vacuum cleaner
Mop and bucket
Cleaning cloths and sponges
Scrubbing brushes
Cleaning products, including all-purpose cleaner, glass cleaner, oven cleaner, and bathroom cleaner
Broom and dustpan.
2.3 Follow a Checklist
Following a checklist is an excellent way to ensure that you don’t miss any essential cleaning tasks. You can find end-of-lease cleaning checklists online or create your checklist. Make sure to tick off each task as you complete it to ensure that you don’t forget anything.
2.4 Start with the Kitchen and Bathroom
The kitchen and bathroom are the areas that require the most attention when it comes to end-of-lease cleaning. Start with these areas and work your way through the rest of the property. Make sure to clean all surfaces thoroughly, including countertops, sinks, and cabinets. Don’t forget to clean the oven, stovetop, range hood, and refrigerator.
In the bathroom, clean and disinfect the toilet, shower, bathtub, and sink. Make sure to scrub the grout and tiles thoroughly, and remove any mold or mildew.
2.5 Don’t Forget the Windows and Outdoor Areas
Windows and outdoor areas are often overlooked when it comes to end-of-lease cleaning, but they are just as essential as the interior of the property. Clean all windows and glass surfaces thoroughly, including window sills and frames.
If the property has a patio, balcony, or garage, make sure to clean these areas thoroughly as well. Remove any debris and sweep the area, and clean any surfaces that need attention.
2.6 Hire a Professional Cleaner
If you’re short on time or don’t feel confident in your cleaning abilities, consider hiring a professional cleaner. A professional cleaner will have the experience and equipment necessary to clean the property thoroughly, ensuring that you get your full bond deposit back.
Section 3: Techniques for Cleaning Different Areas of the Property
In this section, we will discuss some techniques for cleaning different areas of the property. These techniques will help ensure that each area is cleaned thoroughly and to a high standard.
3.1 Kitchen Cleaning Techniques
The kitchen is one of the most important areas of the property to clean thoroughly. Here are some tips for cleaning the kitchen effectively:
Clean the oven: Use an oven cleaner and follow the instructions on the label. Make sure to remove all racks and trays and clean them thoroughly as well.
Clean the stovetop: Remove any grates and soak them in hot, soapy water. Wipe down the stovetop with a sponge or cloth and an all-purpose cleaner.
Clean the rangehood: Remove the filters and soak them in hot, soapy water. Wipe down the rangehood with a sponge or cloth and an all-purpose cleaner.
Clean the refrigerator: Remove all food and shelves, and clean them thoroughly. Wipe down the interior of the refrigerator with a sponge or cloth and an all-purpose cleaner.
Clean the sink: Use a bathroom or all-purpose cleaner and scrub the sink thoroughly. Don’t forget to clean the taps and drain as well.
Clean the countertops and cabinets: Wipe down the countertops and cabinets with an all-purpose cleaner and a sponge or cloth.
3.2 Bathroom Cleaning Techniques
The bathroom is another area of the property that requires special attention. Here are some tips for cleaning the bathroom effectively:
Clean the toilet: Use a toilet cleaner and scrub the toilet thoroughly, including under the rim. Don’t forget to clean the outside of the toilet as well.
Clean the shower and bathtub: Use a bathroom cleaner and scrub the tiles, grout, and surfaces thoroughly. Don’t forget to clean the showerhead and faucet as well.
Clean the sink: Use a bathroom or all-purpose cleaner and scrub the sink thoroughly. Don’t forget to clean the taps and drain as well.
Clean the mirror: Use a glass cleaner and wipe down the mirror with a clean cloth.
Clean the floor: Use a mop and bucket and a bathroom cleaner to clean the bathroom floor thoroughly.
3.3 Bedroom and Living Area Cleaning Techniques
The bedroom and living areas are often overlooked when it comes to end-of-lease cleaning. Here are some tips for cleaning these areas effectively:
Dust all surfaces: Use a duster or cloth to dust all surfaces, including shelves, tables, and chairs.
Clean the windows and window sills: Use a glass cleaner and wipe down the windows and window sills with a clean cloth.
Vacuum the floors: Use a vacuum cleaner to clean the floors thoroughly, including under furniture and in corners.
Clean any marks or stains on walls and baseboards: Use a magic eraser or a damp cloth to clean any marks or stains on walls and baseboards.
Clean any upholstery: Use a vacuum cleaner or upholstery cleaner to clean any upholstery thoroughly.
3.4 Outdoor Area Cleaning Techniques
If the property has an outdoor area, it’s important to clean it thoroughly as well. Here are some tips for cleaning outdoor areas effectively:
Sweep the area: Use a broom to sweep any debris from the area, including leaves and dirt.
Clean any surfaces: Use a pressure washer or a hose with a high-pressure nozzle to clean any outdoor surfaces, including patios, balconies, and garages.
Remove any stains or marks: Use a specialized outdoor cleaner to remove any stains or marks from outdoor surfaces.
Clean any outdoor furniture: Use a specialized outdoor cleaner or soapy water to clean any outdoor furniture thoroughly.
Section 4: Essential Cleaning Tools and Products
In this section, we will discuss some essential cleaning tools and products that you will need to clean the property thoroughly.
4.1 Cleaning Tools
Here are some essential cleaning tools that you will need:
Vacuum cleaner: A vacuum cleaner is essential for cleaning floors, carpets, and upholstery.
Mop and bucket: A mop and bucket are essential for cleaning hard floors.
Broom and dustpan: A broom and dustpan are essential for sweeping up debris from floors and outdoor areas.
Microfiber cloths: Microfiber cloths are essential for cleaning surfaces and removing dust.
Magic eraser: A magic eraser is a useful tool for removing marks and stains from walls and baseboards.
4.2 Cleaning Products
Here are some essential cleaning products that you will need:
All-purpose cleaner: An all-purpose cleaner is essential for cleaning surfaces in the kitchen, bathroom, and living areas.
Bathroom cleaner: A bathroom cleaner is essential for cleaning the toilet, sink, and shower or bathtub.
Glass cleaner: A glass cleaner is essential for cleaning windows and mirrors.
Oven cleaner: An oven cleaner is essential for cleaning the oven.
Carpet cleaner: A carpet cleaner is essential for cleaning carpets and upholstery.
Outdoor cleaner: An outdoor cleaner is essential for cleaning outdoor surfaces.
Section 5: Tips for a Stress-Free End-of-Lease Cleaning
In this section, we will provide some tips for making the end-of-lease cleaning process as stress-free as possible.
5.1 Plan Ahead
Planning ahead is essential for a stress-free end-of-lease cleaning. Make a list of all the areas that need cleaning and create a schedule for cleaning each area. Make sure to give yourself plenty of time to complete the cleaning process.
5.2 Enlist Help
Enlisting the help of friends or family members can make the cleaning process much easier and less stressful. Assign specific tasks to each person and make sure everyone knows what needs to be done.
5.3 Hire a Professional Cleaner
If you’re short on time or don’t feel confident in your cleaning abilities, consider hiring a professional end of lease cleaning Melbourne. A professional cleaner will have the experience and equipment necessary to clean the property thoroughly, ensuring that you get your full bond deposit back.
5.4 Use the Right Tools and Products
Using the right cleaning tools and products is essential for a thorough and stress-free end-of-lease cleaning. Make sure you have all the essential cleaning tools and products before you start the cleaning process.
5.5 Take Breaks
Cleaning can be tiring and stressful, so it’s important to take breaks throughout the cleaning process. Take breaks when you need them, and make sure to stay hydrated and nourished.
In conclusion, end-of-lease cleaning is a necessary and important task for anyone who is moving out of a rental property. It is essential to clean the property thoroughly in order to get the full bond deposit back. By following the tips and techniques outlined in this article, you can ensure that the end-of-lease cleaning process is as stress-free and efficient as possible. Remember to plan ahead, enlist help if necessary, use the right tools and products, take breaks, and stay positive throughout the process. With these strategies, you can successfully clean the property and move on to your next adventure with peace of mind.