roohome.com – As a place to live, the house must be made as comfortable as possible. One way to make your home feel comfortable is to present a calm atmosphere. That way, you can rest from tiring activities comfortably. There are many ways and decorations that you can choose and implement into the rooms in your house. And, in this article, we have provided 22 Decoration Tips That Will Make Your Room Feel Calming. So, let’s check it out!
1. Put The Bean Bag in The Corner of Your Room
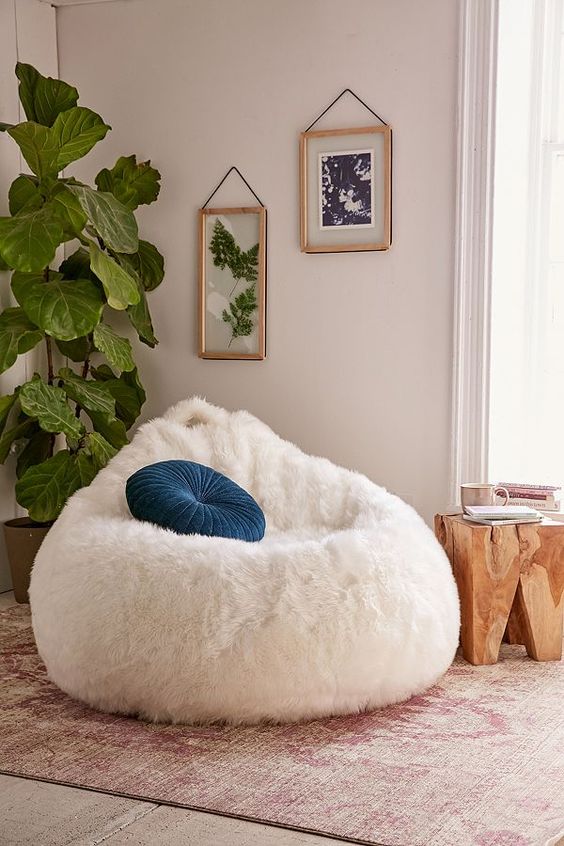
The corner room is often a missed spot. Usually, this spot is left empty or only filled with a large plant. In fact, you can use the corner of the room as a comfortable and quiet place to relax and calm your mind.
By placing a bean bag in the corner of the room, you can sit and rest comfortably. Also, add a throw pillow for you to hug when relaxing.
Before placing the bean bag, make sure you roll out the rug on the floor. This will really help to make your feet more comfortable when sitting on the bean bag.
2. Meditation on The Soft Seat Cushion
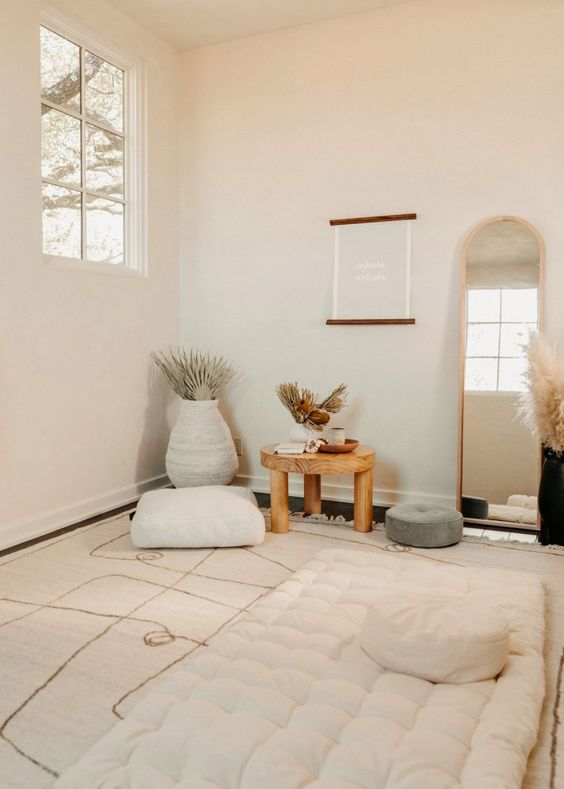
Make a small room a place for meditation. This will really help you to make yourself and your mind relaxed and fresh again. You can make this small room full of serenity with a warm white concept. Brighten the room with natural light to emphasize the warmth and calmness in the room. And, to make it cozy to use, you can decorate this small room with a soft seat cushion. Choose a color that matches the room to create a simpler and more minimalist look. Avoid excessive wall decorations to keep the room calm.
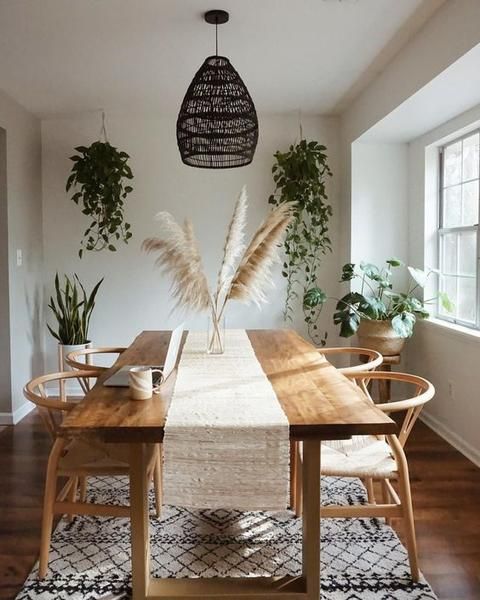
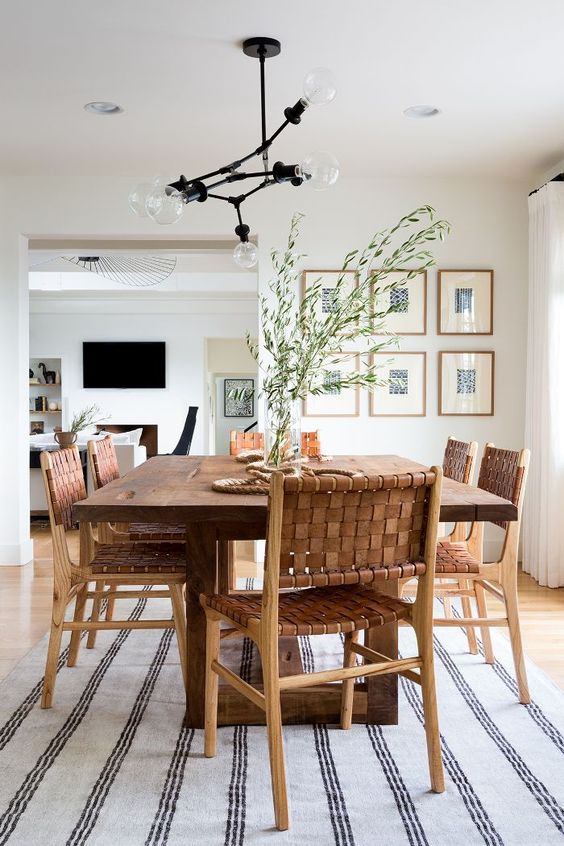
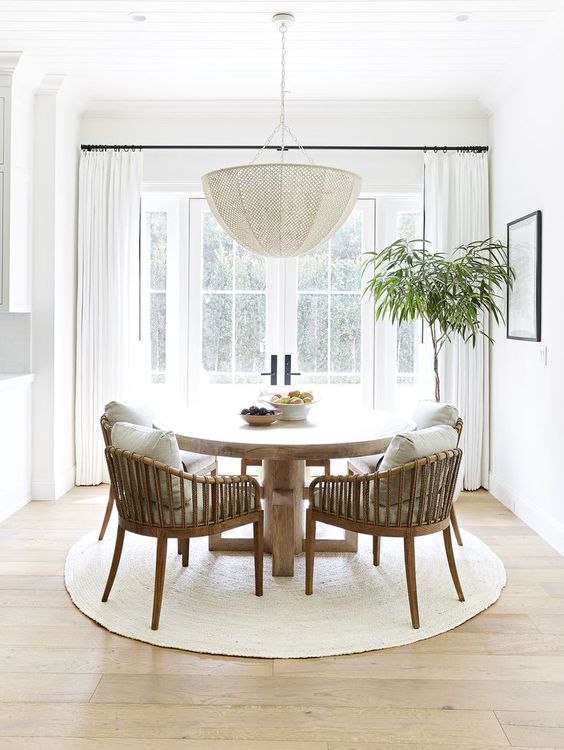
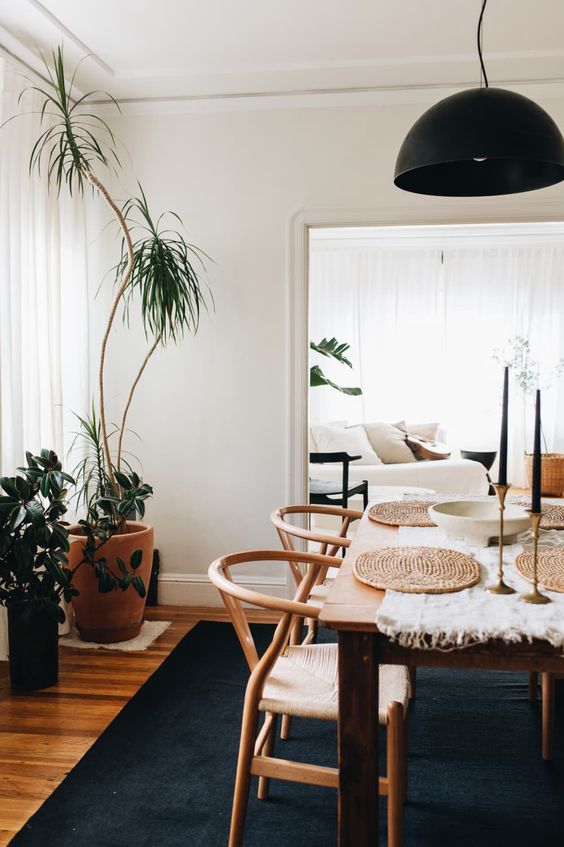
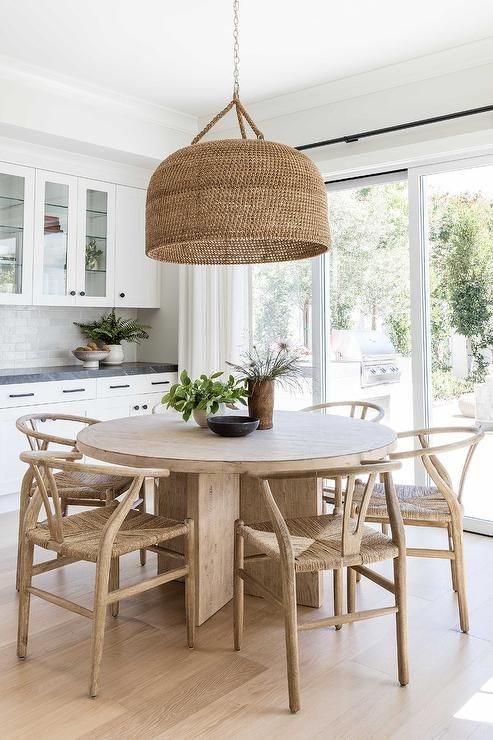
3. Greenery Your Room with Medium Size Plant
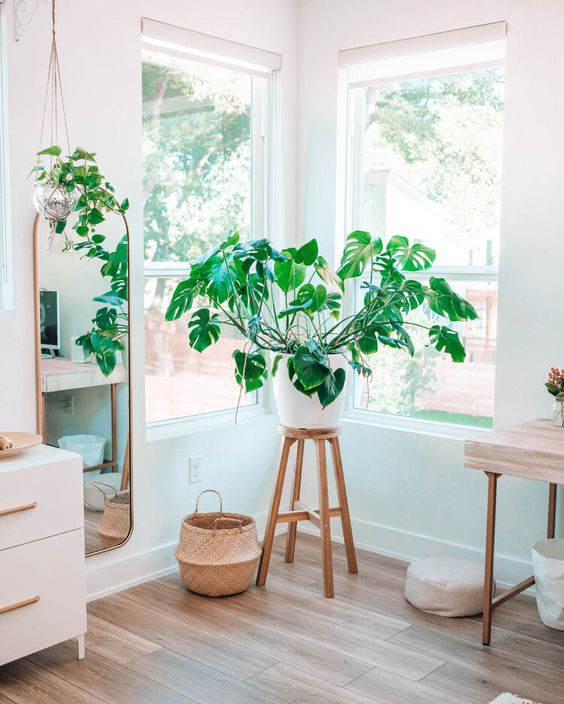
One way to create a calm room is to bring natural elements into the room. Start by making natural lighting the main lighting of the room. Next, present another element in the form of a plant. The presence of plants in the room not only gives peace but also makes it feel refreshing.
Choose indoor plants that can absorb harmful substances in the air. That way, the cleanliness of the air in the room can be maintained properly and make the room feel more comfortable.
No need to use plants with large sizes just to provide freshness and greenery in the room. You can choose a medium size plant to fill your corner room. And, to make it look stand out, you can use a small table with long legs to put plants.
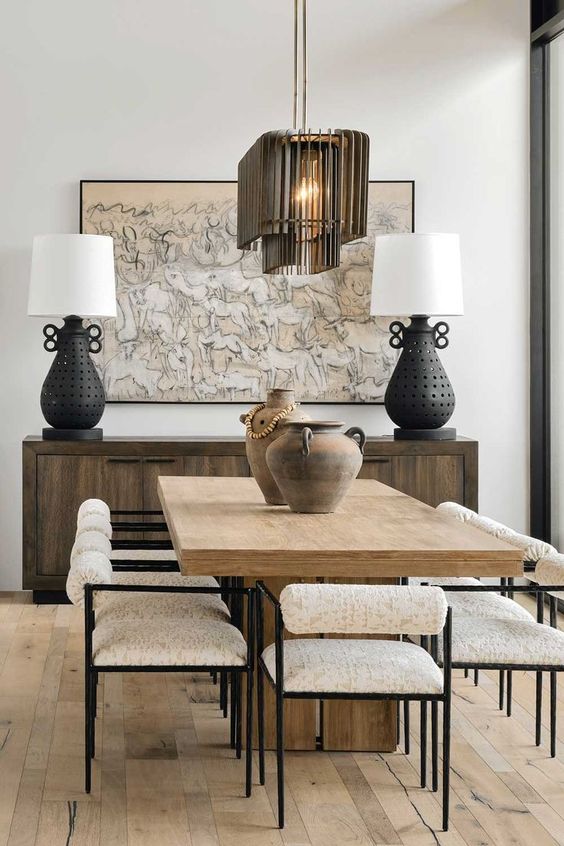
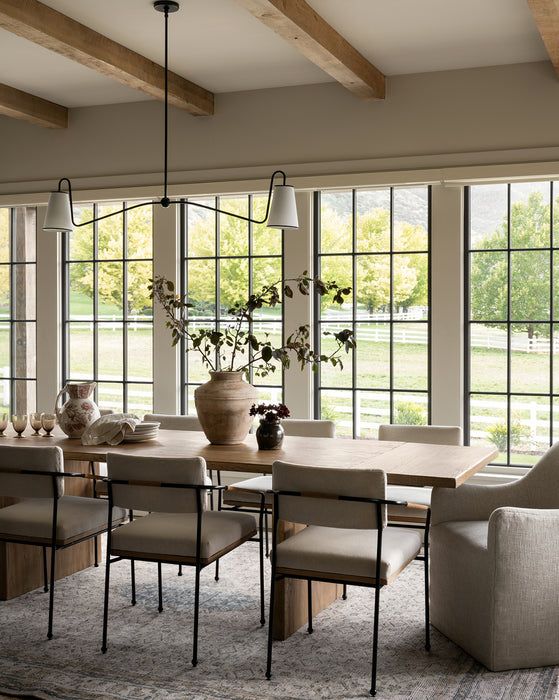
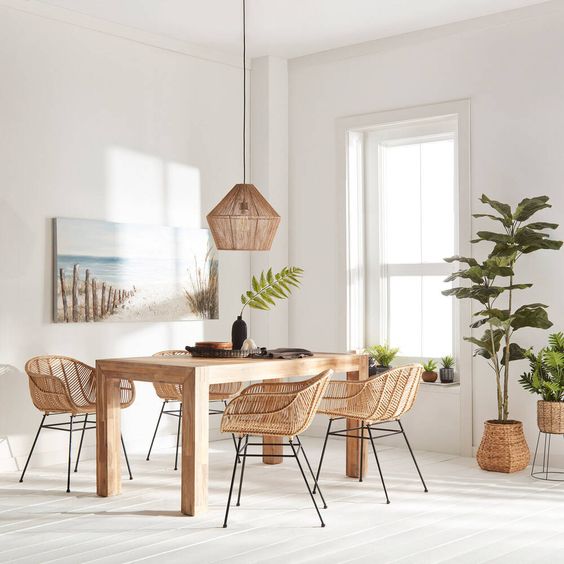
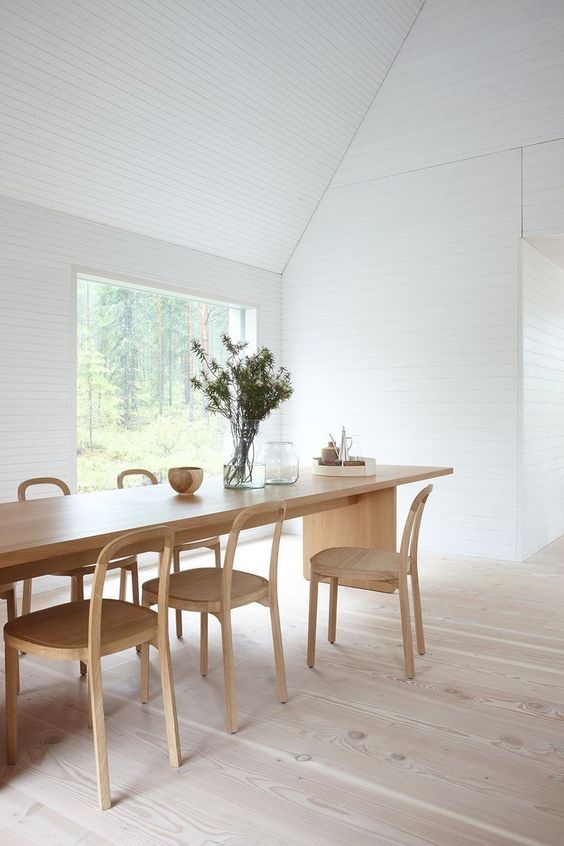
4. Use of Neutral Colors
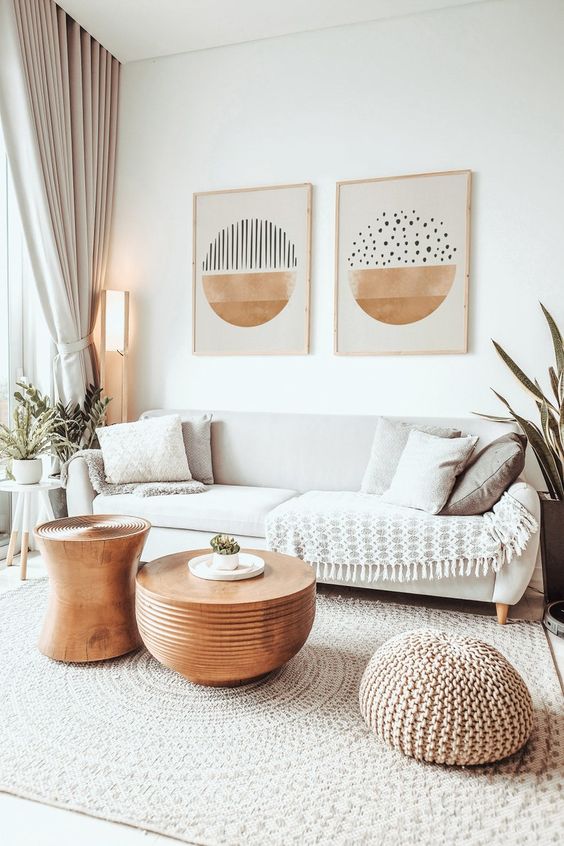
The next of 22 Decoration Tips That Will Make Your Room Feel Calming is to use neutral colors. There are several kinds of neutral colors that you can choose from: white, brown, beige, gray, and black. You can choose two or more neutral colors to decorate the room in your home.
Make white the main color. This color is the best for creating a neutral look. Besides that, this color is also able to make the room look naturally bright, especially when the room is lit with natural lighting.
The white color makes other colors present in the room, such as beige and gray, stand out more clearly. So that the colors in the room become more lively and more beautiful.
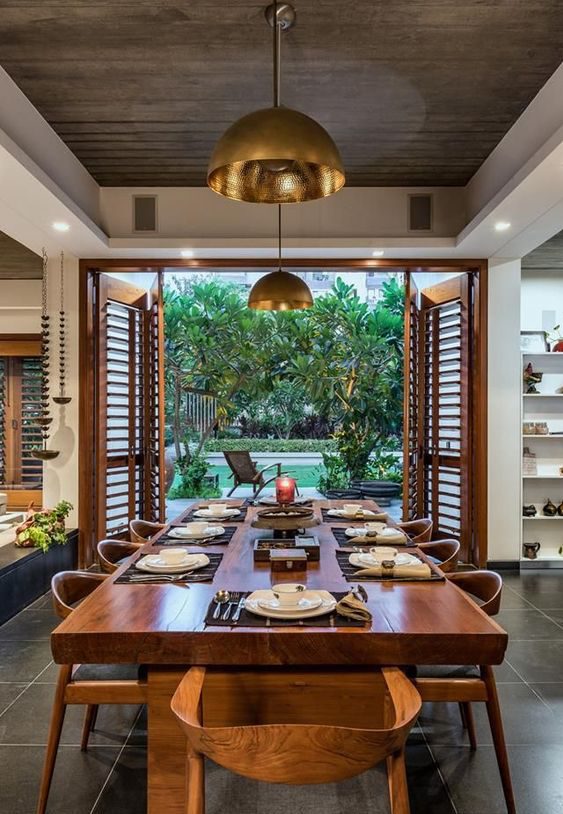
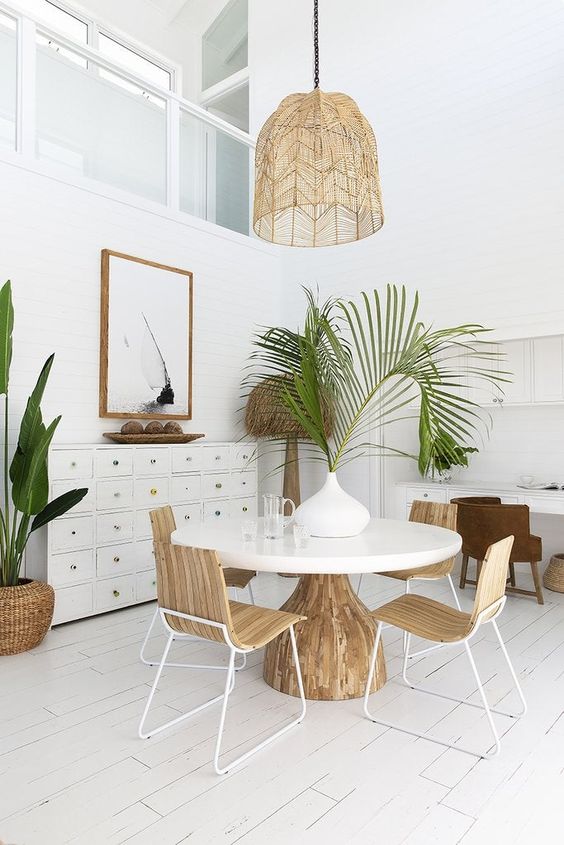
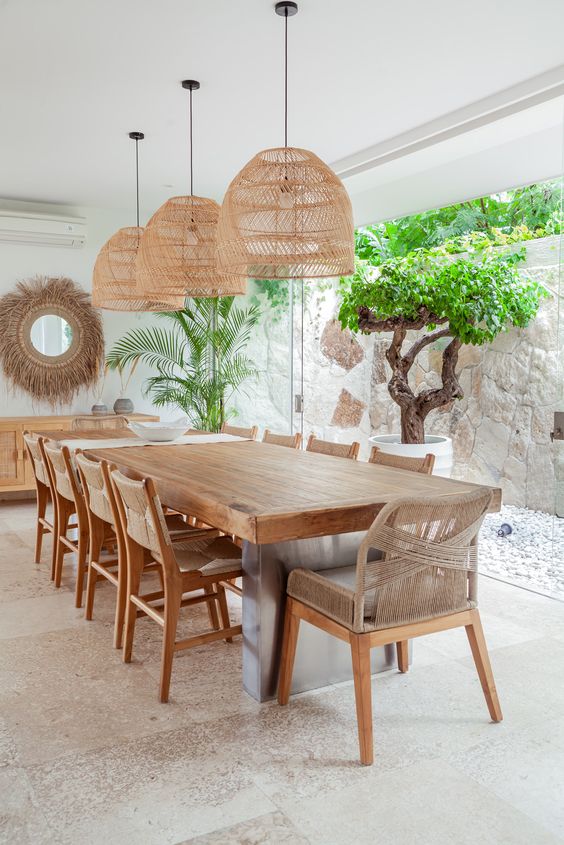
5. Present The Outdoors in Your Living Room
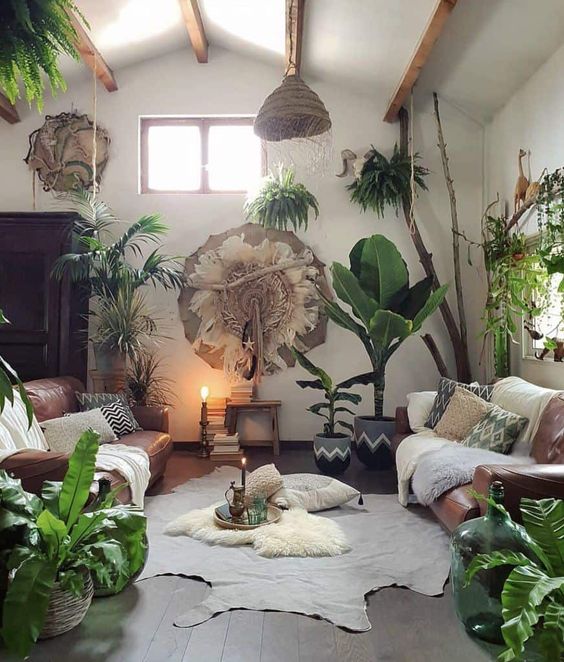
Present the outdoors in the living is the next of 22 Decoration Tips That Will Make Your Room Feel Calming you can follow. The white color is applied to the walls and ceiling to create a neutral look. Next, the room is illuminated with sunlight to make it look naturally bright. And, what brings nature into the room are several types and sizes of fresh green plants. Plants are placed in the corners of the room, the sides of the room, the window area, and up to the ceiling. So that the green color seems to spread perfectly and makes the room feel very fresh and lively.
6. Decor The Bedroom with String Light
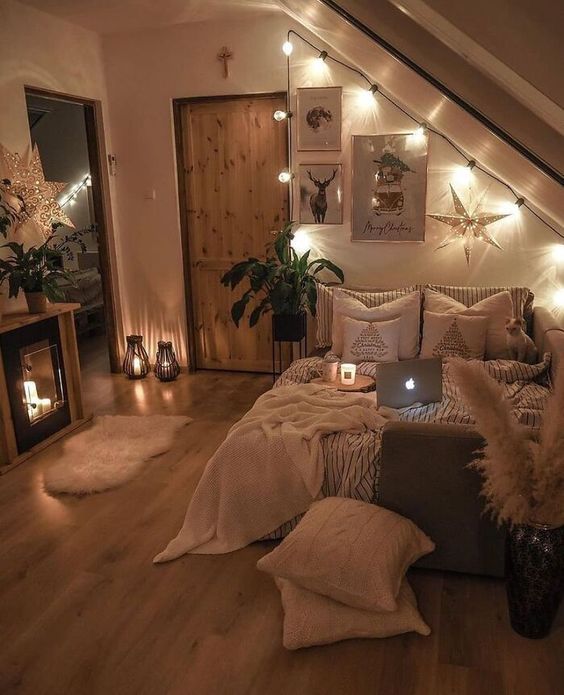
In creating a quiet room, you can make natural lighting the main lighting for the room. However, natural light cannot illuminate your room for 24 hours. Therefore, at night, you need light to keep the room bright and comfortable.
Take advantage of the use of lights to create calm in the room. The string light is one type of lamp that you can choose from. You can decorate the room with string light with warm lighting. For example, you can install string lights in the bed area. Yellow lighting that is slightly dim will make the bed area a spot full of serenity and comfort.
7. Put a Swing Chair in The Living Room
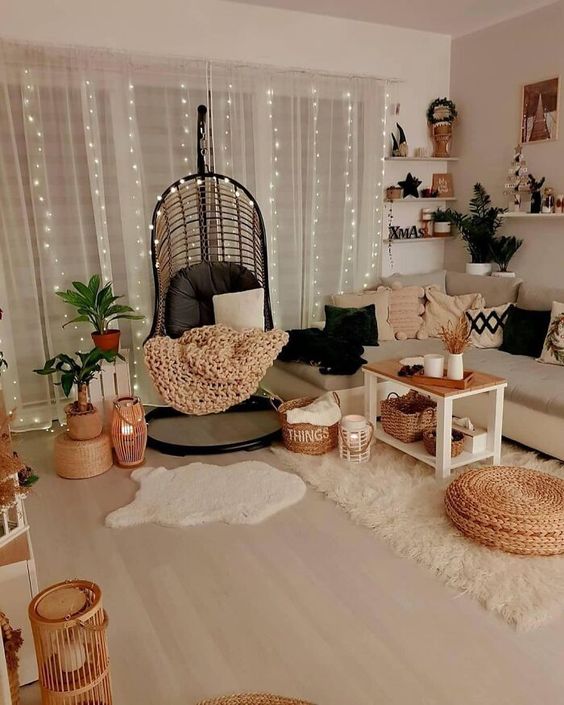
The living room is usually only decorated with a sofa, coffee table, TV table, TV, and rug. Indeed, this is an important/main item for the living room. However, it does not matter if you want to add other items that can add to the aesthetic value and comfort of the living room. One of them is a swing chair.
The swing chair is most appropriate to be placed in the corner of the room. But, if the corner of your room is already filled with other items, you can put it on the other side of the room. This can be a comfortable spot for you to relax in the living room. Resting on the swing chair will make you feel calmer.
For the Scandinavian minimalist living room design, you can choose a black swing chair. The black color will give a more assertive but calm impression to the room.
8. Bright and Fresh Bedroom
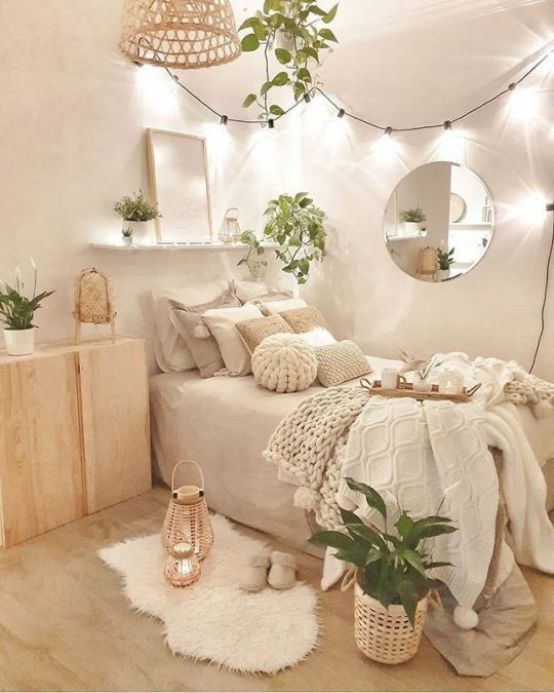
Do not hesitate to apply white to almost the entire bed. You can apply it starting from the walls, ceiling, wall displays, rugs, to bedding. White color will make the look neutral. Not only that, but the room also became bright. Making white the main color will really help in making the color and texture of the wood look clearer. The color of the wood will give a warm and fresh effect to the room.
To make the room brighter, install string lights with white lighting. Decorating the bedroom with some green plants can make it feel fresh and comfortable. You can put the small plants on the floating wall shelves, table, near your bed, or hang them on the ceiling.
9. Hang The Hammock as Relaxing Spot
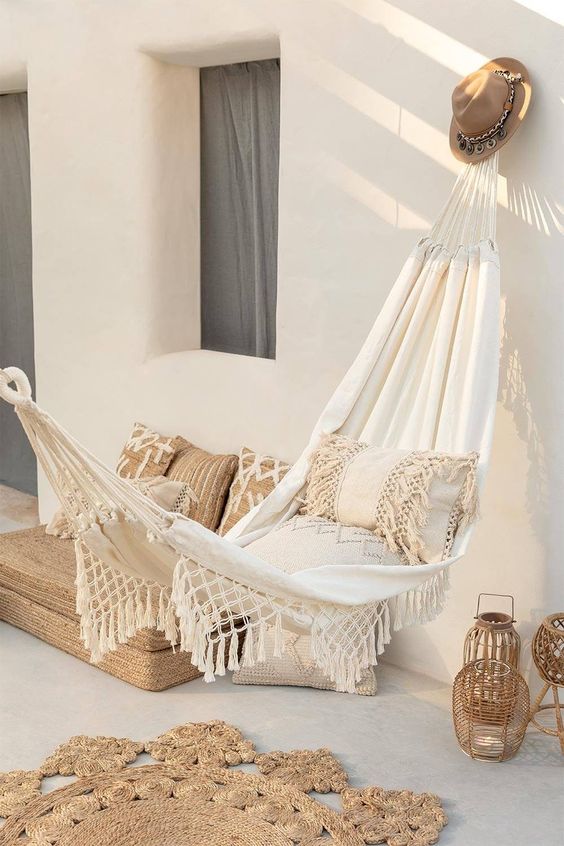
With a hammock, you can have a comfortable spot to relax. You can choose an empty area in your house that gets natural lighting. That way, you can feel a bit of the natural atmosphere there.
Hang the hammock from one wall to another. Make it feel more comfortable by placing a pillow there. You can also use a blanket to make you feel warm when winter arrives.
Also, pay attention to the beauty of the hammock area. To make it feel cozy, you need to make it look beautiful. Besides that, you can also take advantage of some decorations to add peace to the room. On the floor area, you can give a rattan rug with an interesting shape. Expand the brown color with natural materials such as rattan lanterns and rattan tatami.
10. Round Seat Cushion and Throw Pillows for the Corner Room
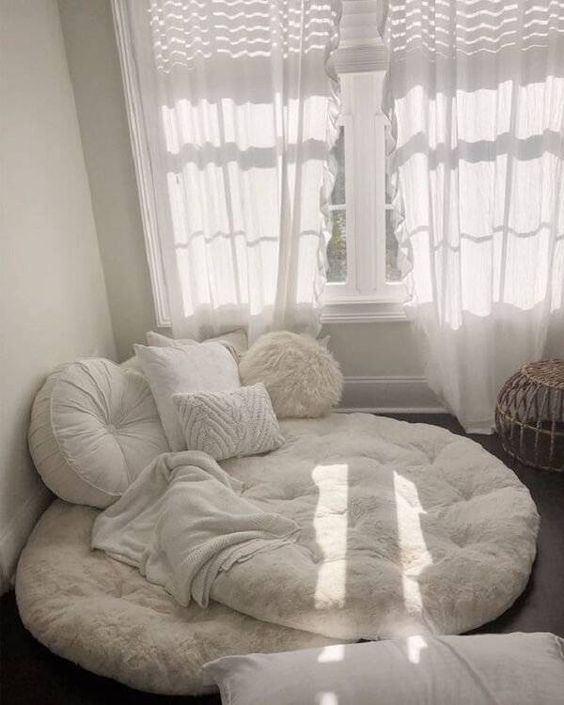
You can use the tranquility in the corner of the room as a place to relax and rest. With a large round seat cushion, you can sit or lie down there. Make this area even more comfortable by adding some throw pillows. You can also use throw pillows to add value to the beauty of the corner of the room by choosing a simple but beautiful design.
So that the calm in the corners of the room can be maintained properly, then choose neutral colors. Here, you can choose a soft white color. Apply white color dominantly starting from the walls, seat cushions, throw pillows, and sheer curtains.
11. Add Aromatherapy Candles in The Bathroom
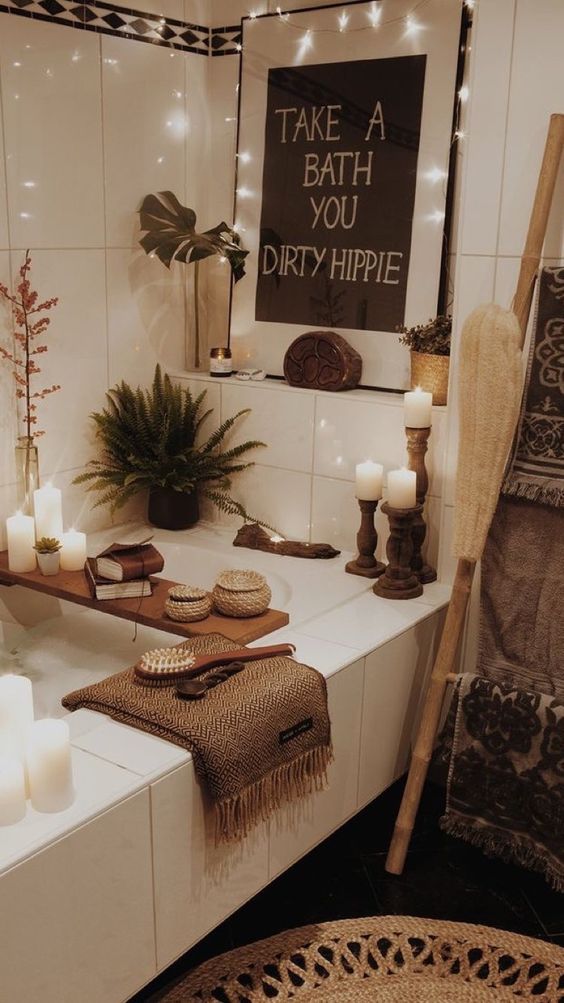
Soaking in warm water after a busy activity can make the muscles relax again. You will also feel calmer afterward. Especially, if there are aromatherapy candles in the bathroom. When the candle is lit, the room will be fragrant. You can enjoy the fragrance of aromatherapy candles to make yourself more relaxed. Therefore, adding aromatherapy candles in the bathroom is the next of the 22 Decoration Tips That Will Make Your Room Feel Calming you can follow.
You can install the floating wall shelves in the bathroom to put some aromatherapy candles there. Or, you can also add the bath tray. This one item can not only be used to place aromatherapy candles, but you can also place a book to write a journal or place a tablet to watch your favorite Netflix series.
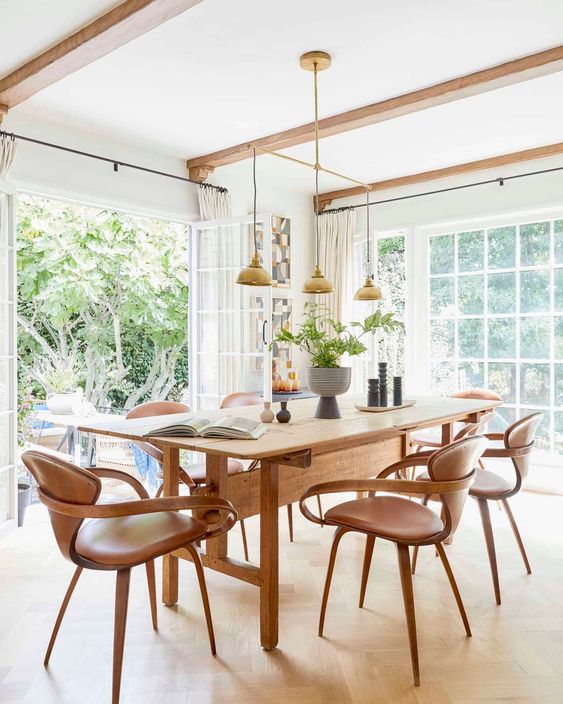
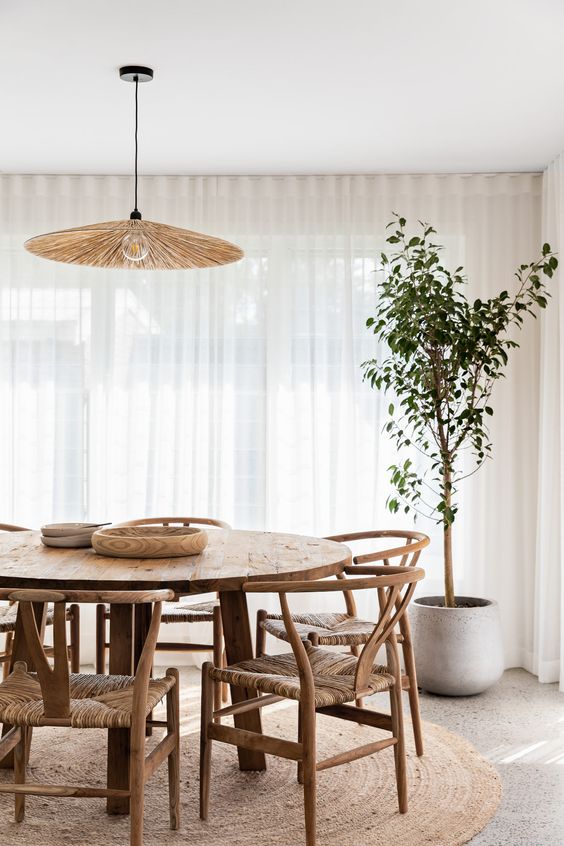
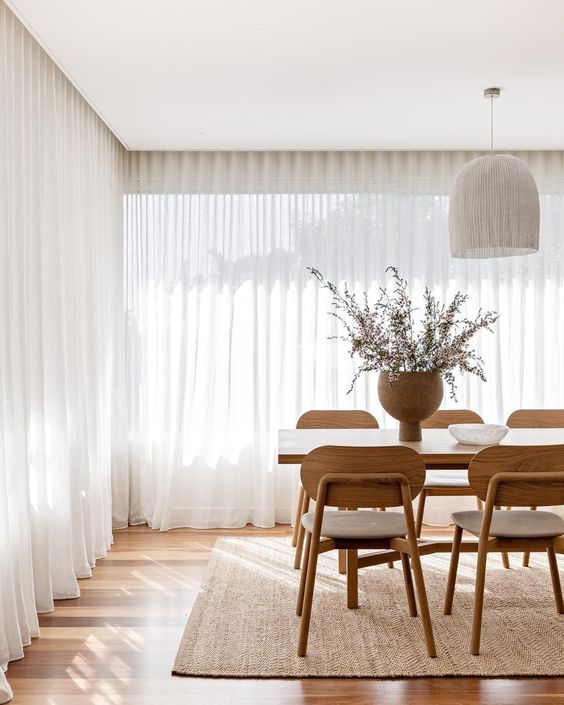
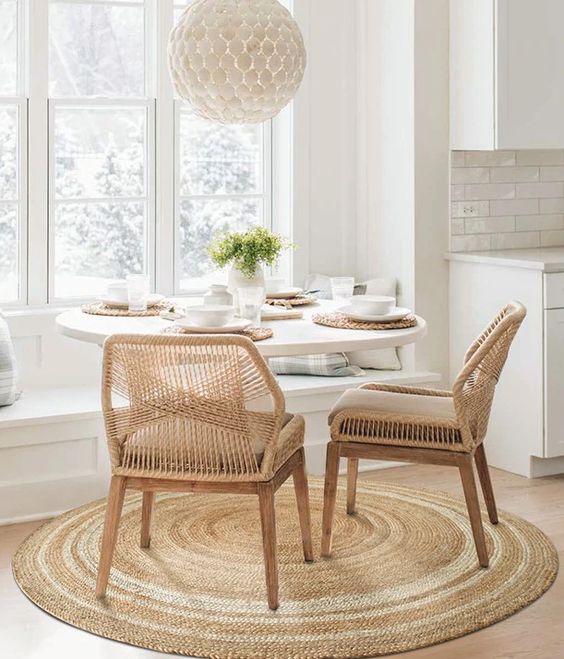
12. Combine Beige and White

The choice of color is the key to the atmosphere and appearance of the room. For those of you who want to make your bedroom feel calm, you can combine some neutral colors. White and beige are two colors that you can choose to decorate your bedroom.
The white color makes the bedroom look naturally bright. Create a natural look by lighting the room with sunlight. Therefore, try not to cover windows with curtains. And, the presence of beige in the room gives a soft, warm, and calm effect. You can play with natural materials in bringing beige to the room, such as rattan rugs for the floor, rattan pots for the plants, and so on.
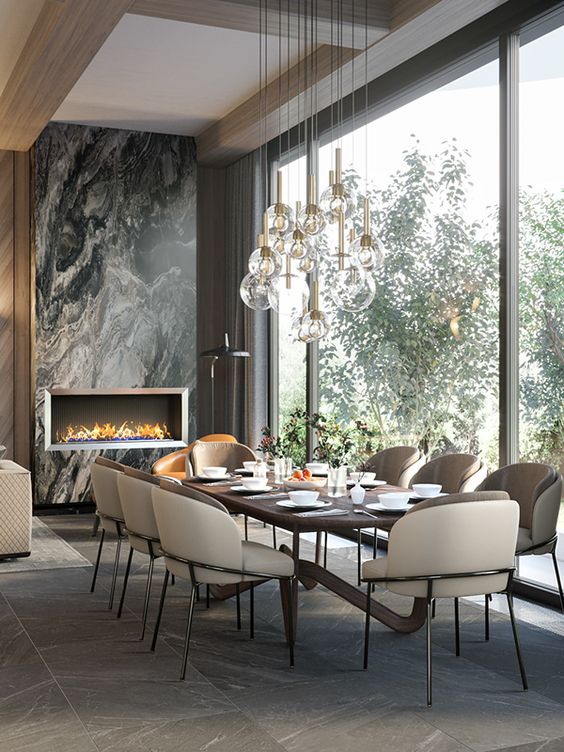
13. Place The Modern Fireplace Behind The Sofa
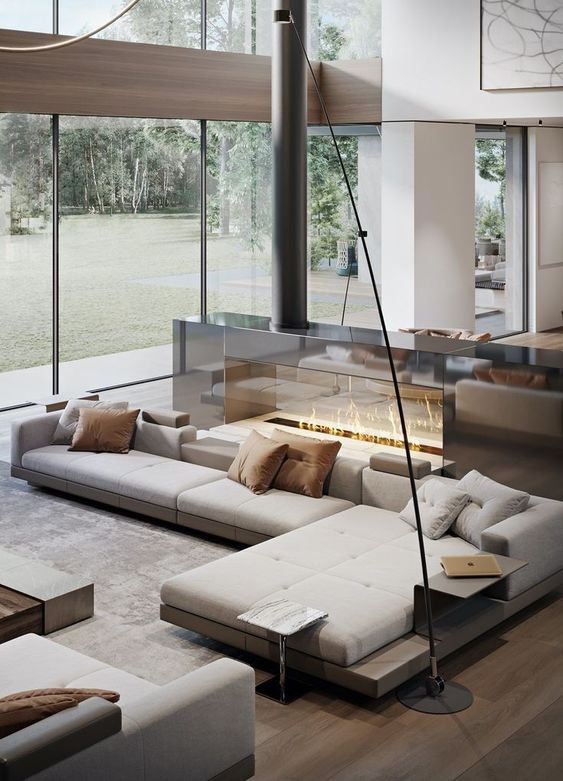
A warm room will create a relaxing atmosphere. Therefore, placing the modern fireplace behind the sofa is the next of 22 Decoration Tips That Will Make Your Room Feel Calming you can choose from.
In this one idea, you can see a living room with a modern minimalist design. A simple appearance is enough to make the atmosphere in the room feel calm. But, the tranquility can be felt more clearly from the fireplace behind the sofa. The modern fireplace fits perfectly with the living room concept so that the appearance looks so harmonious. There is glass in the modern fireplace so you can enjoy the view of the fires burning there.
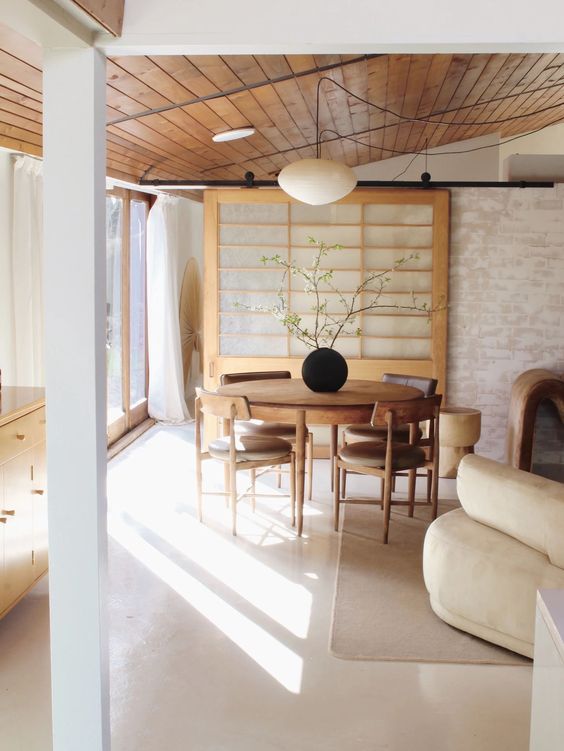
14. Add Vines on Timber
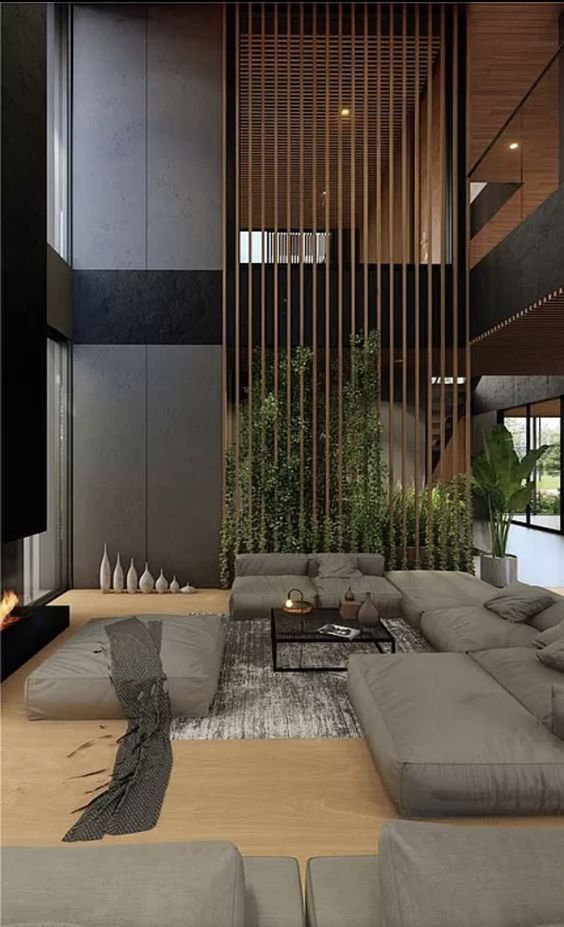
The open-plan concept has recently been chosen and applied to homes. The loss of a wall as a barrier makes the room feel wider and more comfortable. Usually, to provide boundaries between one room and another, timber is installed vertically. Several installation distances make other rooms still clearly visible. So, it does not really cover the room like a wall.
You can utilize the timber in the room to give beauty and also bring serenity to the room. Installing vines on the timber is the right idea. Vines wrapped around the timber will make this spot look aesthetically pleasing. Not only that, but the green color of the vines also brings freshness to the room and makes it feel more comfortable and calm.
15. Remove The Curtain on Skylight Window
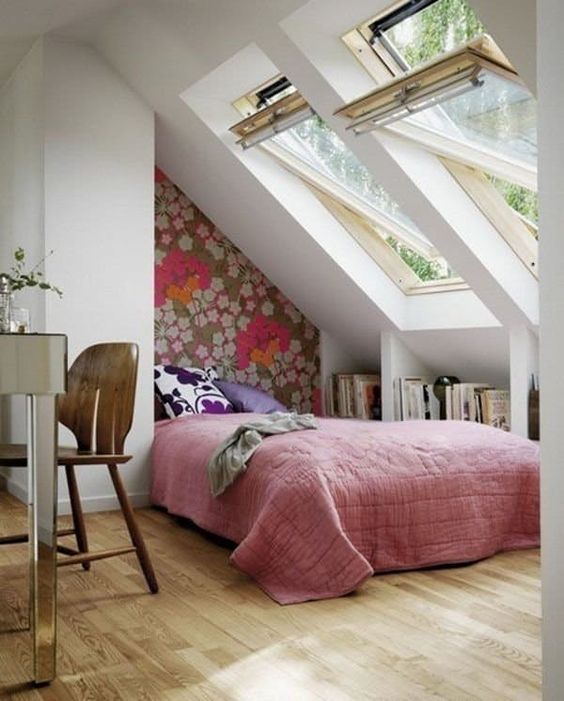
Skylight is a type of window that you can choose for the attic bedroom. Because of its small size, you need to maximize natural lighting. That way, the attic bedroom will be far from feeling cramped and stuffy that bothers. Not only that, but maximum natural lighting will also make the attic bedroom feel so calm. So you can relax and rest there comfortably.
To allow natural light to enter freely into the attic bedroom, make sure you do not use curtains to cover the skylight window. Leave the plain skylight window without any decoration.
16. Calm Reading Nook with Fresh Ambiance
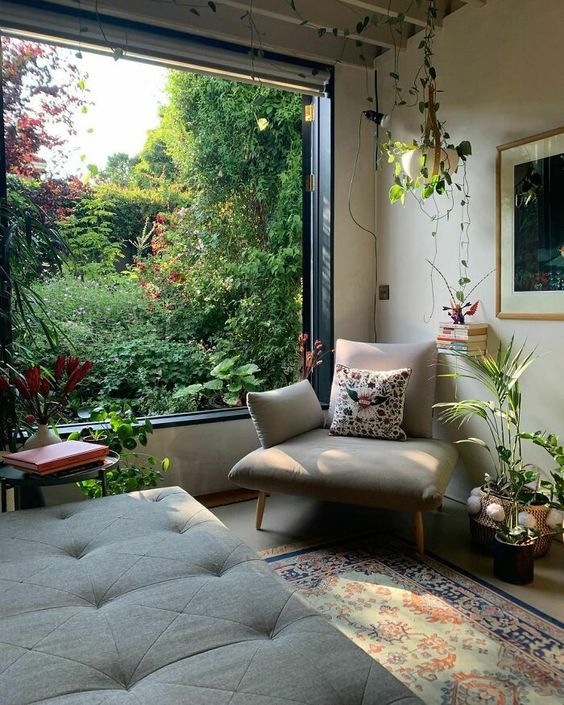
The corner of the room where the window is located in the most appropriate spot for you to make a reading nook. As we know, reading will be much more comfortable if it is illuminated with natural lighting. And, what you need here is how to make the reading nook a place full of comfort and serenity.
Place a small, comfortable chair in the corner of the room. This is the place where you will spend your time flipping through the papers. Decorate with a throw pillow with a beautiful picture to support the beauty of the reading nook. So that this area is full of serenity, choose neutral colors when decorating. Next, you just need to decorate your reading nook with some indoor plants.
17. Cozy Window Bench

A window bench is the most appropriate area for you to spend your free time. You can enjoy a fresh atmosphere outside the house from indoors. This activity can make you feel more calm and relaxed. Therefore, make sure your window bench area is as quiet as possible. Avoid using various kinds of decorations. Try to keep the window bench area as simple as possible.
The air that enters through the window gap will make your body feel cold. Therefore, when winter comes, you can use a blanket there. Also, put two throw pillows to make you feel more comfortable. The candles in the lantern are a light source that can bring warmth to the window bench.
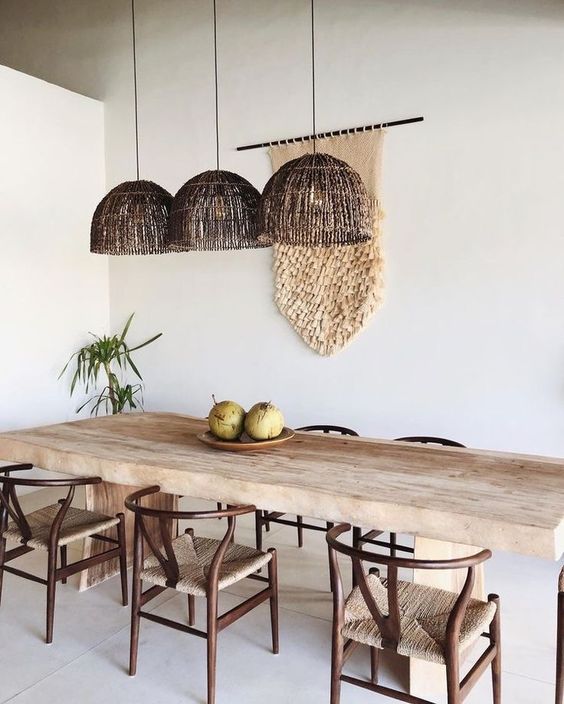
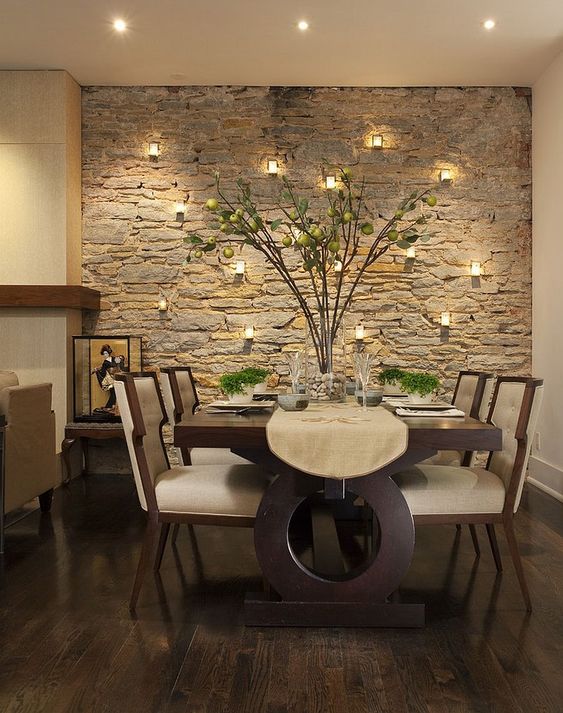
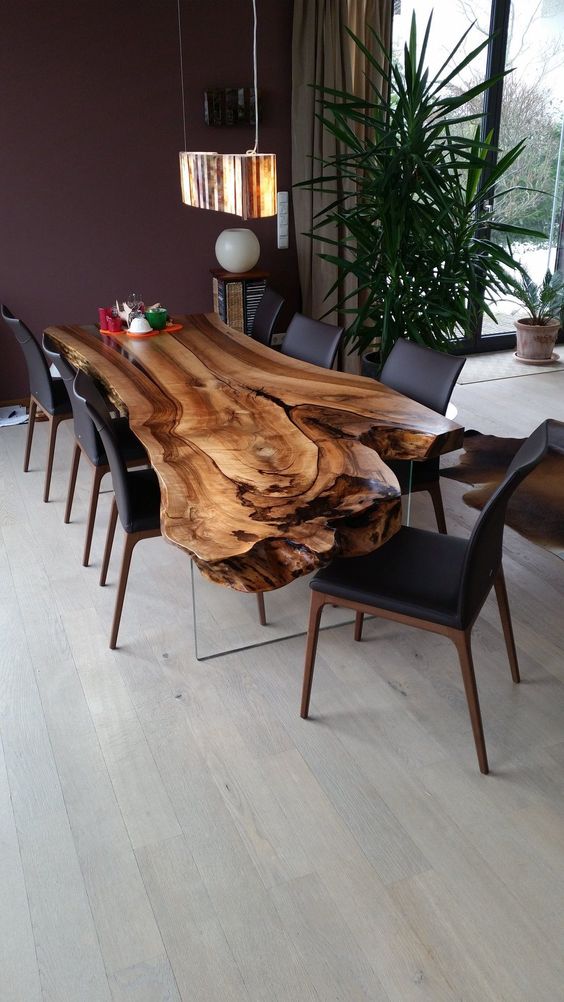
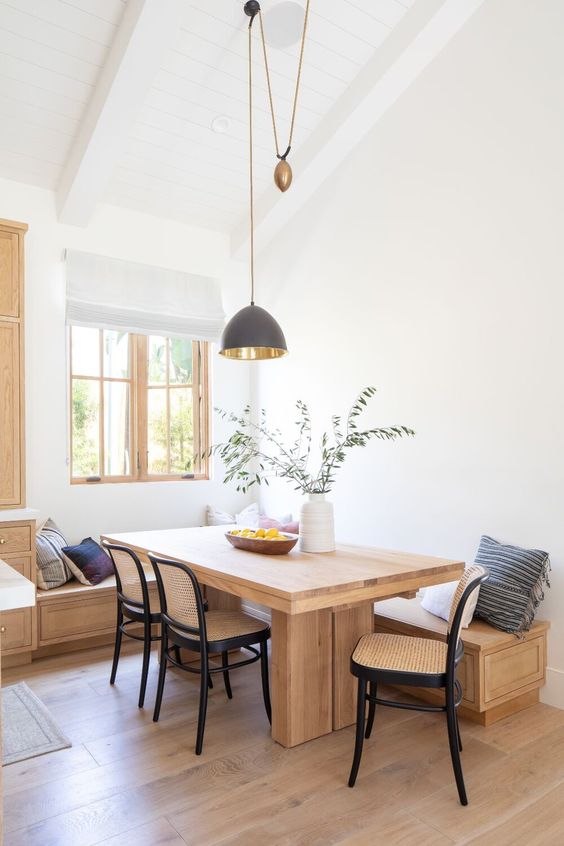
18. Hanging Three Globe Pendant Lights
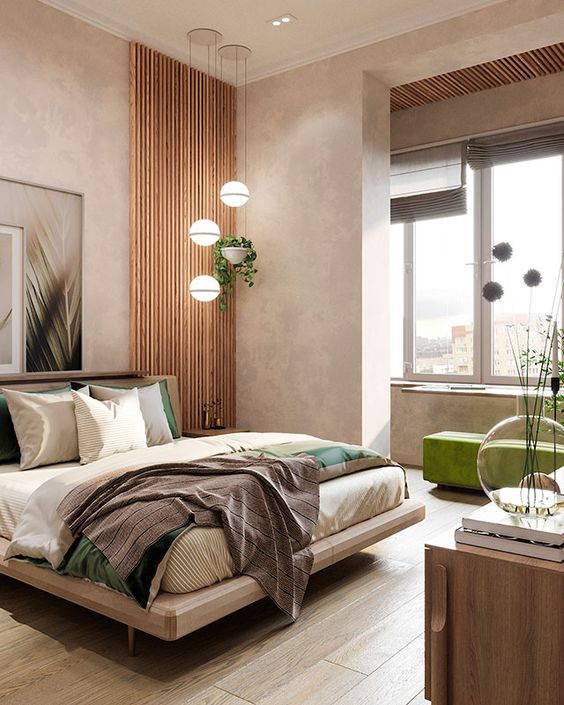
Vertically mounted timber provides an interesting accent to the wall. The texture and color of the wood can be seen more clearly with the lighting in the corner of the room. Three globe pendant lights are hung at different lengths making the light illuminate the timber from the top to the center.
The use of yellow light makes the natural brown color of the timber stand out more clearly. Where this changes the atmosphere of the room to be warm and also calm.
19. Install LED Light for Minimalist Bedroom
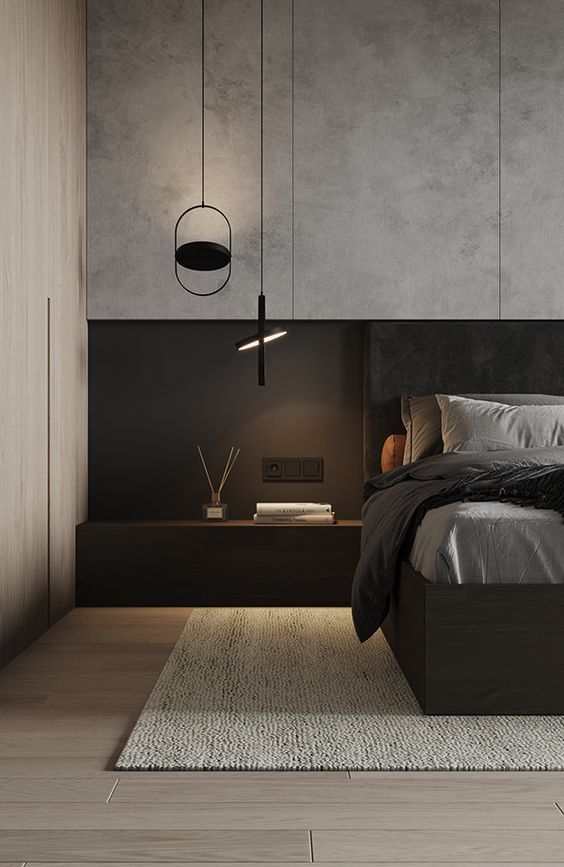
In a minimalist bedroom, it is highly recommended not to overdo it. Too many decorations will actually erase the minimalist side itself. Therefore, you need to know a good way to decorate a minimalist bedroom so that it is far from boring but does not eliminate the minimalist impression. And, installing an LED light on a floating bedside table is the right idea.
Instead of choosing white lighting, it would be better to choose yellow lighting. This one light is very good at helping neutral colors to create a calm atmosphere. With this, a minimalist bedroom can make your sleep sound and quality.
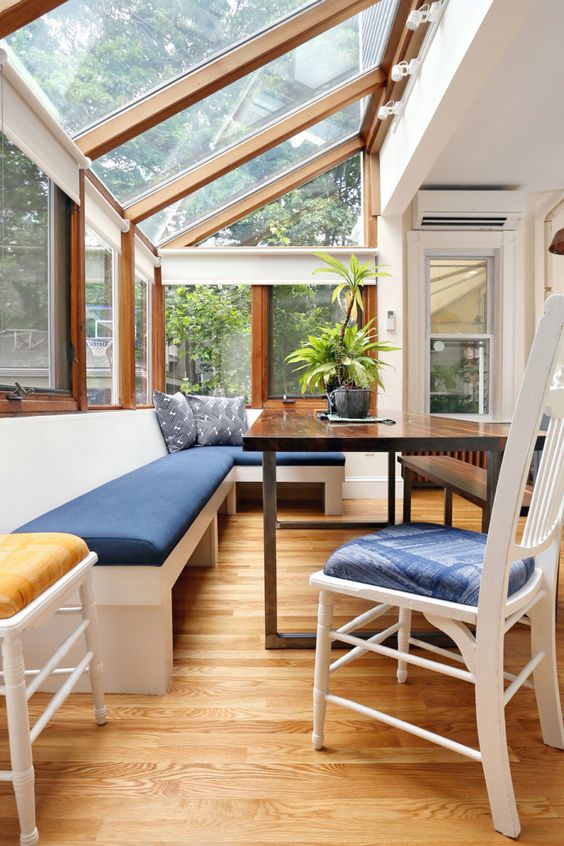
20. Dining Bench with Soft Seat Cushion
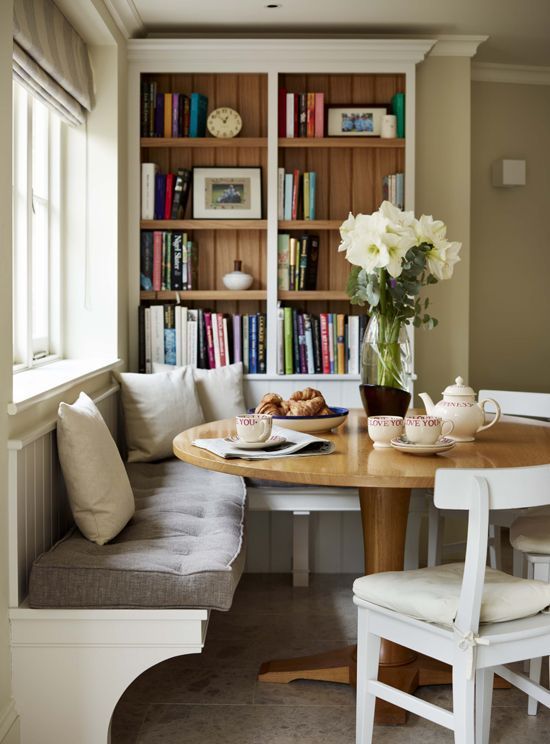
You can function in the dining room not only as a place to eat delicious dishes or enjoy a cup of hot coffee. You can also use the dining room as a relaxing area. With the replacement of the dining chair with a dining bench, you can sit or lie down there. Especially if right above the bench is given a thick, soft seat cushion.
You can also make the dining room a place to read books. With the built-in shelves right behind the dining bench, you can put all your favorite books there. Windows that are left open just let natural light enter freely. With this, reading will feel more comfortable.
21. Kitchen Floating Shelves to Display Vintage-Designed Items
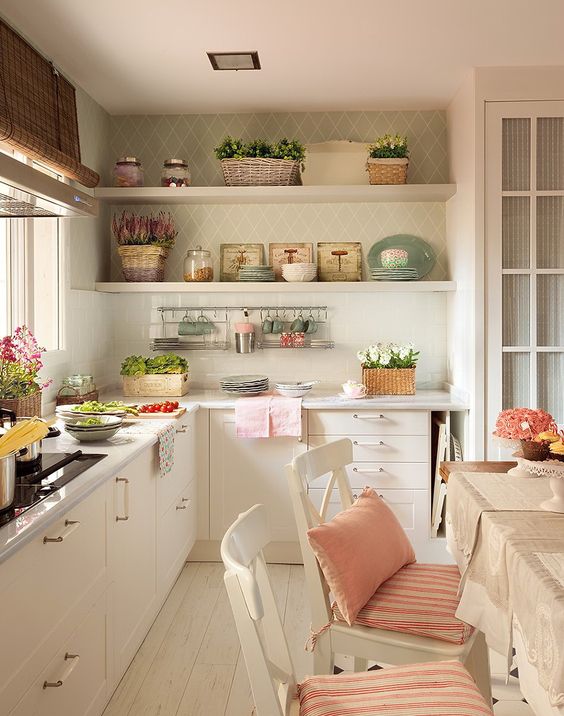
The vintage design has curved lines that cover the straight and stiff lines of the room. Moreover, this design also uses soft colors. Therefore, the look of a vintage-style room tends to be soft and has a calm atmosphere.
Do not store the kitchen utensils with a vintage design in the kitchen cabinet. You can use this as a decoration to add to the aesthetic value of the kitchen. And most importantly, displaying these items on the floating wall shelves will evoke a soft and calm atmosphere in the kitchen.
22. Add Diffuser to Your Workspace
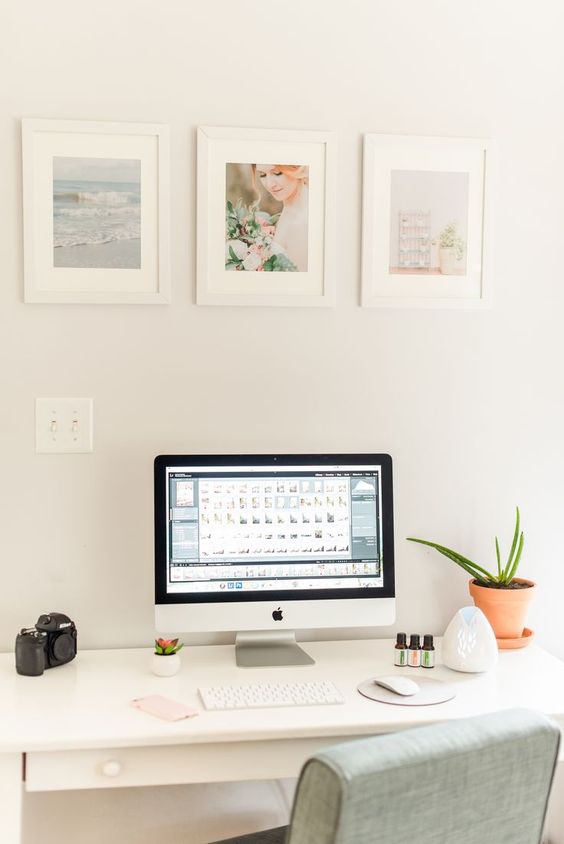
Comfort is the main point that you should pay attention to in decorating your workspace. Therefore, do not decorate your workspace with items that are useless or only win from an aesthetic point of view. Choose items that can support the beauty and be able to make the workspace a comfortable and quiet place.
You can decorate your workspace with a diffuser. With essential oils, you can feel calm in the workspace. Not only that, but the diffuser can also maintain air humidity and make the workspace a comfortable place.
Final Words
Not only beauty, comfort is also an important point at home. You would certainly prefer to rest in a comfortable place right? Therefore, make sure you create a room full of calm. That way, you can relax and make yourself and your mind fresh and relaxed again. And, the points above are 22 Decoration Tips That Will Make Your Room Feel Calming you can follow. So, good luck!