Home Blog Page 252

7 Simple Ways to Make Your Exteriors Look New Again

Beautiful, Newly Built Luxury Home Exterior

The exterior of a house has a significant impact on its worth. For instance, it can influence how your neighbors view other houses in the area. Fortunately, if the exterior of your home lacks appeal, a few tweaks may go a long way in reviving the whole façade of your property.

How To Spruce Up Your Exterior

Good news—updating your exterior doesn’t always mean spending lots of money, time, and effort. With a few easy fixes like the ones listed below, your home’s exterior will look fantastic and you’ll have a great curb appeal.

1. Update Your Landscaping

The significance of landscaping to your property’s façade should never be discounted. Adding strategically placed bushes and plants to the front of your house may help conceal a slew of flaws. It may also infuse the space with some necessary hue and vibrancy.

When you’re planting, be sure you don’t block windows or other light sources. If the branches on your trees or other plants are becoming a hindrance, feel free to trim them. Garbage disposal services are available if you’re concerned about the mess. You can read more about them on the internet.

2. Scrub The Paving

Over time, paving, pathways, and sometimes even doorsteps may become soiled and slippery. Using a pressure washer, you can restore their color and eliminate any unattractive moss from large cement sections and block pavement. Avoid splashing by using paving-specific pressure washer attachments.

You can get the same results with a brush and warm water on smaller areas like your doorstep or a short sidewalk. Whichever method you choose, make sure to use a cleanser made specifically for outdoor pavement. This will help keep the surface looking good and also keep molds from growing on it.

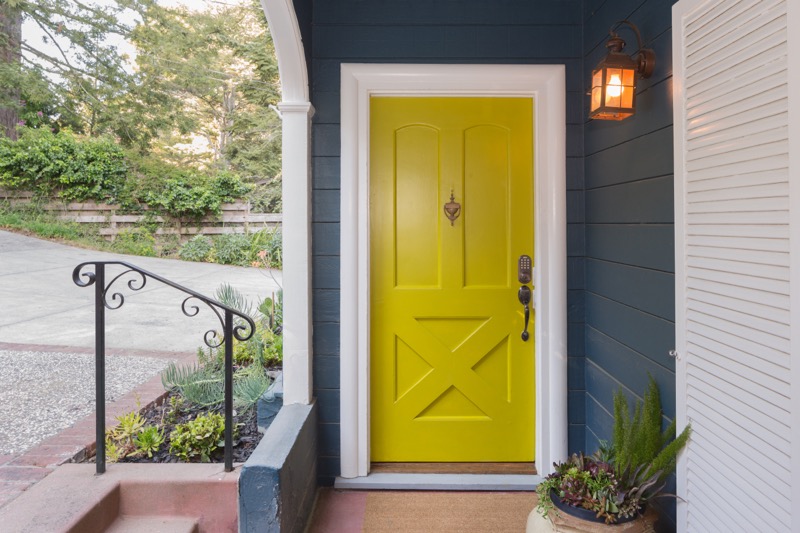
3. Add Color To Your Front Door

The front door is the primary entrance to your house and can be an effective representation of the rest of the house. So, be sure to care for it too and make it stand out. A bold choice like giving your front door a bright hue paint may be risky, but the results might be well worth the risk.

It’s important to choose the appropriate hue and finish. The color should also be influenced by your current paint scheme and the design of your home. The idea is to make it stand out without the front door becoming overbearing. If you’re able to achieve that delicate balance, you’re on your way to a much-improved curb appeal.

4. Replace Worn Hardware

Replacing worn-out door hardware may breathe new life into an outdated door. Moreover, everything around the new hardware also gets a facelift simply by being close to it. Thus, improve the look of your doors by replacing the locks, knobs, and other hardware.

5. Clean Your Windows

When seen from the outside, a house with clean windows looks more attractive. Additionally, it increases the amount of natural light entering your house, making it seem more spacious.

It won’t be a hassle to clean your windows if you have the proper equipment, especially if you have bay windows and windows on a higher floor. For instance, you can try using a window vacuum cleaner to get things done faster.

When cleaning your windows, don’t forget about the frames. These may also need a good wash and scrub to make them look better.

6. Hang Window Boxes

Window boxes have a certain beauty about them. Spend some time looking for ones that go nicely with the existing decor of your house. Window boxes come in a wide range of materials, such as plastic, wrought metal, and aluminum. These boxes could breathe new life into your home’s exterior when they’re decorated with vibrant flowers or lush foliage.

You can make your window boxes look like architectural features without spending too much money with a little additional work. One of the fastest and simplest methods to improve your exterior is to hang a couple of them in the front area of your house.

7. Clean Your Roof

The quality of your roof greatly influences your home’s appearance and functionality. If your roof is old and in need of replacement, it’s best to have it replaced. However, this may be an expensive improvement. If it’s still in excellent condition and can still last a few more years, a deep cleaning may restore its appearance by eliminating debris and algae stains.

Takeaway

Even the smallest changes can have a significant effect on your home’s exterior. So, if you want to freshen up your long-term residence or are contemplating listing your house for sale, these suggestions are the ideal way to add flair and freshness to your property. Use some or all of these tips to make your exterior look better. 

Where Can I Use Round Rugs?

Round rugs are becoming trendy to use in different areas and spaces in your home. You can use those rugs in any area of your room, such as bedroom, dining room, kitchen, kid’s room, and many other places. You may use it according to your needs but below are some good places to use a round rug in your home.

1. Living Room

Using round rugs in the living room is popular. Do you have an open and large living room? If you have a big room, you can place furniture anywhere in the room in a unique style; in such a room, you can place the round rug under the furniture to attract others’ attention.

But there is another option to place a round rug to allow the furniture on the rug’s perimeter. It will not just add intimacy but also give strong designing features. You can also place the rug separately without engaging it with your furniture.  You can keep your furniture items on the side of the rug that will also give an awesome look. You can find many unique and easy ways to place it in your living room.

2. Bed Room

Round rugs are widely used in the bedroom; you can place a round rug beside your bed for landing on a soft and fluffy surface. It will also add to its look and give a very fine and cozy touch to your bedroom.  Mostly rugs are used closer to the bed, but you can also place them in other areas in your bedroom.

If you want a nice look, choose a moderate-sized round rug and place it 6 to 12 inches apart from your bedroom side. It will give a better look to your room and give a safe and nice landing option when you get up. If the size of the bed is larger, like queen size or king size, then 8 inches rug could be a perfect choice for you.

3. Dining Room

It is also best to use round rugs in the dining room. Larger rugs are best to choose when your purpose is to use them in the dining room. When placing a round rug in your dining room, make sure chairs do not get tripped with the rug and are free to move. Choosing a 30 inches or larger round rug is the best choice for use in the dining room.

You can also place a round rug under the square dining table, but make sure your rug does not touch the walls. So place the dining table in the mid of the room if possible. But if you place it closer to a wall, make sure the rug does not touch the wall.

4. Kid’s room

It is best to use round rugs in the kid’s room. Your kids can sleep on it, play on it, and can study on the round rug. Choosing a nicer, versatile, stylish rugs could be a better decision for your kid’s room. Try to place it between the rooms or place it apart from furniture items where your kid can easily sleep or land.

Final Thoughts

There are plenty of choices to use round rugs. We have also provided you with some of the easy ways to use them in the above places. You can consider any of the above ways. But you can use them in various other places such as in the kitchen etc.

How to Decorate Your Room Using Round Rugs?

Round rugs come in versatile and beautiful designs that make them suitable to use for rooms decoration. Round rugs are a modern and unique style that perfectly matches your furniture, room style, and other environments. But there you need proper ways to give a nice look to your room.

If you are looking for amazing ways to decorate your rooms with round rugs, then my below content will be helpful for you.

Ways to use a round rug in your room

There are plenty of ideas, but below are some excellent and easy ways to give your room décor a unique look by using round rugs.

1. Use a round rug under the round table.

Do you have a round table in your room? Then it could be a nice experience to place the round rug under the round table; it is an obvious and smarter choice. It will make a good balance with the table and look very charming. But make sure you have picked the right size of the rug according to table size.

2. Round rugs help to create a cohesive look.

You can use round rugs for perfection and balancing in your room if you have many round objects in your room. You can shape them well if they are disconnected by using a round rug.

It may assist you in uniquely connecting them without making them messy. You can pick a custom round rug in a bright color to make your rooms and areas awesome looking. Place the round rug in the center of your room to connect all separated round items.

3. Give a wider look to a small space.

Using a round rug in a small space could enhance its look. Designers widely use round rugs to give it a nice look that feels bigger than the actual. You can place the round rugs for nooks, small offices, or kid’s rooms. Round-shaped rugs give a nice look to the entrance in the room.

4. Can dress up your corners

It is very challenging to improve a blanked corner of your room. Suppose you do not have enough space in the room corner or have an item to place in the corner, then placing round rugs of manageable size. It will give a fine and nice look to the corner.

5. Use round rugs for layering purposes.

In most decorations, we need layering because, without proper layering, your room not gives a nicer look. If you need to place something on the floor for nice decoration, then use the round rug.

A round rug is a better choice than other rugs because they are easy to manage and have a unique style that easily matches your room. No matter what style of room or furniture you have, a round rug will easily match the setting. It will give a very fine look.

Final Thoughts

Round rugs are uniquely styled and colorful options that you can use in your room decoration. You can place round rugs in several ways to decorate your room to give it a fine and nice look. We have provided simple ways to decorate your rooms with round rugs.

What are Pool Heaters ?

Even though heating a swimming pool consumes a significant amount of energy, many people consider it a good investment due to the increased utilisation the pool will receive as a result.

Solar, heat pumps/electric, and gas are the three basic kinds of pool heating. We’ve outlined the possible benefits and drawbacks of each to help you decide which pool heater is right for you. The most common technique of heating a salt water pool is with a gas pool heater.

How Does it Work?

Solar pool heating works by heating circulating water with the sun’s free energy and returning it to the pool at a higher temperature.

PROS

Eco-Friendly. We should be worried about our impact on the environment now more than ever before, and solar powered heating is the finest option in this regard.

Affordability. For a typical sized pool, a solar heating system can be installed for under $2,500.

It requires minimal maintenance. After it’s been installed, there’s almost nothing left to do but relax and enjoy the warm water!

Long-lasting. Internal wiring and moving parts are absent from solar pool heating systems. This means they won’t rust because there are fewer components that can rust. After a long period, the only damage you’ll notice is from the sun, and it’s usually easy to heal.

It’s simple to set up. Solar pool heating systems are quite simple to set up. You can, in fact, do it yourself. It  requires climbing to the roof and connecting some plumbing, so only attempt it if you’re a skilled roof climber! Alternatively, a handyman or a local pool supply business may be able to help.

Low-cost. Solar heating is completely free! The heating will not cost you anything once the setup is complete.

CONS

It is inefficient compared to a gas heater. Solar heating is most efficient when the panels are exposed to direct sunshine, hence it is ineffective at night. Some of the systems have advanced control settings that can help with these problems.

It takes up a lot of room. A certain quantity of surface area is required for this pool heating to perform successfully. Solar panels should cover roughly 260 square feet in a 1632 pool (512 square feet). For other homes, this is simply not doable.

Gas Heating

How Does it Work?

Natural gas or propane are used to heat swimming pools. The gas is consumed, heating copper coils through which the water runs and is then heated before being returned to the pool.

PROS

The initial investment is minimal. In comparison to heat pumps, gas pool heating requires a lower initial investment, and it is often even less expensive than solar pool heating.

on demand heat. Gas heaters heat swimming pools quickly and effectively, regardless of the pool’s size or existing temperature.

External weather conditions aren’t a problem. Unlike the solar heating or heat pumps, gas heaters are not affected by the weather or other external influences.

You can easily use this for a salt water pool.

CONS

Life expectancy is short. In comparison to solar, a gas heater has a much shorter lifespan. Although regular maintenance and repairs can extend the life of a gas heater, the typical lifespan is five years.

Not good for the environment. Gas heaters are not only more expensive to run since they release carbon dioxide, but they also have a larger environmental impact.

Heat Pump or Electric Pump Heating

An electric pool heater, often known as a heat pump, works by pumping warmed water back into the pool after it has been heated in a heating tank. Your pool is kept warm by a continual exchange of cold and heat. Electric heaters come in two varieties: water-source and air-source. The water-source heater transmits heat from a water supply to your swimming pool water, whereas the air-source heater uses heat from the air.

In a saltwater pool, any of the heaters listed above will work. A heater for a saltwater pool should cost between $1,350 to $9,500 for the average customer. A salt water pool can last upto 15 years.

When choosing a pool heater, the best place to start is determining how frequently and when you’ll use your pool, your budget, and what best matches your pool and home. Choosing the correct pool heater should be very simple once you have a basic understanding of these factors.

Home Security Improvement with Smart Gadgets

What do we normally go for when it comes to home security? Alarm systems, surveillance cameras, wired fences and lights around the yard. Keeping your home secure doesn’t always mean from intruders, but the overall safety of your home including potential fires.

There is a way Smart gadgets can help with the overall home security of your home. Smart gadgets are commonly known for automating homes and for their energy efficiency, but what we don’t realize is that their remote control and wireless access make them the perfect devices to keep your home safe.

Here are some smart gadgets and how they can help with home security.

1. Video Doorbells

Video doorbells are like the upgraded, smart versions of video intercoms. So why are they great for home security? Well, not only do you get to see who’s at your door when the bell rings, but with smart video doorbells, you can answer to door from practically wherever you are, and that is because these devices feature their own mobile apps that allow for this remote and wireless access. Their cameras give you a full head-to-toe, wide-angle view of whoever is outside, and you can also receive alerts whenever someone’s outside even if they haven’t rung the bell.

Although video doorbells without subscription tend to have fewer features, but they are still well enough to serve for home security measures. With subscriptions you can unlock features like facial recognition, Cloud video storage, etc.

2. Smart Cameras

Much like all smart devices, the greatest aspect of smart cameras is that the video feed is accessible from mobile apps that are downloadable onto smartphones, tablets and laptops. You could be at work, in the kitchen, or even in another city, but you can watch over your home anytime and from practically anywhere.

Smart cameras feature two-way audio that makes it easier for you to communicate with whoever is at the other end. They also send in alerts to your mobile devices when any movement is detected while you’re away – so get real-time notifications with a video snapshot of what you probably missed out on.

These cameras have a video feed in HD quality, with excellent, colored night vision for you to see clearly what’s going on even if there is low light or if it’s completely dark. They are available to be installed indoors and outdoors, with wired as well as wireless, battery-operated ones that can easily be placed anywhere you like. It’s perfect for hiding it on the shelf to keep an eye out for getting to the bottom of whoever has been secretly eating your stash of cookies.

3. Smart Smoke Detectors

Part of making your home a secure place means to have the right protective gear in place – and that includes smoke detectors. A very crucial part of the average American household is a smoke detector, a device we usually don’t pay much attention to until the occasional battery change beeping.

Smart smoke detectors have the capability of detecting smoke whether almost unnoticeable or a flame, as well as poisonous gases like carbon monoxide. If wired, all smoke detectors begin to sound the alarm, and with smart ones, it guides you to where exactly a potential threat has been detected. Get alerts on your smartphones, and turn off false alarms easily.

4. Smart Door Lock

Door locks are meant to keep our homes secure, but keys can be duplicated, stolen, lost and locks can be picked by those that have mastered the art. Smart door locks make your locks keyless and tamperproof. That essentially erases any attempt of break-ins.

Create personalized passcodes to unlock your smart door lock, or unlock using your smartphone – whatever you choose. With these you don’t have to entrust anybody with the keys to your home again if you don’t want to – unlock the door for anybody you wish to, from wherever you are. Get notifications whenever your smart door lock is unlocked, and set auto-lock schedules for the doors to lock automatically right after they close.

With the mobile app there is a lot that you can do; like even checking your lock status, and locking the door while you’re on your way to work if you had previously forgotten to.

6 Tips To Keep Your Garage Neat And Organized

How long has it been since you last organized your garage? Long enough, right? Let’s buckle up for a round of garage cleaning and organizing!

Let’s face it! Garages are used more as dumping sites for clothes you have grown out of, stuff that you find hard to deal with, empty paint cans, car washing supplies, etc., than as a space to park just your car. No matter how hard you try to shut your eyes to the mess, it will always be there to haunt you and make you feel stressed out. So, before it’s too late, take some smart measures to keep your garage clean and organized. It will save you from unnecessary hassle and sky-high expenses that may surface later.

So, are you ready to come to grips with a highly daunting task? Listed below are a few tips that will help you better organize your garage and keep it mess-free for a more extended period.

Clean and secure the garage’s entrance

Start with the garage door. A garage door not only keeps the house safe from unexpected break-ins and entries, but it also adds to your home’s curb appeal. To get a semblance of things, brush off any loose debris holding on to the door, or wipe it down inch by inch to remove any splotches or stains. You can also buff the hard ones out with your hands.

After cleaning, next comes safety. Garage doors and windows provide burglars with easy access to the inside. A little carelessness may cause you a pretty penny, so be vigilant and upgrade your garage security. So pick up the phone and commission a garage door repair to get your noisy, squeaky, and damaged door serviced and install protective locks. Doing so will also add value and appeal to your house and save your possessions from unfortunate events.

Declutter, donate and toss out unwanted stuff

Tired of garage clutter yet can’t help but hoard stuff regardless of their use? Learn to let go of things; otherwise, your garage will turn into a mess soon after you clean it up. When your wardrobe stuff reaches the garage, remember that it is time to say some goodbyes.

If you aren’t sure where to start, it is imperative to move with a strategy. For example, begin sorting stuff in categories like frequently used, annually used, never-used to make it easy. Also, start with clearing up the floor so that your car can enjoy more space. Once you have sorted everything, purge through the never-used stuff to find anything you still want to keep. Donate the never-used stuff, which may be useless for you but might spark joy for someone else. Also, toss the irreparable things like a cracked racket that you have been trying to fix. Regular decluttering is instrumental in keeping the garage clean and organized for a long time.

Look for storage ideas that work for you

Garage organizing is all about clever tips that keep the stuff off your way and make it look appealing. Listed below are the do’s and don’ts that will benefit you while organizing your garage.

  • Toss the dated seeds that you kept for gardening a year ago unless you want frequent visits from pests.
  • Use empty coffee jars to store the hardware and other small items, but wash them up beforehand.
  • Use cost-effective shelves instead of cabinets for easy access to frequently used things. You can also use wire shelving as it’s space-efficient and compliments the space at the same time.
  • Use cabinets for keeping stuff that needs protection from dust and moisture.
  • Use a pegboard for lightweight items like hand tools.
  • Keep heavy items like bicycles off the floor and hang them up on ceiling hooks to protect them from damage.
  • You can also use the overhead space by hanging stuff like ladders, seasonal sports gear, etc.

Install a workbench

If you are a handyman who likes tinkering with tools, or you have a habit of repairing, building, and maintaining mechanical equipment, a workbench is a must-have. Whether you go for a workbench with pinboard or one with multiple drawers, a workbench will provide you with a solid foundation to work on. It will help in keeping the garage organized and clutter-free. Not only do you have extra storage space to keep your things in one place, but you have a base that will make your work much more manageable. Workbenches come in various designs. You can opt for a wall-mounted-fold-down-model that tucks out of the ways when unused, benches with built-in drawers, or even a simple worktable placed near a pegboard.

Use epoxy floor coating

As a homeowner, you must have heard about epoxy floor coating. Even if you haven’t, here’s the thing. An epoxy floor coating adheres to your garage floor better than any conventional oil-based paint making it look shiny. It provides the floor with a super high gloss finish that is also mold and waterproof. Don’t let your dingy concrete slab bring down the appearance of your organized garage. Get an all-inclusive kit and make your garage floor stain-free and antiskid on a free day with a temperature of 50-80 degrees for proper drying.  It’ll be a lot easier to clean every time there’s an oil spill.

Adhere to cleaning tips

Like every room of your house, your garage needs regular cleaning too. Adherence to the following tips will help keep your garage clean for an extended period.

  • If you live in temperate zones, use pesticides to fend off insects that emerge during spring and summer to keep your possessions in the garage safe and sound.
  • Hose down or wipe off the garage floor regularly.
  • Treat instant oil and grease spills with kitty litter to prevent them from becoming permanent ugly blotches.
  • Declutter your garage every season to save yourself from unnecessary work.

Conclusion

A garage is just as important as any other room in your house. Keeping it clean and organized will give you an overall sense of satisfaction and make your home look more organized and appealing. The task may seem daunting, but the outcomes are worth the effort. Chances are you may even start to enjoy doing things outdoors more. The tips mentioned above will help you maximize your cleaning efforts. These tips will not only keep your garage organized, but they will also protect your investments, such as your car. So get your stuff and begin cleaning now.

7 Landlord-Friendly Ways to Decorate Your Apartment in Paris

When you own an apartment, renovating and decorating are easy. After all, you are the only person you have to consult. However, living in a rented apartment is an entirely different story because there are clauses in the tenant-landlord agreement that limit how much you can decorate your space.

Even so, it doesn’t mean that you are limited on design choices. There are still ways you can make your apartment feel like home without getting in trouble with your landlord.

In this post, we show you seven landlord-friendly ways to decorate your apartment when living in Paris.

Use temporary wall decorations

One way to make your Parisian apartment feel like home without pissing off your landlord is by adding pictures and art to your walls. Worth noting though is that many landlords insert clauses in the lease agreement that ban hanging pictures with nails.

Fortunately, you can go to your local store and get removable hooks, Japanese strips, and command strips. With these temporary alternatives, it’s easy to change the decorations whenever you like.

Hide bad flooring

While you can request your landlord to do something about the aging floor, the reality is this may not happen until your tenancy ends. A quick way to add color to the floor is by investing in a quality rug or two to cover the old carpets for a long time. Even a cheap rug can add style to your space and bring out a rental property’s hidden personality. A runner in a hallway can upgrade the feel of the hall or entrance leading to the bedroom.

Install mirrors

Apart from checking your outfit before leaving the door, a mirror is a great way to make a small space feel bigger, due to its reflectiveness. Try positioning a few different mirrors around the house to amplify the space. If you don’t have space to hang a mirror, you can use standing mirrors in corners.

In the kitchen, you can position a mirror above the sink to make it appear roomier while allowing natural light to set in further. Ultimately, this can bring out a dash of class and elegance.

Upgrade the light fixtures

Most landlords pay the least attention to lighting, so it’s understandable if you wish to upgrade some, if not all, of the lights. If the rental has bare bulbs or unsightly pendants, you can add a refreshing touch to it by replacing the shades.

Remember to keep everything safe so that you can restore the light fixtures to the same condition when moving out. Also, position some table lamps on a side table or hall to create a homey feel and add some personality to the space.

Refresh the kitchen

Many people overlook the kitchen when decorating their apartments in Paris, yet it’s among the easier places to spruce up. Consider using a removable peel and stick backsplash behind the counters to add a bit of texture and color.

You can also ask the landlord to replace the handles with more aesthetically pleasing ones. Other things to add to your kitchen include colorful towels, a hanging fruit basket, sophisticated wooden cutting boards, and more. Additionally, invest in quality kitchen appliances and cooking utensils and play with how you display them.

Be creative with soft furnishings

You might not be allowed to use a different paint on the wall, but you can add a splash of color and texture to the room using animated wallpaper. Think of colorful cushions in the living room and ravishing bed linen in your bedroom. When done properly, soft furnishings can make a room come alive – perhaps even better than a can of emulsion.

Use greenery

What about adding some plants and flowers to lift the mood in your space? Besides adding life to your room, they also help to clean the air and eliminate toxins. Making your place look elegant and clean the indoor air are other reasons to add them.

Don’t just limit the plants to your living room; consider adding them to the bathroom, too. For example, plants like cacti thrive well in a  warm bathroom space.

Conclusion

Decorating your rental does not need to be complicated or damaging. You can find many creative ways to upgrade your space without violating your landlord’s rules. If you’re not sure whether the decoration you’re about to effect is alright, check with your landlord to confirm. These are just a few tips to take your apartment to the next level.

No matter how strict the decoration policy, there’s always something you can do to bring out the full potential of your room.

Six Reasons Why You Need a Crockery Unit for Your Home

It’s not a crime to own too many plates. However, the difficult part is to keep them organized. You don’t want your precious glassware strewn across the kitchen for lack of space.

So, what’s the solution? Crockery cabinets, of course!

Crockery units have been a kitchen design staple for decades. There’s no denying that the trend is timeless. Besides providing you with a space to arrange your ceramics, they also lend a beautiful, classy appeal to your kitchen/dining room décor.

Whether you choose a free-standing crockery unit or a wall-fixed one, you’re in for a treat. Let’s look at six remarkable advantages of having custom-made cabinets for your crockery.

1. Helps Display Your Crockery in Style

If you have quite a few eye-catching porcelain dinner sets, don’t stow them away in a dark corner of your overhead loft. Instead, you can invest in a crockery cabinet with glass panel doors.  Not only does it allow you to create a pretty display out of your ceramics, but also keeps them neatly compartmentalized.

2. Protects Delicate Crockery

Fine china and glassware are notoriously brittle. Needless to say, they need a lot of tender love and care. A crockery unit can safeguard your beautiful collection from falling and breaking unceremoniously. Find a cabinet with special shelves for different plates, bowls, cups, and glasses. These can keep the ceramics upright and steady, no matter which way you move the unit.

3. Enables Quick and Easy Maintenance

Sure, the lesser you use your best glassware, the longer it lasts. But tucking it away indefinitely can do more harm than good. Ideally, you should take your dinner sets out of their slumber every three to four months, wipe them with a soft cloth, and give them an airing before placing them back.

Sounds like too much work? A crockery unit can make things easier for you. With your delicate crockery only an arm’s length away, you won’t have to go through hell and high water to access them. All you have to do is open the cabinet door, take out your crockery carefully, and you’re good to go!

4. Provides Increased Storage

Are your dinner plates hogging all the space in your kitchen cabinets? Do you have to keep your spice bottles in the refrigerator because there’s no room in your drawers? If the answer to these questions is ‘yes’, then a crockery unit is a must-have for you.

Crockery cabinets can ensure clutter control by holding the majority of your dinnerware, especially items you don’t use as much. Based on your requirements, you can choose a multi-shelf unit to keep all your china in order.

Additionally, drawers and doors in these crockery units can hide frequently used tableware, such as placemats, coasters, and runners. The possibilities are endless!

5. Keeps Your Crockery Dirt-Free

In case you’re thinking of keeping your china out in the open, think again. Regardless of where you stash them, they will collect dust. Consequently, you’ll have to undertake frequent cleaning missions to keep them sparkling, and more importantly, hygienic.

A crockery cabinet can save you from this hassle with ease. Because covered cabinets keep dirt and debris at bay, you won’t have to schedule cleaning sessions for your dinner sets anymore. That’s a great time-saving hack right there!

6. Adds a Decorative Element to Your Décor

There are multiple ways you can use a crockery unit to make a fashion statement. For starters, adding attractive lighting inside the unit can amp up its style quotient. Plus, from a functionality point of view, this can act as a secondary source of illumination in the kitchen.

That said, crockery units aren’t meant for the dining area alone. You can place them anywhere around the home to take the room’s décor up a notch.

For example, use an antique, wood-finish crockery unit to display books and showpieces in your living room. Place some vases and picture frames on the flat top, and you have yourself a chic mantelpiece-style arrangement.

Bottom Line

There’s a reason why crockery units have been around for so long. They offer the perfect balance of style and purpose, providing you with some much-needed extra space in your kitchen while elevating its design. Now that you know the many benefits of installing a crockery unit in your home, don’t hesitate to get one for yourself.

Author Bio:

Riley Swanson is a lifestyle blogger, passionate about food, fashion, home improvement, and traveling. She is also an avid traveler and shares her traveling experiences in her blog Riley+Christian Travel.”

Arrangement Of An Elite Office

The office is the place where the most important decisions on the conduct of the labor process are Arrangement of an elite office

The office is the place where the most important decisions on the conduct of the labor process are made. It is intended for discussion of complex issues requiring attention. At the same time, the office is a room for meeting visitors, business partners, work colleagues, heads of various companies and government officials.

As for elite offices, as a rule, they are furnished with expensive furniture, which not everyone is able to afford. Despite this, such an expensive setting is the best way to help relieve tension and create an atmosphere of peace, without disrupting the business orientation of the meeting.

Purpose of elite offices

While in the office, people should feel the desire for active and successful creative activity. The purpose of the furniture in this process is to emphasize and sometimes artificially create a business atmosphere, demonstrate the originality and refined taste of its owner, and inspire guests with a sense of confidence in their owner.

Some researchers compare the presence in such rooms with attending a hypnosis session or meeting with an unexplained phenomenon, under the influence of which there is a spontaneous signing of such documents, which under normal conditions a person would never sign.

Components of elite offices

Instances of this class of furniture are made exclusively from natural materials: wood from valuable species of wood, genuine leather. It should be noted that the processing of future furniture during its manufacture is also carried out in a special way. It combines both handicraft like a gun cabinets. So is the use of the latest high-tech equipment, which makes it possible to speed up the process and improve the quality of the product.

Decorative elements are made of precious metals, paint is applied by hand, carving is done by specialists, thus emphasizing the uniqueness of the created masterpiece, its consummateness, the respectability of its future owner, his ability to tastefully choose the interior of his workplace.

The furniture itself, which stands out for its sophistication from the environment, is unlikely to be able to provide the desired effect in creating a creative atmosphere. For this reason, it should be considered only in conjunction with the rest of the decoration of the room. In pursuit of such a goal, all the design work carried out to complete the appearance of the interior is entrusted to an experienced architect who has the skills of both a psychologist and a designer.

A person with such skills is able to compare the location, appearance of all interior details in order to achieve the desired result from the created composition in the future. It is in the process of design development that the project of the furniture itself is born. An important space you should not neglect is the restroom area. Upgrading them is important, as a clean and welcoming restroom can make or break your business image. Sites like onepointpartitions.com can help you find a bathroom design suitable for an elite office space.

Manufacturers of luxury cabinets

In recent years, many furniture manufacturers have begun to adopt the experience of foreign competitors, taking on the production of custom-made furniture in a wide variety of options. To do this, manufacturers use the latest technology, complementing the impeccably made samples with the most unique manual processing.

Now the furniture is in no way inferior to interior items made by top firms, and has its own individual, unique, inimitable style, distinguished by the highest professional skill of its execution.

Nevertheless, German companies are considered to be one of the most famous furniture manufacturers at the moment. It is furniture from Germany that is preferred by respectable companies that dominate the European market. The prestigious furniture produced in this country is mainly made to order, making it one of a kind.

An Installation Guide for a DIY Porch Swing

Making a DIY porch swing can transform your porch into an extra living area. We will demonstrate how to build one on the weekend using inexpensive items that you can find inside your home.

A porch swing can be considered one of the most remarkable improvements you can make to your outdoor living space. Rather than purchasing an expensive version from a store, try to make one out on your own.

Steps on How to Install a Porch Swing

Before installing a porch swing, check to ensure that your porch’s ceiling construction is solid enough to hold a two-person swing. If your joists are correctly supported at both ends, you should be safe to attach the swing.

This swing is intended to be hung from the ceiling using a hook. Choose an S-hook suited for outdoor use (galvanized or stainless steel) and has a minimum operating load rating of 500 pounds. Additionally, your hook’s diameter should be not less than 1/2 inch, and its threaded shank should be a minimum of 4 inches long.

Collaborate with a friend and set up an afternoon to finish this project. Consider painting your new porch swing to add character and add some color with outdoor pillows.

Instructions

Our guide below will teach you how to build a porch swing. This outdoor project will take several hours to complete, plus time for staining or painting the swing.

1. Cut wood pieces

Using a table saw, cut the wood pieces based on the cut list above. Determine the necessary curved accent angle for the detail you want on the rear of the porch swing. This will be mounted on the 47-1/2″ x 21″ backboard.

2. Construct the base frame

Assemble the swing’s base by aligning the two 47-1/2″ x 3-1/2″ planks parallel to one another. To construct a rectangle, align two 18-inch x 3-1/2-inch boards perpendicular to the two longer boards at each end. The long sides should be divided and marked into thirds with a tape measure, then place the other two 18-inch x 3-1/2-inch boards between the two longer boards at those points. Glue and clamp until completely dry, and after that, pre-drill the holes and install with screws.

3. Connect the frame supports

Along the long sides of the swing foundation, position the two 58-inch x 3-1/2-inch planks flat. Each edge of these planks should protrude 5-1/4 inches beyond the frame. Put screws every six inches to the 47-1/2-inch boards and to where the 58-inch board joins the 18-inch planks.

4. Assemble the seat

Align one long edge of the 47-1/2-inch x 3-3/4-inch board with the 47-1/2-inch x 26-inch plywood sheet. Attach the board in place and secure using clamps until it dries. From the bottom, screw the components together.

5. Attach the seat

Flip the base frame so the longboards are on the bottom. Place the seat, board side down, on top of the frame, with the edge of the board flat against the frame’s side. On the other side, there should be approximately 1-1/4-inch overlap. From the bottom of the seat to the frame’s bottom borders, you must s crew every eight inches or so.

6. Assemble the back

Position the two back pieces to ensure that the cutout patterns pair up, and use the shorter (7-inch tall) board on the top. Draw a straight line through the middle of the smaller board using a pencil and straightedge. Screw every six to eight inches along the length of the line. Vertically align the two 5-1/4-inch-wide back support pieces, one on each side, against the plywood backboard. Draw a line through the center with a straightedge and then attach with screws along the line.

7. Assemble the sides

On your work table, place one of the angled 18-inch plywood side pieces flat. Align the 18-inch x 3-1/2-inch board on the plywood’s squared edge. Draw a line through the center of the board using a straightedge and screw three screws on the line. Rep with the opposite arm.

Align the angled support board perpendicular to the plywood against the 18-inch board with a squared edge flush against the plywood’s longer side and the angled edge pointing toward the plywood’s shorter edge. Secure the 10-3/8-inch support board by marking and drilling screws. Carry out the same procedure with the opposite arm and 10-3/8-inch support board.

Perpendicularly align a 33-1/2-inch-long arm board along the plywood’s long edge. The arm should be offset approximately 1 inch from the plywood’s angled side and 7-1/2 inches at the squared side. Screw at the top of the arm board on the border of the plywood and where the arm meets the angled support board 10-3/8-inch. Rep with the opposite arm.

8. Connect the arms to the base

Align one of the completed arm panels against the side of the base, using the 18-inch x 3-1/2-inch board perpendicular with the 58-inch x 3-1/2-inch board attached to the side of the seat. Your angled edge of the plywood side piece must face away from the swing, toward the back. Drill your holes in advance and use screws to secure the side piece to the base frame along the base of the plywood side. Carry out the same procedure with the other completed arm panel.

9. Attach the backboard

Attach the swing’s back panel by putting a screw through the plywood side pieces to the back panel’s sides. Seal the seat’s bottom and back foundation with a line of external wood glue.

10. Insert the side trim

Position the 18-5/8-inch x 3-1/2-inch angled board beneath the armrest to make the angled edges flush with the armrest’s bottom and base support’s top. Secure with a screw. Rep on the other side.

11. Sand and smooth

To avoid weathering, seal the screw holes using exterior wood filler. Once completely dry, use sandpaper to smooth off any rough edges.

12. Borehole’s drilling

Drill a 1-inch borehole into every bun foot with a hole saw. Drill a 1-inch borehole in the middle of every baseboard below the armrests. Make two holes at either edge of each armrest, precisely on top of the holes in the baseboard.

13. Knot the ropes

Determine the height of the hanging hooks with the desired distance between your swing and the ground. Allow several inches for knots. Any extra can always be trimmed later.

Attach the rope’s end down into the front of the arm and base through a bun foot, starting on one side of the swing. Secure with an overhand knot. Reverse the procedure with the opposite end of the rope at the backside. Do not cut any excess rope until the swing is hung since this will allow you to make any necessary adjustments to your knots, as well as the swing’s height and balance. Repeat on the opposite side of the swing, and then hang.

Recent Posts

Posts You Might Like