Home Blog Page 254

8 Pest Control Tips To Reclaim Your Kitchen

Professional contractor doing pest control at kitchen

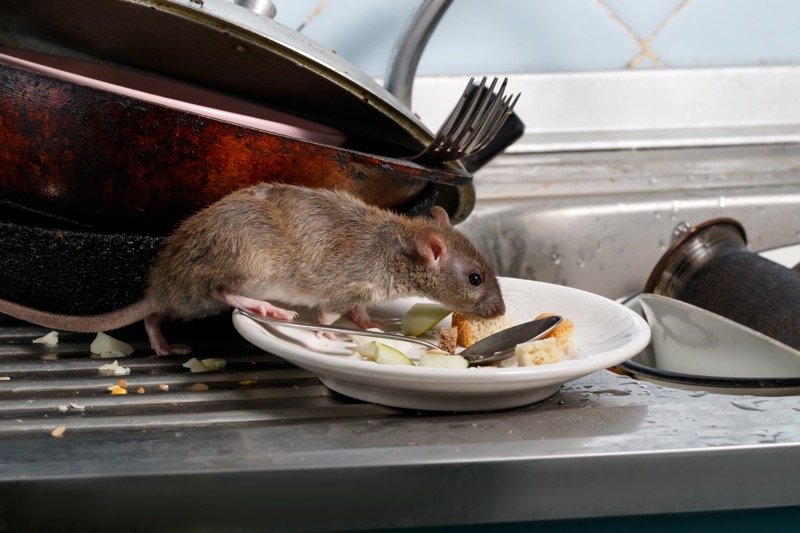
The kitchen is the favorite place for the whole family to gather. It’s where you prepare delicious meals and bond with family members or guests. Sadly, it’s one of the locations in your home where you might face unwelcome visitors which you don’t want to have in your home.

Rodents, cockroaches, ants, fruit flies, spiders, and pantry pests are likely to find their way into your kitchen. The presence of these pests can pose a health hazard since they can contaminate food, spread bacteria, and make your kitchen an unclean space.

If you’re facing a pest problem in your kitchen, make the right choice by working with a professional. When searching for a reputable pest control service for your home, checking out Cleargate Pest Defense Services and others can effectively help deal with your pest problem.

With the help of a pest control service, you’ll have the assurance of effectively eliminating any pests you’re facing. Make sure to perform regular cleaning and maintenance of your kitchen. Here are pest control tips to keep your kitchen free of unwanted visitors.

1. Tidy Up

A damp, cluttered space is where pests are likely to thrive. One of the effective ways to keep your home free of pests is routine cleaning with these measures.

  • The kitchen counters, corners, and nooks should undergo regular cleaning using a disinfectant cleanser.
  • All surfaces of appliances, shelves, and countertops must receive a thorough scrubbing, ideally every two days or daily if you have time.
  • Clean the interior of the cupboards or cabinets.
  • Regularly inspect the space below the refrigerator and other large appliances since things can easily roll under and accumulate over time.
  • When you have curtains in your kitchen, regularly wash them since they’re likely to hold on to odor easily.
  • After cooking, make it a habit to clean up everything as you go instead of setting it aside, leaving behind a mess that can easily attract pests.

Performing these cleaning measures will keep your kitchen clean and less likely to attract pests.

2. Block All Potential Entry Points

Installing nets or screens on the kitchen windows can prevent the entry of pests such as house flies, cockroaches, spiders, and mosquitoes. This approach ensures good ventilation in your kitchen while keeping any unwanted pests out. If you have any open vents, you can seal them with a wire mesh.

Throughout the years, the kitchen goes through continuous wear and tear. Most homeowners often overlook minor damages in the kitchen. When you have broken floor tiles, deteriorating roofing, or missing backsplash tiles, they become entry points for ants, spiders, cockroaches, and even rodents. Generally, pests are likely to hide in these crevices or gaps, so you need to carry out immediate repairs.

3. Proper Storage Of Food

Any food left in the open can attract pests. After cooking or eating, make sure not to leave behind any food items in the kitchen. It would be best to store any leftovers in the refrigerator right away or keep them in airtight containers.

4. Discard Ripe Vegetables And Fruits

Vegetables and fruits shouldn’t be left out in the open, especially if they’re getting too ripe. Make sure to store them in the fridge, eat right away or discard them. Remember that overly ripe food attracts flies and other insects, which can result in an infestation issue.

5. Proper Management Of Waste

An effective way to limit pests is to use a heavy-duty airtight plastic or glass trash bin. Always make sure to cover the bin at all times. If you’re planning to set up a compost bin, use a well-sealed container outdoors, ideally away from the kitchen. Doing so can prevent insects and rodents from swarming into your kitchen.

Avoid allowing any waste in your garbage bin to stay too long. It’s best to dispose of the kitchen wastes daily to lower the risk of pests infesting your home. When there’s no waste inside your home, you’ll have a clean and pest-free kitchen.

6. Avoid Leaving Pet Food And Water Overnight

If you have pets, clean up any leftover pet food and water before resting for the night. Nocturnal pests such as rodents and rats will look around for food sources and might find their way to your pet’s food.

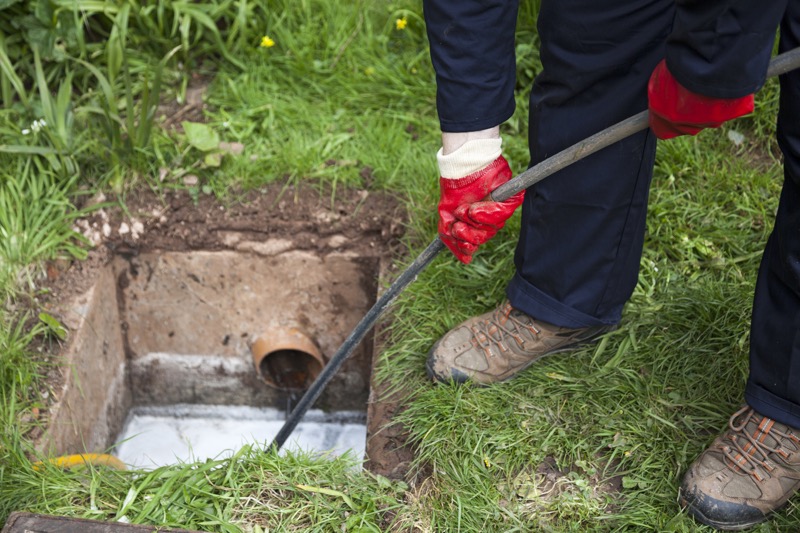
7. Repair The Plumbing

When you have leaks in your kitchen, the resulting moisture can damage any wooden elements and serve as the ideal breeding ground for small insects you usually find behind shelves and dark crevices. Even minor leaks require timely action to prevent pests from multiplying over time.

8. Keep The Kitchen Dry

Once you fix any leaks in your kitchen, make it a priority to keep all surfaces in your kitchen dry at all times. When water or any other liquid such as oil combines, a grease-like compound forms which attracts pests. If the mixture is left out too long, it can discolor your cabinets permanently. With this in mind, always keep your kitchen dry by wiping down any water or liquids away.

Final Thoughts

If you’re already facing a severe pest infestation in your kitchen, consulting a professional pest control service is the best move you’ll make. Once the professionals complete their job, you must stay vigilant in keeping your kitchen clean and clutter-free with the help of these valuable tips.

Why Homeowners Are Selling Without Realtors

While there are plenty of ‘for sale’ signs emblazoning the lawns of most neighborhoods, you may also be noticing that properties are changing hands without a single realtor inspection occurring.

This is because many homeowners are deciding to sell to cash buyers, and they are able to enjoy a wide range of benefits by doing so. If you’re curious about why this is happening, it may just be for some of the following reasons.

You Get to Keep All the Money

Many people start searching for information about ‘selling my house without a realtor’ because they’re curious about how much of their house sale money they get to keep. The short answer is all of it.

In many situations, if you don’t have a mortgage and haven’t sold your property as an investment, the money you receive from a cash buyer is what will enter your bank account. You don’t have to pay any realtor fees, spend money staging, or cover your back taxes. Your preferred cash buyer generally takes care of everything.

No Open Houses

Most homeowners know that holding open houses is one of the best ways to sell through a realtor, but that doesn’t mean they are enjoyable. You have to spend time decluttering, putting your personal possession away, and making sure your home is clean and tidy for prospective purchasers.

You also have to vacate and be ready for someone to schedule a viewing at a moment’s notice. It can be stressful when you’re trying to carry on with life as usual.

When you sell to a cash buyer, you don’t have to hold any public open houses. The cash buyer will inspect the property in its as-is state and generally make a decision after one viewing.

No Repairs or Maintenance

One of the most popular reasons homeowners sell to cash buyers is to avoid making any repairs or maintenance. Sometimes, the reason why they are selling in the first place is that they can no longer keep up with what a property needs to stay in excellent condition.

Cash buyers purchase homes as they are, and you don’t even need to vacuum or weed the gardens before vacating.

Faster Sale

It can sometimes seem like realtors ‘for sale’ signs sit on lawns for months before a property eventually changes hands. During that time, the homeowner may be paying advertising fees and putting up with endless open houses.

Faster sales are almost guaranteed with cash buyers. Most of them make a decision about whether they want to buy in 48 hours, with the legal paperwork taken care of in as little as a week.

Less Risk of Falling Through

One of the most heartbreaking moments for any homeowner is being excited about closing the deal and moving, only for the sale to fall through at the last minute. That generally doesn’t happen with cash buyers who make offers with certainty and usually don’t have to worry about bank financing. You can be sure that when they’re making an offer, they genuinely want your home.

There are many different ways to sell your home, but there’s a reason you may have noticed not everyone is choosing to sign up with a realtor. These benefits above are just a few of the many reasons people are starting to explore their options.

Why Is Sleep Important for Children and How to Improve It?

Getting quality sleep is not only good for your child but it’s essential for your child’s physical and mental development.

In this post, we’re going to talk about the benefits of sleep, what’ll happen if your child doesn’t get enough sleep, how much sleep is ideal, and tips for improving your child’s sleep.

Let’s start with why sleep is important for children.

Why is sleep important for children?

Sleep is super important for your children’s growth. It affects the development and functioning of your child’s mind and body.

A good night’s sleep will improve your child’s attention span, resiliency, vocabulary, cognitive performance, learning skills, memory, fine motor skills, and mood.

While these benefits are already a lot, the list doesn’t stop here. Kids who get quality sleep develop their brains faster and have a stronger immune system in adulthood compared to kids who don’t get quality sleep.

What happens when children don’t get enough sleep?

All sorts of problems occur when children don’t get enough sleep. Children can become grumpy and hyperactive (they both are symptoms of ADHD).

Lack of sleep in early childhood can lead to long-term effects on academic performance and mental health. Not enough sleep at any age can lead to obesity, allergies, diseases, substance abuse, and bad motor skills (children are at higher risk than adults).

How much sleep is ideal for children?

There is not a fixed number. The ideal amount of sleep depends on the age of the child. Below we’ve listed the ideal amount for children of all ages.

  • Under 1 year: 12-16 hours
  • 1-2 years: 11-14 hours
  • 3-5 years: 10-13 hours
  • 6-12 years: 9-12 hours
  • 13-18 years: 8-10 hours

Tips to improve sleep

Some kids go to sleep easily and others don’t. If your kid is having a problem getting quality sleep, apply the tips we’ve mentioned below.

First, we’re going to share some basic tips and then we’re going to give you the best tips for each age group.

Here are some good sleep tips:

  • Turn off all electronic devices 2 hours before sleep
  • Encourage your kids for a light playtime
  • Make your kids wear breathable cotton pajamas
  • Tell a story right before bedtime
  • Don’t let your kids take naps longer than 20 mins
  • The nap should be taken during the early afternoon
  • Give a toy for protection against ghosts
  • Limit caffeine consumption
  • Don’t drink coffee past afternoon
  • Take a warm bath before bed
  • Have a comfortable and supportive kids mattress
  • Pair the mattress with a kids memory foam pillow

These are all good tips and any one of these tips could improve your child’s sleep quality significantly. At different ages, kids make different sorts of trouble during sleep time. Let’s talk about what kind of problems kids make at what age and how to solve them.

Infants: At this age, your child may not have developed the circadian rhythm yet. If your child doesn’t sleep through the whole night, know that it’s normal.

If the child doesn’t go to sleep soon after waking up, talk with them and touch them gently (don’t pick them up). If the problem persists, your baby is probably hungry or needs a diaper change. In either case, do what needs to be done quickly and quietly.

Toddlers: Toddlers may make trouble at bedtime because of two reasons. Separation anxiety and fear of missing out. They’ll cry and argue with you to get what they want.

The solution is to give them control over minor stuff and reassure them you’re not far away. Ask them what pajamas they want to wear, what book they want to read, you get the drill. Make sure to be firm yet kind, getting angry with kids can have effects on their health.

School kids: At this age, kids have a lot on their plate. They go to school, do homework, have a social life, and have extracurricular obligations.

All this can be stressful and make it hard for your kid to get proper sleep. To counter this problem, you’ve got to be extra careful with school kids’ bedtime and sleep routine.

It’s best to create a consistent sleep routine and have your kids follow it even during holidays. Also, stop your kids from playing and doing homework in the bedroom.

Teenagers: It’s common for teenagers to have a later circadian rhythm. Meaning, when kids become teenagers they tend to go to bed later. This is not the case with all teenagers.

Identify the natural sleep timing of your kid and create a schedule that aligns with their circadian rhythm. Another good tip for helping teenagers form better sleeping and waking up habits is to form healthy sleeping habits yourself.

Teens imitate their parents’ behavior so they’ll automatically pick your healthy sleeping habits.

That’s it! We’ve covered all the tips. If you’ve found this post helpful, share it on social media so others can benefit as well. If you’ve got any questions, let us know in the comments section.

The Best Minimalist Bedroom Design Ideas

At least bedrooms are hairy to assemble, not because of the need for furnishings and furnishings, but simply because people have the capableness to buy and dispose of a lot of effects when preparing a room Might look good. As the name suggests, the tools and accessories challenged to make the least sense are littlest junior is really more. A general rule of thumb is to keep everything as simple as possible, so if you suppose of everything as a box within a box you’ll find it ticklish to complicate the look. You can buy simple box wardrobes, box bed bases and fresh, while maintaining buffed lines and uncomplicated exteriors. Now providing here is to you the minimalist wallpaper choice to make a good look.

Designs preferences

Some people struggle with this, but they prefer the design of their appointments to reflect their tastes. What they fail to see is that with a fewest entry, some of the autograph pieces you use inside the room automatically come the focal points of the room. So if you like minimalist shapes, but want to add a part of the bohemian mood, you can breed a minimalist room in one color and either choose differing bohemian pieces, possibly a damask bed spread or Take a rustic, luxurious chairman to your agency.. The devil is in the detail, because where the detail is added, fewest measure around it incontinently draws excess attention.

So effectively, you need to stretch a simple, slightest painting of the bedroom to get started. Using the ‘box inbox’ tack, it’s wise to enrich only one color, or a limited palette of parallel colors, for representative all white. So, when a varying piece is added, it has a smaller effect, namely throwing seeds in a white room to increase the heat.

Bold frames and wallpapers

Once you’ve got your rubbed, slightest painting, you can start making stuff. Black and white prints work well in bold frames. It’s a good idea to put them all together on a wall, or in a place like a bed. To help you, floating shelves are a good choice and can be copped cheaply from IKEA. You can junk pieces of wood to cover any part of the wall or as a glass frame, to add a rustic effect. The black color used on the bottom, whether it’s carpet or wood bottom, helps light rainbow chambers to throw furnishings in comfort.

Wallpaper accessories

We cannot help with the accessories, but we can help you plan your room and advise you on how to fit your bedroom furniture. However, get us at Pinnacle KBB or visit our bedroom mart, If you are short on ideas or need some happiness or friendly advice. As the Managing Director of Pinnacle KBB, I understand the weightiness of consulting experts when redesigning my kitchen, washroom or bedroom. Choosing a style and setting according to your home and tastes can be tricky. Knowing that you have expert fitters, installing your new within can be a great relief to be known for the standard service and securing that you get the sporty results you can swing with your plutocrat.

 Special bedroom designs and papers

When we talk about interior designing, designing an up-to-the-minute bedroom is the most tricky task for an originator because you shape not only the within but also the dreams. A well- designed bedroom plays the most important work in shaping the mood of the tenants, which in turn helps them to see and shape their dreams. Again, the person who’s tired from the day’s work wants some comfort in the bedroom and a beautifully designed bedroom helps in quick psychological recovery which gives him enough enthusiasm to start anew the succeeding day.

Ultra-modern designs for bedrooms

An innovative design course helps professionals develop rain bow ultra-modern design ideas and taking a look at the informal within design websites will give you ample testimony of how these ideas work now. The notion of space-age bedroom design is swayed by multitudinous sources. There are multitudinous space-age minimalist designs that are complex or simple enough to stimulate the natural imagination. There are some designs, which come with creative usage of colors as well as communal lights on the walls that occasion an atmosphere outside the world, which calms the mind. If you are interested to get the canvas wall art designs for bedroom or for any place so just visit here are available.

Specific interior designs

Interior design ideas normally involve the installation of introducer wood paneling that creates a whole new look. Designs using wood paneling are generally used in space-age apartments and this is the rearmost rage. Again, a classic pattern is more suitable in large chambers with old chambers. Classic designs are enough to occasion a quaint look of the bedroom that creates a sense of love. In general, large houses with large carpets in pastoral areas are more suitable for this type of design. You’ll surely find beaucoup of these antique look designs in the interior design cinema that you’ll find on the internet.

Buying Your First Home in Canada? Here’s Everything You Need to Know

Buying your first home is a great way to your independence and moving into the future you’ve always dreamed of. However, as a first-time Canadian homebuyer, there are a few key things you should know about the real estate market in the Great White North. Let’s take a look at some of these details.

The Housing Market Varies Across the Country

The Canadian housing market is incredibly multifaceted, and it varies across all provinces and territories on a number of factors.

For example, let’s start by considering affordability. As of 2020, the most affordable place to buy a house was in New Brunswick (costing an average of 3.8 years of wages to purchase an average home). On the other hand, the most expensive location was British Columbia, costing an estimated 13.4 years of wages to buy an average home in this province. More specifically, Vancouver ranks as the most expensive city in Canada to buy property.

With that in mind, you need to do thorough research into the nature of the housing market in the province or territory you hope to buy in. If you’re hoping to buy in Ontario, become extremely well-versed in the Ontario housing market. If you’re hoping to buy in Alberta, focus your research on the Alberta real estate scene.

Buying a Condo Is Different From Buying a House

If you’re a city dweller, there’s a good chance you could be looking at condos for your first property purchase. While condos are an excellent investment, buying one carries a different set of considerations than a traditional house.

Specifically, condo owners don’t need to just pay a mortgage; they also need to pay condo fees. The amount of condo fees you pay typically depends on the square footage of your place. This range can vary quite widely; for example, in Toronto, condo fees cost roughly $0.50 per square foot but can reach up to $1 per square foot. These fees are used to cover the maintenance costs of communal spaces, such as gyms, pools, saunas, or rooftop barbecue areas.

You Can Save Money With First-Time Homebuyer Incentives

Canada is home to some great first-time homebuyer incentive programs. For example, there is the Home Buyers’ Plan (HBP), which enables first-time homebuyers to take up to $35,000 out of their RRSP in order to finance their down payment. There is also the GST/HST New Housing Rebate, the Home Buyers’ Amount (amounting at $5,000) and the Land Transfer Tax Refund (for buyers in British Columbia, Ontario, or Prince Edward Island).

You’ll Need to Have a Large Amount Saved for a Down Payment

The minimum down payment for a property in Canada is 5%; however, this rate only applies to the first $500,000 you spend on a property. From $500,000 to $999,999, you’ll need 10% and once you exceed $1 million, you will need 20% of the purchase price. In order to fund purchases of this level, you need to have a significant amount of money saved.

For first-time homebuyers, navigating the real estate market can be a daunting process. However, with the help of this guide, you’ll be able to better understand the Canadian housing market and make more informed decisions. Happy house hunting!

5 Steps to Install Your Homemade Aquarium Canister Filter

An aquarium might be the best stress reliever during this pandemic season. Most people consider this as an excellent product for their kids. In addition, fishes can provide happiness to their owner when they multiply. Thus, an aquarium also requires excellent maintenance to maintain its good condition. The Kings of the Aquarium gives us some information about the equipment that might be ideal for your tanks.

This information includes a Homemade Aquarium Canister Filter. It is an outstanding tool to make your tanks in good condition for your fish. Also, it can provide great assistance to make your fish pets healthy. It can filter the debris that your fish produces. That is why you also need to make it functional to serve an excellent effort.

For this article, we want to share some details on how you can install your Homemade Aquarium Canister Filter. Plus, the essential thing that you must provide is to align and construct this filter in your aquarium. Therefore, the information below can play a crucial role in achieving the proper usage of your filter. For that reason, keep in touch and read the section below.

What do you need to provide before installation?

First thing first, when making your Homemade Aquarium Canister Filter, you need to provide the following materials;

  • 8 x 4 inches diameter of PVC pipe
  • 1 to 4 inches diameter of the plug
  • 1 to 4 inches diameter of the rubber end cap with a hose clamp
  • Two female garden hose repair ends
  • Two of half an inch threaded valves
  • Four of ¾ inch to half an inch of threaded plastic hose connections
  • One male garden hose threaded
  • Three PVC grates about one and a half-inch tall
  • One ¾ inch 90-degree corner tube with hose ends
  • Small hose clamps
  • PVC cleaner
  • PVC glue
  • Teflon tape
  • Aquarium silicone
  • 20 inches of ¾ inch tubing
  • 5 inches of 1-inch tubing
  • Three small zip-ties
  • Pump
  • Filter media:
  • Poly sponge
  • Knee-high stockings
  • Bio-balls

Some tools are essential to make all the parts together. It includes the following;

  • Drill
  • Small drill bit
  • Coping saw
  • Utility knife
  • ⅞ inch of a spade bit
  • Channel-lock pliers
  • Tape measure
  • Flathead screwdriver
  • Needle nose pliers
  • Sanding block
  • Scissors

Steps for Installing the Filter

This section contains the steps that you need to follow when installing this filter project. It consists of the information below;

Step #1: DRILL HOLES IN PIPES

Providing holes is the first step to insert the screw to put together all the pipes. Then, place a spot and drill from the bottom of the PVC above the rubber end cap. The Small bit is the tool that you must use to make the holes. Then, use a garden hose adapter to screw it perfectly. That way, you can keep the spade centered.

However, be careful to use these tools. Safety first before anything. Also, drill slowly to manage the dirt that you may cause after.

Step #2: SET YOUR FILTER BASKET

To grate and cover the floor grains, you need a filter basket. You might need to cut the filter basket in diameter to fit inside the pipe for some reason. And to cut it, a coping saw is required. It is challenging to do. That is why feel free to do it twice or thrice until you get the perfect cut that can satisfy you.

Step #3. CONNECT VALVES AND HOSE

It is necessary to stop the water flow when you need to change the filter media. As for that, you will be using the valves. First, attach the Teflon tape on the threaded ¾ inch to ½ inch tube connector and thread it to each valve. After that, connect the hoses to the pump and the valves.

With the use of a female garden hose connector, attach the filter. Use the channel lock plier to pinch the connector down into the hose when you might need to slide the hose. And to stop the hose from sinking, attach a 90-degree corner to the bottom.

Step #4: USE FILTER MEDIA

The poly sponge was the filter media in this project. It is placed in the cleaning section of the hardware department. Commonly, most people use this to clean cars and houses because it is resistant to solvents. Besides, unlike dishwashing sponges, poly sponges don’t have large holes.

To use it in the canister filter project:

  1. Place it on the filter basket.
  2. On the other hand, place the activated carbon on the second basket.
  3. Fill them up using plenty of activated carbon.

Step #5. INSTALL ALL TOGETHER

Before anything else, clean and wash everything to remove all the dirt left when working on them. Then, at the bottom of the pipe, put the rubber plug and tighten the hose clamp. In the outlet valve, attach that tube. First, drop your bio balls inside the PVC, then the carbon sock, and at the end, the sponge.

On the top, tighten the plug. You install all of the parts perfectly when there is no leakage going on. If it does, make sure to check all the pipes, tubes, corners, and covers of your Homemade Aquarium Canister Filter.

Conclusion

We hope that this information can offer you great help to install your Homemade Aquarium Canister Filter properly. Each step is essential to make things work right. Following them is the key to achieving the excellent function of this filter. Also, providing the materials listed above is necessary to make this project possible.

We Thank you for your time. We also appreciate your effort in reading this article. Have a nice day!

Natural Ways to Get Rid of Molds

We all think that nothing is going on in the dark areas of houses. So we are all comfortable that nothing wrong might happen here. But in darkness grows the root of all evil. And that is what molds are. They overgrow in places where the sun does not reach them.

Furthermore, molds don’t just impose an unaesthetic ambiance, but it poses a significant risk in your health, especially if you have kids at home. The gardenandgrass.com sees molds as a nightmare for homeowners. Who would love the black and green moss growing at any part of your house? Plus, it does not smell good either.

In this section, let us deal with evil in an instant. Let us all do it with ease and act on it fast!

Natural Home Treatments for Mold

Since mold quickly grows, let us kill it with easy-to-make solutions.

Peroxide on the Side

We all know that hydrogen peroxide is medicine for cleansing wounds. And also an antifungal and antibacterial component. Given that, it will be a great solution to deter the molds.

But before you apply this to any surface, test it first. It is because it somehow discolors the area like how Clorox works. If it does not discolor after the test, then you can apply it to the molds. Let it untouched for ten to fifteen minutes. After that, scrub it with just the proper force to remove the mildew. Just wipe it dry after.

Remove it using vinegar.

White vinegar is famous for having an acidic component that kills almost all germs and bacterias present on Earth. The great thing about it is that you can use it without testing, just like peroxide. In addition, it does not discolor the surfaces at all.

All you have to do is put it in a spray bottle. Spray it to the area with molds. You can add a fabric conditioner to the solution to the vinegar to eliminate that vinegar odor. Yes, we know not everyone loves the aroma of vinegar. We don’t suggest adding water as it lessens the effectiveness of the vinegar.

Baking soda always does the trick.

Baking soda has been used widely for cleansing purposes, from removing foul odors in refrigerators to removing moisture from any surface. However, it does not clean; it also keeps those bacterias and germs gone for good.

Now here is the trick that you need to do. Add a tablespoon to a spray bottle with water. Shake well and spray to surfaces with molds. Let it untouched for a couple of minutes, then scrub well. Wash with water until the baking soda residue is all out.

Now for heavy black molds, combine baking soda, water, and vinegar all in one part. Mix until you create a paste-like texture. Apply it in the molds and let it dry. Once dry, scrape it, and you are good to go.

Essential Oil is the Key

The best essential oil to use is tea tree oil. It works as a deodorizer and antiseptic. What you have to do is mix one teaspoon of tea tree oil with one cup of water. Spray it in the area with molds, then let it sit for an hour. After that, wipe it with a dry towel. Ensure that you wear protective things such as gloves to avoid contact with your skin. It is because some have reported that they get skin irritation after getting in touch with essential oils.

Use lemon to remove molds.

As usual, lemons are used in cleaning kitchen sinks or any surfaces in your home. Just like vinegar, it has acidic components that kill germs and bacterias and even molds. Here, what you have to do is squeeze at least three to five regular-sized lemons.

Spray it directly to the area with molds. In addition, make sure not to add anything or water. Pure lemon is the key to kill these molds immediately. After that, you can let it sit for a while and then wipe it with a cloth. You can repeat this for rigid molds.

Conclusion

A clean house is what makes it a home. That pleasing aroma coming from it makes it relaxing day by day. But if molds threaten you, life can be a tough one to get by every day, especially if you have kids. It might risk their respiratory health and so as you.

We hope that the remedies that we have gathered will be of great help to you. So, if you have your home remedies, share them with us to create a mold-free community.

Spice Up Your Washroom Décor with These Six Bathroom Accessories

Few home renovation projects are as easy as a bathroom remodel. That said, they’re also the most overlooked. It’s not uncommon for homeowners to neglect their bathrooms for bigger, more decorative spaces, like the living room and the bedrooms.

While your bathrooms may not be the most glamorous part of your home, they’re heavily used by family and guests alike. As a result, it may be worth your while to show them some love and care.

One way to do this is by using a few eye-catching items to jazz up your washroom interiors.

From towel baskets to silver trays, there are tons of bathroom accessories you can choose from. Let’s take a look at six such elements that’ll take your bathroom décor up a notch.

1. Apothecary Jars

When it comes to antique décor pieces, glass apothecary jars take the cake. Besides being great countertop decorations, these jars can fit just about anything, including:

  • Soaps
  • Cotton balls
  • Cotton swabs
  • Miniature hand lotions and shampoos

In case you want to take a different route, you can fill the apothecary jars with potpourri, dried flowers, and bath beads, among other things.

Feel free to experiment with various jar styles. This way, you’ll be able to keep things fun and dynamic. Place some soap in one, some potpourri in another, and some mini scented candles in a third. Use apothecary jars with spigots to pour out shower gels, conditioners, and liquid soap. There’s no end to the things you can do!

2. Side Table

If a refreshing soak after a long, hard day sounds like your kind of deal, you may benefit from adding a side table next to your standalone bathtub.

Nobody enjoys interrupting their bath to fetch things from across the room. And, with a table in your bathroom, you won’t have to any longer. Whether it’s a book, a glass of wine, or your favorite jar of bath salts, a side table can help keep everything within easy reach. Be sure to pick one that complements your bathroom interiors and highlights it elegantly.

3. Towel Rings

Have you ever washed your hands in the sink, only to realize there’s no towel around? If yes, then you probably know what follows: a comical struggle to find one without dripping water everywhere.

To avoid this disaster, consider investing in towel rings. Install one near your washbasin to hang hand towels hassle-free. This way, you’ll not have to walk a mile to dry your hands. Additionally, these rings also keep wet towels off the floor, ensuring they dry quicker.

4. Soap Dishes and Dispensers

Soap melts quite quickly, and before you know it, you have a gooey mess on your bathroom countertop. This can be a nightmare to clean (think soap-stain hell).

An easy way to prevent this is to place your soap on a nice steel soap dish. Not only does this keep the soap from melting everywhere, but it also adds a classy touch to the space.

Alternatively, you can use soap dispensers to store shower gels and liquid soaps. They’re as stylish as they are functional. Better still, they minimize wastage.

5. Mirrors

Believe it or not, there’s more to bathroom mirrors than meets the eye. When placed correctly, mirrors can reflect light into a room, making it look larger than it is.

The perks don’t end there. In case your bathroom is a little dark (or lacks natural light), hang a large mirror or a couple of smaller mirrors to brighten it up instantly.

Not to mention, mirrors can add visual drama to your bathroom. Choosing an ornate mirror as an accent for your minimalist bathroom can transform it in moments.

Given the benefits, it only makes sense to work a mirror into your bathroom’s design. But remember to wipe it down regularly to keep patches and stains at bay.

6. Bathroom Mat

Unless you want your post-shower routine to turn into a slip ‘n’ slide, get yourself a sturdy, plush bathroom mat. A mat placed outside your shower space will catch dripping water while you dry yourself.

Needless to say, bathroom mats come in all shapes and designs, so it’s up to you to choose a piece that matches your aesthetic. For example, a bamboo bath mat can add a bit of the outdoors to your bathroom. It’s a perfect accessory for nature enthusiasts.

Wrapping Up

Often, the smallest details in a room tie it together. So, you can trust an elegant mat or a sleek apothecary jar to take your bathroom décor to the next level. All you need to do is find something that fits your vibe, and you’re good to go!

Author Bio:

Riley Swanson is a lifestyle blogger, passionate about food, fashion, home improvement, and traveling. She is also an avid traveler and shares her traveling experiences in her blog Riley+Christian Travel.”


What is Drain Cleaning?

Dirty sink before and after clearing the blockage. Clog problems in the bathroom and toilet

Drain Cleaning is the process of removing all debris from your drains. That includes hair, food particles, and other foreign objects that can clog up a drainpipe or sewer line. The most common cause for this problem is tree roots growing into the pipes, which then block them, causing water to back up in your home. Other causes include heavy rainfall, flooding, broken appliances, and even animals such as cats and dogs who have accidents inside your house. If you are experiencing any problems with your plumbing system, it’s important to call an experienced plumber immediately so they can fix the issue before it becomes worse.

How Does Plumbing Work?

Plumbing works by using pressurized water to move waste through pipes. Water pressure pushes waste out of fixtures like sinks and toilets and carries it away via drainage systems. Toilets use gravity to push waste down their pipe, while sink drains rely on pumps to pull waste down their lines. When something goes wrong with these components, however, sewage backs up into homes and businesses. Plumbing professionals know how to repair leaks and clear blocked drains quickly and efficiently. They also install new piping when needed.

Drain being cleared by worker in navy overalls.

Plumbing Companies & Drain Cleaning

There are many benefits of utilizing the services of professional plumbers for drain cleaning. Some of those benefits include:

They’re Good At What They Do

Plumbing companies will identify where the leak is coming from and find ways to correct the problem. Most people don’t realize there’s more than one way to solve a particular problem. For example, if the drainpipe is blocked, there may not only be a hole in the pipe but there could also be a crack in the pipe itself. In either case, the solution would be different. It takes experience to figure out exactly what needs fixing.

They’re Trained

Professional plumbers go through extensive training programs to learn about every aspect of plumbing, including design, installation, maintenance, and repairs. They must pass tests to become licensed and certified. These tests cover everything from basic math skills to understanding building codes and regulations. If you need help installing a toilet flange, you probably want to hire a contractor instead of calling a friend or family member. While everyone knows how to change a light bulb, few understand electrical wiring. And no matter how handy you are around the house, chances are you aren’t qualified to handle a major plumbing project. This includes replacing sewer line sections as well as repairing broken appliances such as washing machines and dishwashers.

They Offer Warranties

When hiring a plumber, make sure he offers some warranty. Warranties vary depending on the company offering the service. However, some companies provide lifetime guarantees on parts and labour. Others offer 90-day warranties on workmanship. You should always check the fine print because sometimes the guarantee doesn’t apply to certain situations.

They’re Insured

During drain cleaning, if anything happens during the job, plumbing companies have insurance coverage. That means if someone gets hurt while working on your property, the homeowner won’t be responsible. Insurance covers things like bodily injury, medical bills, and lost wages.

They’ll Save You Money

You might think that doing the job yourself saves time and money. But often, DIY projects end up costing much more than hiring a pro. Not only does it take longer to complete, but mistakes often cost extra too. Hiring a professional ensures quality workmanship and proper materials.

They Have Licenses

Licensing requirements differ depending on where you live. It’s recommended you check local laws before hiring anyone for any construction project. Licenses ensure that workers are properly trained and experienced.

They Can Fix and Identify Problems Fast

Most homeowners try to tackle small issues themselves, hoping to avoid paying an expensive bill. Unfortunately, these simple fixes usually lead to bigger problems down the road. A good plumber can spot potential trouble spots so they can get rid of them right away.

Conclusion

Drain cleaning is not rocket science. It’s quite easy once you find the right person to do the job. Make sure you choose a reputable drain cleaner. Look at their reviews online and ask friends and neighbours for recommendations. Once you’ve found a reliable plumbing company like Calgary Plumbers And Drains, give them a call.

How Do Restoration Companies Make Money?

Aftermath: Charred Remains of Kitchen Destroyed by Fire

Sometimes, a building or a house can burn down or get flooded. That’s a tragedy for the owner of the property. However, some people work in this field, and they can ensure that any fire damage on a home is quickly fixed. It is not as simple as you might think to repair damage from a fire. It’s something that requires training and many years of experience to do correctly.

Services Restoration Companies Provide

To have your home repaired after being damaged by a fire, you will need to hire a restoration company to do the work for you. Not all companies will handle repairing your house if it has burned down entirely because their expertise usually only deals with water damage, smoke odour removal, or other types of injuries that can happen due to a fire. So, the first thing you need to do is find a company that can restore your house correctly after being damaged by fire.

Once you have found a reputable restoration company, ask them what steps they will take once they arrive on site. For example, how would someone begin working if your home is not safe to walk through because its structural integrity has been compromised due to fire damage? Also, the contractor needs to know what types of materials were used to construct your house so that proper repairs can be made.

Hiring an experienced restoration company is very important if you want your house restored quickly and efficiently after being damaged by fire. However, it would be best if you still educated yourself on some of the steps that need to be taken to ensure the quality of work that is being done.

Steps Involved In Restorations

Some of the essential details to remember are:

1) Having a restoration company come out and do an assessment early on. This way, your insurance provider will know what has happened to start replacing personal belongings as soon as possible. They will often give you money for clothing and other necessities while you cannot return home.

2) Make sure that no one is allowed inside until it is approved by a restoration company because there might still be damage resulting from fire coming into contact with various materials used around the house, such as carpets and walls. Some companies will inspect the site by looking in through windows and doors to be sure.

3) You should also remember that anything on your property that is burned will need to be removed. That includes materials such as soil, concrete, and grass. Suppose any of these materials get into a water supply during runoff from cleaning up the site. In that case, there could be some very serious consequences associated with drinking the contaminated water or swimming in it downstream.

Overall, fire damage restoration can be very complicated for people unfamiliar with restoration companies or what they do. However, this work has to be done well, or else you might end up getting very sick because of mould growth inside your home due to lack of good air quality after a fire burns down your house completely. So, make sure you follow all of the steps above so that your home can be safely restored.

Dealing With Costs Of Restorations

Ensure you know what is included and what must be negotiated and paid separately if and when necessary. Make sure before hiring a restoration company, you discuss all potential costs with your insurer first to avoid paying more than you should or receiving less than you’re owed. Suppose your insurance provider doesn’t want to help. In that case, it’s probably time to switch providers because they are doing their customers a disservice by not negotiating with current contractors to keep costs low. If you want to ensure you hire a trustworthy company, visit the website of multiple restoration companies and compare them to one another. Click this link to get a good idea of what the website of a reliable restoration company looks like: https://nationwiderestorations.ca/.

The bottom line is that insurance companies will pay for necessary repairs and services to have your home restored to its pre-loss condition but not beyond. Luckily, it’s pretty simple for you to avoid any unpleasant surprises by making sure you know what is included and what must be negotiated and paid separately if and when necessary.

Recent Posts

Posts You Might Like