Home Blog Page 178

How Can You Make Your Home More Eco-Friendly?

Sustainability is a big priority in our everyday lives, and a big part of that is how your home operates. The good news is, there are plenty of things you can do that won’t require much effort or expense to achieve a greener way of living, especially at home.

Below we discuss a few easy ways to make your home more eco-friendly, most of which offer the added benefit of saving a little money as well!

Switch your energy supplier

There are more green energy suppliers available now than ever before. If you haven’t checked with your current supplier to see if they offer greener solutions, this is the first step. If they do, you are in for a very simple switch.

If not, a little shopping around can lead to a very effective way to make your home more environmentally friendly. If you have the capability in your home, you can look at alternative ways of heating your home with a log fire, for example.

Using natural products

Increasing your use of natural products in the home, especially when it comes to beauty treatments and cleaning products, reduces your exposure to potentially harmful chemicals. This means fewer chemicals end up in our water supply. You can also help this along by checking the pH level in your pool.

You can find ingredients and instructions online to make your own cleaning products from plant-based and mineral materials. These are often just as effective as the chemical versions, far more eco-friendly, and in some cases, even a little cheaper!

Bulk buy certain products

If you have the storage space, bulk buying your cleaning products and toiletries reduces your plastic waste and petrol or shipping impact. You’ll also save some money in the long run on the purchase.

The amount of rubbish your household produces every year by minimizing the amount of packaging you purchase and reading the labels to ensure you are purchasing recyclable containers and disposing of them correctly.

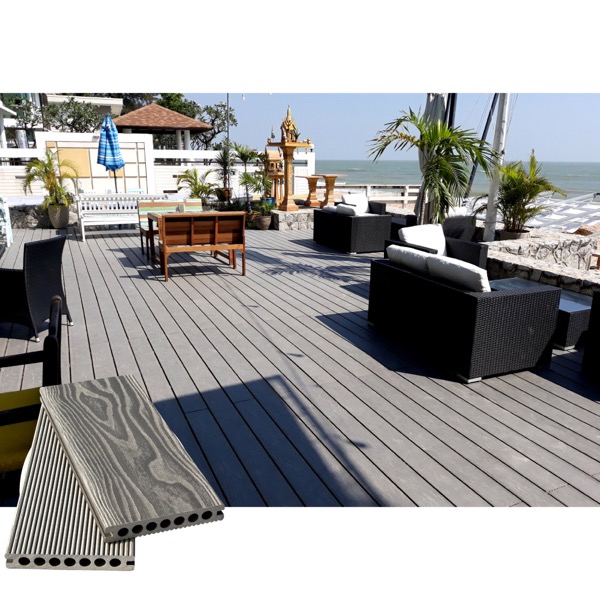
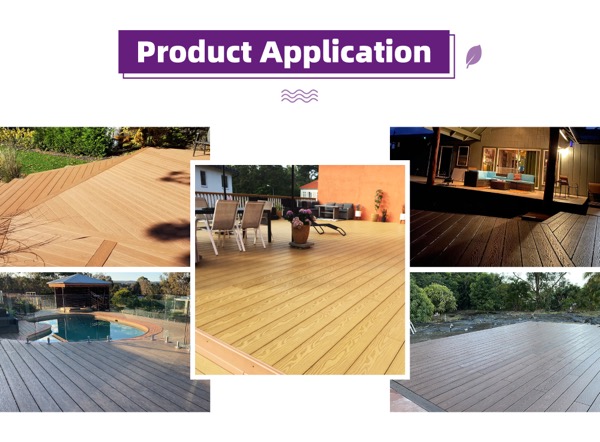
Using sustainable homeware

Your interior design can also be sustainable and stylish with affordable homewares that are made ethically and sustainably. Keep your eye out for products made from FSC-certified Acacia wood, for example, to ensure the smallest possible carbon footprint.

You can also take control of your recycling by purchasing and refurbishing second-hand furniture. This can be an excellent way to find something unique and customize it to match your unique style. After all, there’s nothing better than a piece that is one of one!

Always use reusable bags and coffee cups

One of the easiest things we can do to reduce single-use plastic waste is to carry a reusable tote bag or reusable coffee cup when you go out to the shops. It’s important to note that reuseable bags are rendered pointless if you buy new ones each time you go to the supermarket because you forgot to bring some with you! Instead, invest in some mesh produce bags or slimline bags that are easily folded and left in your handbag or glove compartment.

The same can be said about your reusable coffee cup. Avoid disposable cups by investing in a decent reusable option. Many cafes will even offer a small discount if you supply your own cup!

Go vegan

The widespread adoption of a vegan diet would significantly cut food-related greenhouse gas emissions while providing a healthier diet. Forget about the myths that a plant-based diet isn’t healthy or delicious – vegan food has come a long way, and you can now eat pretty much any meal and have it taste amazing! Even better, you can live with a clear conscience that no animals are harmed for something as simple as a sandwich.

Only buy what you need

Unnecessary excess leads to unnecessary waste. This is something to specifically keep in mind when shopping at your local supermarket. Only buying the things we need prevents food and packaging waste. This should also be front of mind when buying that new outfit, as we send a lot of clothing to landfills every year.

The minimalistic approach to your shopping will also benefit your bank account. Thank us later!

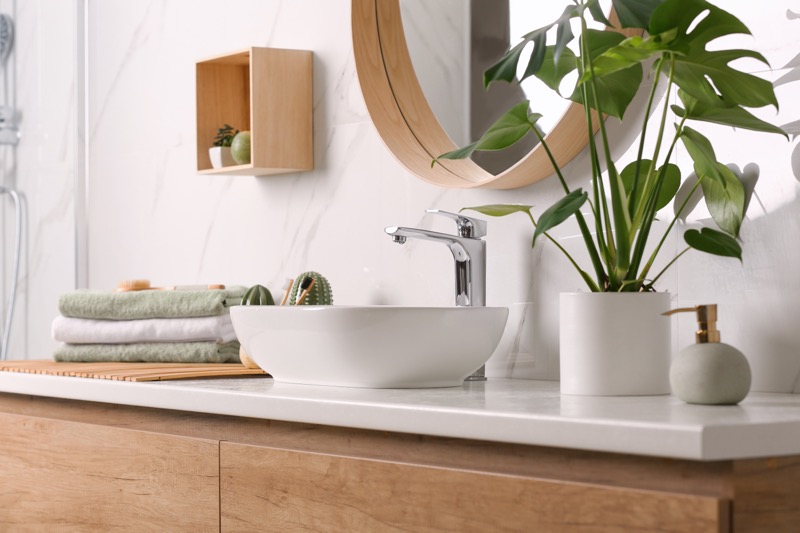
Fill your home with plants!

It has been proven that having plants in your house helps to absorb harmful organic compounds, which are one of the main categories of pollutant gases. The bromeliad, for example, removes over 80 percent of the bad gas in the air, all while looking very pretty.

House plants improve the overall air quality of your home while making the place look fantastic, so it’s a win-win!

Get a little greener every day

These are some small things that can be done to create a more sustainable home. As you can see, they are pretty easy and even a little fun. If we all keep eco-friendliness in front of mind, the world will be in better shape. Pair this with our blog about updating your decor, and you’ll be comfortable and green at home in n time!

How to Make Moving to Your New Home Less Stressful

Moving to a new home is both exciting and stressful. While you and your family look forward to a new environment and redecorating your new place, packing and unpacking offer their set of challenges. After all, you will have amassed quite a few belongings through the years, some of which you will probably need to dispose of. Family members also have things they have collected, and sorting through these items can take time. However, it is always best to get rid of excess things when you move to a new house to have more space and keep it free from unnecessary clutter. To help you get rid of trash and other domestic waste from your old home, you can always hire a mini skip for a quick and easy disposal and keep your new place neat and clean.

Whatever reasons you have for moving, whether for a growing family or to be closer to your job location, planning your move months in advance can help reduce the stress from rushing and ensure that you have everything ready. Below are helpful strategies to make your move to your new home less stressful for you and your family.

Make a list of things to do

While you may think you can remember everything you need to do before moving out, making a list will ensure that you haven’t forgotten anything. A list keeps you organized, prioritizing and accomplishing whatever moving tasks need to be completed. Making this list in advance is an efficient way of getting things done and should include deadlines to help you do what needs to be done first before moving on to the following items on the list. Also, it would be best to make an inventory of things you are taking with you, ticking them off once they are packed. Your inventory ensures that you do not leave anything behind, and everything is accounted for when you get to your new house.

Take it one room at a time

Some people think that packing items from one room to the other is quicker to get things done. However, looking at everything you own and what needs to be packed can be overwhelming, and you may not accomplish much at the end of the day. The best way to do it is to focus on one room first, packing items in labelled boxes and clearing up the area before moving on to the next room. It reduces stress and makes unpacking more straightforward and faster.

Delegate responsibilities

If you are moving out with your family, it will help to delegate responsibilities and lighten your load. Start by providing family members with labelled boxes for each of their rooms. Then, they can start packing their belongings and allow you to take care of other areas of the house. Also, provide them with an extra box for items they want to dispose of, as this is the best time to declutter and reduce the amount of stuff for the new place.

Finally, make sure that everyone has an overnight bag ready. Unpacking and getting settled immediately is not possible, so it is best to have a few essential items on hand.


Infographic provided by True Friends Moving Company

7 Ways To Make Your Bathroom Look And Feel Luxurious

The bathroom is one of the most expensive sections to design in a house, but with a little knowledge of the best style ideas, creating and decorating a luxurious bathroom won’t cost you that much. Contrary to popular opinion, you don’t need to replace everything in your bathroom for it to look luxurious. By discovering ways to use typical accessories and the right mix of colors, you can make your bathroom look gorgeous on a lower budget.

Creating a luxury and relaxing bathroom is beneficial to both your physical and mental well-being, meaning you shouldn’t take it for granted. If you’re looking for luxury bathroom ideas, you’ve come to the right post. In this post, you’ll learn the gorgeous modern bathroom designs that are cheap and easy to emulate.

Stylish vessel sink on light countertop in modern bathroom

1. Upgrade Your Shower Head

A regular shower head can make your bathroom look ordinary. You need to get an innovative and outstanding showerhead for a touch of luxury. Different improved shower head designs are available, including snaking double-ended faucets, amphibian showerheads, musical showerheads, multi-compartmental showers, waterfall showerheads, head and shoulder showers, and flipping showers, among others. You can visit Savoy Living and other online or local stores to look for a showerhead that can make your bathroom look luxurious.

2. Install Printed Wallpaper Designs In Your Bathroom

Bathroom wallpaper may not seem like a luxury scheme, but it gives a fantastic and long-lasting look if installed correctly. Whether you want to wallpaper the entire or part of your bathroom, choose a colorful accent that fits your bathroom. However, avoid high-moisture areas where the wallpaper can be ruined by water, including areas around the washbasin, bathtubs, faucets, and shower fixtures.

Bathroom wallpapers are coated with vinyl and are designed to be used in the bathroom, meaning odd splashes here and there can’t ruin them.

3. Upgrade Your Lighting

If you want your bathroom to look spacious, don’t settle for the typical lighting above the vanity. Install extra lights based on your bathroom’s structure, like around the mirrors for proper visuals, or hang a fun chandelier above your bathtub for visual interests. Your bathroom should have both bright and dimmer bulbs. Bright bulbs are for careful observations, while dim lights enhance a calming and romantic feeling. If you prefer pot lights, place them above your shower, bathtub, or vanity to avoid interfering with your decor.

4. Buy Quality Towels

There’s no point in a luxury bathroom if you’re using poor quality or thin, scratchy towels. Luxury bathrooms need high-quality cotton towels that are plush, fluffy, soft, and oversized. Choose towels that are heavyweight because they absorb water well. Also, opt for cotton towels because they’re softer, absorbent, and durable.

5. Tile Your Floor And Walls

Tiles are great for adding beauty and texture to your bathroom. Tiles offer various options in their color, size, shape, finish, and installation patterns to ensure your bathroom is attractive. Consider tiling both your bathroom floor and walls for a more stunning effect, glossy light reflection, and ease of cleaning. Tiles are preferred because of their affordability, ease in installation, and can last for years with almost no maintenance except the regular cleaning.

For easy wall tile installation, use large tile formats to minimize grout lines which often collect dirt. Also, choose tile colors that won’t show dirt but are compatible with the basic decor of your bathroom and house.

6. Use Scents In Your Bathroom

Many spas use scents in their bathroom to make the entire bathroom smell fantastic and evoke different feelings in users. You may want to place scented soaps and scented candles throughout the bathroom for a luxurious touch in your bathroom. Nicely smelling bathrooms boost your mood every time you’re taking a shower. Choose different scents that you like and which evoke good feelings you want in your luxurious bathroom.

You may also use essential oils in your shampoo or your bathtub water. Essential oils smell not only good but also have therapeutic features. For instance, lavender oil is good for relaxation, while rosemary helps with hair growth.

7. Create An Exceptional Vanity Design

A bathroom vanity is a combination of a sink and a storage structure around it. In addition to storage, it hides exposed plumbing equipment to ensure your bathroom looks neat. Customize the vanity according to the properties of your bathroom. You can adopt different kinds of vanities, including a rustic modern bathroom, master bathroom vanity, wooden bathroom vanity, or contemporary bathroom vanity.

The Bottom Line

You don’t have to break your bank to create a luxury spa feel in your bathroom. Simple adjustments and upgrades discussed above can make a huge difference in your bathroom decor. You just have to be creative and unique to create a perfect luxury bathroom.

How to Prepare for a Residential HVAC Installation

Installing a new HVAC system in your home is the best way to cut energy bills while enhancing comfort and overall value of your property. Through proper preparation, your HVAC project will be quick and efficient. Here is how you can prepare for your residential HVAC installation.

Choose an HVAC Contractor

While it is possible to install the HVAC system yourself, it’s best to get an HVAC expert to do the job for excellent results. With the numerous heating and cooling companies available today, it’s best to do your research well to identify the ideal one. Some of the factors to consider when choosing an HVAC company include licensing and experience, home evaluation, referrals, and price.

Create Space for Installation

Most HVAC equipment, such as air conditioners and furnaces, are heavy appliances that require a lot of space. You need to create a clear path indoors and outdoors to enable the installation team to move and work efficiently. The work area for the indoor spaces should be free from furniture and other obstacles that may hinder the HVAC installation. Remember to take anything of value from the work area, like artwork, and keep them in a safe location.

Relocate Children and Pets

For safety reasons, plan to transfer your pets and children to another home or take them to a family member for that day. In addition, if you have a tenant, remember to tell them about the installation and time to avoid inconveniences.

Examine Ductwork

You may need to check your air ducts and entire ductwork to determine whether they need replacements. If in perfect shape, the installation team can proceed and connect the new HVAC system to your existing ductwork. Before the installation, ensure you get a professional to examine the integrity of your duct system and provide necessary recommendations to avoid air loss in the future.

Be Present

It is good to be available from the beginning of HVAC installation till the end. The installation team may require some clarification or need to ask you questions during the entire installation process. The best way to supervise the process would be to take some days off work to prepare for the installation, purchase the materials needed, do testing, and do any other crucial inspection. You may also use the time to inquire more about what your HVAC system will include if you have not discussed it and the installation duration.

Consider Thermostat Replacement

You may want to consider replacing the thermostat if you cannot program the existing one. Doing market research will help locate a well-equipped thermostat model, maximized for all energy-efficient features present in your new HVAC system. A few smart thermostat models exist, enabling you to control them even when you’re not at home.

Plan for the Unexpected

Like other home advancement projects, you may encounter unexpected repairs that require you to address them before proceeding with your HVAC project. These may involve replacing rotten wall studs, damaged ductwork, and doing some electrical upgrades. Thus, you need to include some extra amount in your initial estimate to cater to any work that may arise outside your scope.

Installing an HVAC system is a long-lasting investment that requires proper planning and preparation before undertaking the project.

Everything You Want to Know About Composite Decking and Wood Decking

Composite decking is routinely compared to wood decking from every conceivable aspect.

These tw           o have been engaged in conflict for decades. Especially now that composite decking materials have vastly improved, making comparisons much more favorable.

Let’s take a look at some of the most commonly compared characteristics.


Expenses

Composite Wood Decking

The average cost of composite wood decking ranges from $18 to $40 per square foot depending on the quality of components.

The cost of WPC decking varies depending on the manufacturer. Despite the fact that composite decking is typically more expensive than wood decking, you should not allow the price deter you.

Here is why…

Composite deck boards is a one-time investment that does not necessitate ongoing maintenance costs. Without the need for maintenance procedures such as sanding, varnishing, and tinting, you can save more money.

This is why composite decking is considered to be more economical than wood decking.

Wood Decking

The cost to install a pressure-treated wood deck is $15 to $25 per square foot .

Wood decking prices are highly dependent on the selected wood’s quality. Typically, softwoods, such as pine and cedar, are less durable than hardwoods and are therefore cheaper.

If quality is your primary concern, you should choose hardwood, but be aware that the price will be greater.

Here is a crucial point to remember.

Remember that wood decking requires long-term maintenance, and expert maintenance can be costly. Otherwise, the maintenance costs will soon exceed your initial investment, rendering it unprofitable.

COMPOSITE DECKING VS. WOOD DECKING COST
Decking Type Average Price Per Square Foot
Composite $18 – $40
Pressure-Treated Wood $15 – $25
Cedar Wood $30+

Installation

Wood Plastic Composite Decking

Wood plastic composite decking is typically simple to install and requires little skill. According to the type of composite decking, either hollow or solid, additional installation accessories are required.

Even though composite decking is simple to install, do-it-yourself installation is not recommended, especially if you lack knowledge.

A pressure-treated wood frame is required to provide adequate stability for composite decking.

Wood Decking

Similar to the installation of composite decking, installing wood decking is simple and straightforward.

Typically, concealed fasteners are utilized during installation to provide enough anchoring force.

Installation requires certain expertise, like frame construction, leveling, and screw drilling for a flawless result.

For satisfactory wood decking installation, it is therefore preferable to contact a professional.

Maintenance and Care

Composite Decking

Many may assert that composite decking brands requires no upkeep, however this is not the case. To be exact, composite decking is a low-maintenance deck material.

The hues and tones of composite decking can be maintained without varnishing or sanding. The appearance of composite decking can be preserved even when exposed to water and sunlight.

It is sturdy and resistant to splitting, cracking, and splintering, requiring no further maintenance like wood decking.

Wood Decking

Wood decking is naturally less weather resistant than composite decking. Sunlight and moisture are its principal adversaries.

Due to prolonged exposure to heat and UV radiation, wood tends to lose its color. Absorption of moisture by wood will result in dimension changes such as warping and cupping.

Such severe conditions will eventually lead wood decking to develop splinters, splits, and cracks.

Therefore, routine maintenance such as sanding, varnishing, waxing, and staining is required to keep its aesthetic appeal. Deck maintenance can be time-consuming and expensive.

Performance

Composite Decking

When compared to wood decking, composite decking is renowned for its superior durability. Reason being, composite decking is resistant to sun and rain damage.

Composite decking will not crack or splinter like wood decking, making it safe for walking barefoot.

It is also an eco-friendly solution because it is made from recycled materials without deforestation.

Wood Decking

The hues and patterns of natural wood are undeniably captivating in every aspect. Depending on the species of hardwood, wood decking may be resilient and have a longer lifespan.

In addition, wood decking is sturdy and capable of providing appropriate support for foot traffic.

Note, however, that the sun and rain have a significant impact on the durability of wood decking, diminishing its weather resistance.

3 Things To Consider Before Replacing Air Conditioner Capacitor

Your AC is an essential part of your comfort during summer, but what should you be considering before changing your air conditioner capacitor? One of the most common reasons for a malfunctioning AC system is a failing capacitor. However, if you discover your capacitor is broken, replace it before the problem worsens.

But there are a few things to consider before doing that. If you think you need help replacing your capacitor, read more.

What is the capacitor?

A capacitor is a specific part of an AC system that releases electricity to the compressor, the outside fan, and the blower. The capacitor looks like a shiny cylinder, and it is connected to the air conditioner motor to provide energy and get the system running when necessary.

If it breaks, the system will not be able to work correctly or will have to work harder to make the air circulate. This can result in higher consumption and higher energy bill, the faster wearing of the system, and eventual damages if the situation persists for too long.

Capacitors are responsible for giving the initial electricity jolt to the air conditioner at the moment of start-up. It is capable of storing electricity and can send it to the motor in a higher amount when it is the moment of starting up.

The AC system is designed this way because the house electric system will not be able to supply a burst of electricity when it is time to start the air conditioner or when the system has to perform other functions.

In addition, when the system has already started to work, the capacitor can reduce energy output and provide enough electricity just to get it running.

What should you consider before replacing your AC capacitor?

Before changing the air conditioner capacitor, you should consider the following things:

  1. Is the capacitor broken or malfunctioning?
  2. Should you change the capacitor yourself?
  3. Or, should you let a professional do it?

You should be able to detect when a capacitor needs replacement and judge whether or not you should be the one changing it or let a professional do it.

How can you recognize if the capacitor is not working?

1. Signs that the capacitor is broken or malfunctioning?

Although homeowners are generally not trained technicians, there are still signs and clues you can spot that will tell you if there is anything wrong with the capacitor.

Here are some of the signs to look for:

  • No cold air is coming out of the air conditioner
  • Higher energy bill
  • Humming noises coming from the air conditioning
  • The air conditioner tends to turn off alone
  • The air conditioner doesn’t turn on, or there is a delay when turning on

The most obvious sign of a problem with the capacitor is the lack of cold air. This is the first sign that there is something wrong. The increased energy bill is another clue that the capacitor has a problem. It signifies that your system is running harder than it should.

In most cases, noises coming from the AC system are bad news, and it might have something to do with the capacitor. Indeed, it has to be inspected by a professional to make sure that everything is ok.

If the HVAC system is old, it is just a matter of time before a component breaks. If the system is quite old, it is necessary to have regular inspections to make sure the capacitor is not failing or about to fail.

Similarly, if the system is not turning on immediately or not turning on at all, the capacitor might be responsible for it.

2. Should you change the capacitor yourself?

Capacitors are considered high voltage batteries or devices and can be dangerous if not carefully managed, taking all the necessary precautions. Touching a capacitor could lead to severe injuries or even death without taking the required protection.

This is why it is advisable to call a professional who knows how to replace a capacitor properly. In addition, capacitors are wired to the air conditioning system, so opening the air conditioner, removing the old capacitor, and inserting a new one is not just a matter of opening the air conditioner.

If you want to change the capacitor yourself, you have to be very careful and take safety precautions. Here are some of the things to keep in mind:

  • Don’t the capacitor terminals
  • Do not use other metal to touch the capacitor terminal
  • Always turn the power off

How often should you replace the AC capacitor?

A capacitor can last for many years, and you may only require replacement every 20 years or so. Capacitors have a fairly long life span; however, several factors might shorten their lifespan, such as heat exposure or improper parts.

However, if you maintain your air conditioner correctly and regularly do the yearly maintenance, it is possible to prolong the capacitor lifespan.

Can a bad capacitor hurt my air conditioner?

A capacitor will deteriorate until it cannot anymore hold a charge, and if that happens, it is common to hear a clicking or humming sound coming from the air conditionerA specialist should be contacted at this point to avoid the motor from failing.

There is a serious risk of ruining and burning the motor if you keep running the air conditioner. If this occurs, you will also need to replace the engine, which would be significantly more costly.

But running an air conditioner with a malfunctioning capacitor can damage other parts of an air conditioning system like the compressor.

Conclusion

The capacitor is an important component of an air conditioner, and it must be replaced when the system becomes too old. Although it is feasible to change a capacitor on one’s own, it is not recommended because it might be dangerous for someone who is inexperienced.

If you need help replacing your capacitor or if you are unsure whether it should even be replaced, don’t hesitate to contact a professional.

Give Your Room A Refreshing Look with These Organization Tips

Decorating your room for like once in a while is one thing. However, keeping up with its beauty is another.

So, does this mean that you are supposed to invest plenty of money every time you want to give your personal space a refreshing look?

We’d say, no!

Keeping in line with that, we have brought you some bedroom organization ideas to beautify your room with just simple moves instead of going hard on your wallet.

Therefore, don’t waste any more time and keep scrolling to find out some useful tips you might have been missing out till now.

1. Give Your Furniture A Shift

What’s the first thing that catches your attention every time you enter your bedroom or any other space?

Furniture, right?

This is the reason why we thought to talk about it first in our bedroom organization ideas.

The orientation of your room’s furniture can make and break the whole vibe you are trying to create.

However, on the other hand, if done right, even a small room can look spacious and lively.

Therefore, first of all, declutter what’s not necessary.

It could be anything, like that single chair sitting in one corner of the room.

After this, rearrange the furniture to bring a refreshing sense to your space alongside making it comfier for you to relax and chill.

2. Do More With The Closet Space

Coming onto the next point for our bedroom organization ideas, here we will mainly focus on how to make the most out of your closet.

The reason is that most people take it as one of the most annoying things to see a cluttered closet every time they open it to get ready in the morning.

Not only this, a disorganized closet also takes away the whole beauty of your room.

Moreover, making the most out of your organizing tricks becomes mandatory if you have a small space.

Therefore, go smart and use clothes hangers for small spaces to give your wardrobe a pleasing and satisfying look alongside protecting your precious from any damage.

3. Don’t Leave The Under-Bed Storage

Speaking of doing more with the available space in the room, how can we forget about the under-bed space?

So, one of our next bedroom organization ideas is not to leave the space available under your bed.

You can utilize it to store things like non-seasonal clothes, shoes, or any other thing.

This is because, if left unattended, these things can easily clutter up your space, ultimately giving it an uncomfortably small or restricted look.

4. Utilize The Corners

Leaving the corners of the room can be a mistake when you are trying to go creative with your organizational skills to give your room a refreshing look.

The reason is that such tricks can easily help you add beauty to your space without spending too much alongside satisfying your cleanliness cravings.

Therefore, the next one of our bedroom organization ideas is to utilize those empty corners.

You can add a beautiful storage basket that matches the rest of the room’s paint or theme. Other options include putting a small bookrack or something similar like that which you can bring in use to store different things with style.

5. Go Creative With The Walls

If you think that you have already run out of bedroom organization ideas, then we have more!

Here, the best way is to do more with the already available wall.

You can hang some pretty art that matches your minimalist style or mount some shelves that can be easily used to store your books in a stylish way.

6. Add Some Greenery

Since all our talk is about going creative with bedroom organization ideas and giving your room a refreshing look, here is a trick that will easily go with your style.

That is, adding some greenery.

According to interior experts, adding greenery to your indoors is considered one of the best options for your décor but also for your visual aesthetics.

They bring a sense of calmness, cleanliness, and freshness.

You can go for multiple options like hanging plants with the use of unique planters, putting one on the bedside table or in the corner, etc.

Bottom Line:

Renovating even a single room can be daunting because of all the cost and time it needs to reach a final result.

However, when you are equipped with some useful tips and tricks, half of your work gets easily done.

Therefore, we believe that the bedroom organization ideas listed above will help you out in the right direction.

Lastly, do let us know how you like to add beauty to your room with simple tricks.

What are your thoughts about the above-written points?

Do you have anything to suggest or add?

Feel free to drop your suggestions in the comments section below!

Are You Planning To Restump Your House? Here Are The Details You Should know

The idea of restumping your house might feel a bit intimidating. After all, the stability and durability of your house depends on it. But it does not always have to be a major nightmare. The most important thing is to keep calm and understand a few things about restumping before proceeding further with it. Read on to know more about restumping before calling a contractor. Let’s get started!

Is restumping necessary for your house?

In order to answer the above question, you will have to answer a couple of other questions:

  • Do your plaster walls have cracks?
  • Is the floor a bit uneven?
  • Do the windows and doors stick?
  • Does the glassware start clink on the shelf each time someone walks by?

If the answer to three of the above questions is yes, it is high time for you to call the experts.

Unless the property is made on concrete slabs, most properties require restumping at a certain stage. The older properties made on timber stumps can last from fifteen to fifty years, based on a number of factors.

If you are thinking of major renovations, make sure that the existing stumps are ready to take the blow. If you have any doubt, restumping has to be made a part of the renovation work. It will help you save both headaches and money on a long-term basis.

What is meant by restumping?

Restumping or reblocking is all about jacking up your house by removing the present wooden stumps and getting them replaced. The floor levels have to be reset while restumping. There is a high possibility that these movements will lead to damaged tiles, cracked plaster, and warped doorframes. Nowadays, the replacement stumps are typically concrete which makes them last longer than the wooden stumps.

Moreover, a house might be partially damaged if just a few areas need restumping. However, if there is visible decay in half of the stumps, there is a high chance that the others are going to give away as well, even though they might look okay now. The experts would advise you to replace every stump at one go for best results.

Complete or partial restumping: Which one is needed?

Partial Restumping

Usually, partial restumping is suggested when just a couple of the existing stumps are checked and seen to be in bad condition but most of them are okay.

The stumps have to be checked closely and regularly by a professional because the look on some of the stumps, particularly the ones made from wood, might be deceiving. They might look like they are okay when, in reality, they have the worst condition going on below the ground.

When it comes to partial restumping, it usually involves lifting that part of a building where those damaged stumps are before replacing them with the new ones. After completion, the house can settle back in those stumps.

However, you can always go for a complete restumping instead of a partial one because it is going to save a lot of hassle and time in the long run. You can restump all the stumps at once rather than two at a time. After all, if two of them have deteriorated, the rest are on the way.

Complete restumping

Complete restumping is usually required when the house is old and made of wooden stumps. Also, it might be a good plan to replace the old wooden stumps with something a bit sturdier like concrete or steel stumps.

The cost of restumping a house

The rate of restumping changes depends on several factors, such as where you stay, the size of the property, the number of existing stumps, the size of the subfloor region, and the difficulty level of reaching the space.

Also, the condition of joists and bearers and soil condition will impact the ultimate bill. It is a highly competitive area of business. So, it is better to find the right expert for your restumping needs. After that, you can check whether the restumper you prefer quotes you right or not.

Choosing the right restumper

You can go by personal recommendations, such as from a neighbour or family member who has recently restumped the property and gotten good results. Ensure that the restumping Richmond company you select has sufficient experience and proper insurance. After all, some experience is needed in this line of work.

You can ask the company about all the recent work they have done or even one of their older jobs (to make sure the levelling remains the same). Figure out if any of the past clients are ready to offer a testimonial. If your chosen restumper is not talking about their past work, it might be a cause of concern.

You should also search for the restumpers online to check all the feedback and reviews. It will also help you know for how long the company has been in business.

Asking all the right questions

Now, before signing a contract, you need to make sure you know all about the agreed scope of work. Ask the company:

  • Are they going to replace all the stumps?
  • Is the floor level going to be at an existing height or higher?
  • Are replacing damaged/rotten joists and bearers a part of the quote?
  • What kind of internal damage is expected?
  • Is floor levelling guaranteed?
  • Will they go and reinstate the floorboards they pull up? What about those carpets?
  • Will windows and doors get restored back to their good condition?
  • Will older stumps and other wastes get removed?

You will require a council permit as well. Though it sounds like an additional hassle, it also means the work will get independent inspection. Make sure that the restumper has the right permits, or else, get the permits yourself.

The bottom line

As you can understand, restumping a house involves several steps and you have to keep a number of things in mind. Hopefully, most of the crucial aspects are clear to you by now. The expert restumpers you choose will help you understand the finer nuances of the project.

5 Great Benefits of Hiring a Contractor for a Home Construction

If you’re a homeowner and are thinking of doing some renovations, or even building a house for the first time, then you may be feeling overwhelmed at the prospect of where to start! It’s a common misconception that some people think they can manage such a large task on their own without help from a professional. However, the chances are that hiring subcontractors, dealing with technical or constructional issues and committing to the project from start to finish, will literally finish off any good intentions you started out with. In contrast to going through an extraordinary amount of stress, why not hire a professional to do the job?

What does a contractor do?

The truth is, when it comes to any kind of large house building job, there are a range of decisions and demands that need addressing. First off, an experienced general contractor will oversee the project, from start to finish, and ensure that the project keeps to the schedule. Ultimately, it is their responsibility to organize all the aspects of the job so that it runs smoothly. This includes providing all the necessary tools, workforce and materials.

1. Cost-effective

When you take on a home improvement job yourself, you usually go down to the store and buy what you need at the retail price. However, when hiring a contractor to oversee the job in hand, they are likely to purchase quality materials at trade prices from their own network of suppliers, thus saving you money from the very start. In addition, their expertise will ensure that your budget is adhered to, so that the end project will be within a given cash flow.

2. Hire professionals

Imagine the headache you would have if you had to separately hire designers, architects, builders, electricians and many more professionals that all contribute to your build? With a contractor, you won’t have to bother as they will also have a network of professionals that can be sub-contracted to do specific jobs; therefore, saving you that hassle of finding reliable and skilled workers. Not only will this speed up the process, but it also means that these qualified employees are managed efficiently.

3. Constant updates

As well as not having to deal with subcontractors on the job, hiring a contractor will also take the role of being a single point of communication, every step of the way. Be prepared for regular updates and consultations during a project meeting. Overseeing every aspect of your build, they will have the low-down on exactly what is happening and will report back to you so you have a clear understanding of what goes on with the job in hand. Plus, you’ll know who to ask, if you have any queries about the work; all of which makes for a good working relationship.

4. Realistic and experienced

It’s very easy to get carried away with home improvements or deciding you don’t want a wall in your designs even though it’s an essential support! However, a professional contractor will ensure that all your ideas are combined to make realistic and practical changes to your home. Similarly, they will guide you according to your budget as it’s all too easy to get carried away on unnecessary developments so they will be realistic for keeping your feet firmly on the ground. All of this adds up to hiring someone with the experience to deal with anything if an emergency comes up and can take control when it does.

5. Peace of mind

If all the above reasons aren’t enough to persuade you, then the prospect of your home construction being in safe hands should be! A licensed contractor will have complete knowledge of building regulations and standard codes relating to such a job. For example, what kind of permit is needed and which department to get it from. Just as important, they are required to have insurance that covers your property, the workers and even your safety too, just in case anything does go wrong. Without this paperwork, the responsibility can lie at your door and you could be liable. Knowing that the construction is cared for and carried out safely, results in a stress-free solution for the homeowner.

Whatever type of home building you need doing, from building a new home to remodeling one, it’s a no-brainer to invest in hiring a professional contractor to take the reins. In doing this, you’re guaranteed a hassle free project, within a budget and have your dream home at the end of it all.

5 Essential Woodworking Tools For DIY Home Furniture

Time for family. Dad shows his little son how to make diy birdhouse in wooden workshop, using hand tools and wooden plank

Working with your hands is always a great time to unwind. There’s this relaxing feeling when keeping yourself busy by creating something with your hands. Whether the result looks good or not, what matters more is that you made it, and that thought alone often leaves craftsmen with a deep sense of satisfaction.

For those who are interested, it’s impossible to dive right into it without the proper tools. Although there are skills that only require your hands and materials like origami, skills that need you to exert more effort require some tools to mold your chosen material better. Woodworking is a prime example of that.

Although it’s not as hard as steel, wood still possesses a level of sturdiness, so your hands can’t easily chip into it. Therefore, you’ll need tools to manipulate the wood the way you want it to, whether the base material is big or small. However, if you’re planning on a timber furniture project, you’ll need all the tools in your arsenal to make it come true.

Yet because you’re just starting, you might dive straight into going overboard when preparing these tools. After all, beginners think it’s better to be overprepared than underprepared. Unfortunately, as diligent as that makes you out to be, spending that much money on tools in bulk isn’t the right move.

While you might consider it an ‘investment,’ you’ll discover that you won’t use that many tools except for the essentials. Moreover, buying that many tools while you only plan to make woodworking a casual hobby might leave the rest decommissioned because you won’t be using them frequently. So, in the end, getting only the essential tools is an excellent start for your woodworking journey. What you need always falls under the following categories:

1. Cutting

Although there’s nothing wrong with cutting up wood the old-fashioned way, data power tools are starting to change every woodworker’s mind. Because they’re powered by electricity, there’s no need to break a sweat when cutting through wood. It also helps that they typically produce cleaner cuts unless you have unsteady hands. As you’re building furniture for yourself, what you might need are:

  • Circular saw
  • Jigsaw
  • Table saw

Circular saws often act as a handy table saw. Therefore, if you want to cut through sheets of plywood, go with either circular saws or table saws. To cut some curves, you’ll need a jigsaw as it’s the easiest to maneuver. Additionally, hardware stores also offer the option to go cordless once you choose the battery-powered jigsaw. You can use it even when you’re outdoors and there’s no power outlet.

2. Measuring

Many appreciate woodworking due to how precise everything is. From cutting down to sanding it out, woodworking can only bear excellent results once you do everything accurately. Therefore, measuring tools are a no-brainer. Fortunately, these tools are in any household, unlike cutting tools. If you want to go into the specifics, what you need are:

  • Pencils
  • Square
  • Tape measure

Admittedly, they’re easy to lose, especially pencils. Thus, it’s highly recommended you get a set of pencils instead of just a few. This way, you’re better prepared if you lose them in the middle of a project.

Young woman assembling a canvas frame using a drill while working at a bench in her picture framing studio

3. Assembling

Because woodworking is a broad term, you can do all sorts of things as long as your medium is wood. Thus, you might carve something in one second and install something in another. Although wood carving often leaves you working on a piece of wood, installation can be tricky, especially when making furniture. As you might be including other materials or pieces of wood, you’ll need a binding agent to bring them together, such as:

  • Wood glue
  • Clamps
  • Drills

More often than not, the only way to bring pieces of wood together is by inserting nails or screws into them. Although you can cut out holes while nailing them down or screwing, the result might be crooked. So, that’s where drills come in. As for clamps and wood glue, these reinforce wood pieces if you need extra strength. Therefore, combining all of these can guarantee your furniture won’t give out anytime soon.

4. Finishing Touches

Although cutting plays a significant role in woodworking, shaping and smoothing the wood is also vital. Aesthetics is a must when you’re creating furniture. Otherwise, you’re left with clunky-looking output. What you need for this part are:

  • Planes
  • Sanding discs
  • Wood finish

Once you have these applied, even a project done by an amateur would look pleasing to the eyes. Hence, even though it’s far from the image you envisioned, at least you nailed the ‘looking good’ part.

5. Safety Gear

It should go without saying that woodworking is a hazardous pastime. Considering you can be exposed to all the cutting involved and chemicals, you need all the safety measures to ensure you don’t make an impromptu visit to the hospital. These tools are as follows:

  • Safety goggles
  • Dust mask
  • Hearing protection

While they don’t guarantee total protection when you go woodworking, having them on should lower your chances of getting hurt. This way, you can have fun bringing your pallet project ideas to life without worrying about your health.

Takeaway

Arts and crafts have always been a stress relief for many people. After all, pulling away from staring at a screen to get your hands dirty is often satisfying in more ways than one. However, you can’t dive into woodworking without any tools, but it’s also ill-advised that you overprepare and become broke. As a beginner woodworker, all you need are the essentials.

Recent Posts

Posts You Might Like